

Walkthrough for Divinity: Original Sin II is provided below for players looking for assistance progressing through the game. You can refer to specific Quests or Locations for detailed information of your current objective.
ACT I
- Previous: n/a
- Next: Reaper's Coast
- Recommended Levels: 1-12
All Quests in area
- Troubled Waters
- A Fate Worse Than Death
- A Rare Prey
- A Wolf Alone
- Artefacts of the Tyrant
- Beast
- Blessing from Afar
- Call to Arms
- Champion of the Gods
- Every Mother's Nightmare
- Fane
- Finding Emmie
- Healing Touch
- Ifan ben-Mezd
- Lohse
- Most Dangerous When Cornered
- Nothing But Child's Play
- Redemption
- Saheila's Signet
- Sebille
- Signs of Resistance
- The Arena of Fort Joy
- The Armoury
- The Burning Pigs
- The Collar (Hot Under the Collar)
- The Cursed Ring
- The Escape (Escape from Fort Joy)
- The Eternal Worshipper
- The Gargoyle's Maze
- The Imprisoned Elf
- The Injured Magister
- The Murderous Gheist
- The Purged Dragon
- The Red Prince
- The Shakedown
- The Shriekers
- The Teleporter
- The Tribe of Saheila
- The Vault of Braccus Rex
- The Voices
- To the Hall of Echoes
- Withermoore's Soul Jar
- Lady o' War
- To the Hall of Echoes
- Seed of Power (Four Relics of Rivellon)
- Threads of a Curse (Four Relics of Rivellon)
- A Hunger From Beyond (Four Relics of Rivellon)
- Keep Calm and Carrion (Four Relics of Rivellon)
Fort Joy
The Hold
Before you start, you need to create your own main character. Divinity Original Sin 2 has 6 Origins, 14 Classes and 5 Races. You can also choose a custom character if you don't like the default origins, but be sure to choose Tags for your customized character, which unlocks special dialogues in the game. For more information, read our Character Creation page.
(Selecting one of the preset origins is highly recommended, since they have more quests in game. Also, remember that Undead characters can use lockpick with their finger instead of lockpicks, and lizard characters can dig things without a shovel.)
Troubled Waters
The epic journey of D:OS II starts in The Hold - the prison ship that transports sourcerers to Fort Joy. There are many fellow prisoners on board this ship, including your future teammates. (Note: You cannot recruit them right now). There are also some lootable crates and sacks, mainly containing a few coins. Be careful not to loot objects with red names, since this behavior will be considered stealing and may result in others attacking you. Looting from the dead is generally not considered stealing in this game. (If you are an elf, you can acquire some knowledge by eating body parts you loot)
In Definitive Edtion, the starting place of the game is a little different, you start at a tutorial deck. Before you climb the ladder to the upper deck. You can explore this place a little bit. There's a door blocked by some crates, move the crates and open the door (left-click the object then drag).
You can talk to the sheep there if you have Pet Pal. but she has no useful info to share. Near the sheep there is a vase that has the cargo key, you need to move some crates to see it.
Once you reach the stern, you'll see a prisoner being attacked by magisters. The use of source abilities summoned voidwokens to the ship. You can now loot from dead bodies and further explore this ship, but other prisoners are currently unconscious. You can also return to the torture room where you first awoke and slay that female magister for some coins (It is possible to kill her right when you first meet her if you choose).
Go upstairs and search the rest of the ship, but be aware of the fire on the ground. Stepping on fire will burn you, causing continuous loss of health. At this level, you will find Magisters Murtof and Ricks, and you can persuade them to help Siwan (need 1 or more Persuasion skill points), or you can kill them. (Note: Some locked doors can be broken by force by holding the CTRL key and attacking them.) Find the Skull-Marked Key from the Corpse of Magister Priest Medwyn.
Head to the deck where a giant Kraken appears and attacks the ship. Now you'll need to fight some voidwokens in order to reach the other side of the deck. Once you reach the lifeboat, a kid onboard asks you to find other survivors on this ship. Insist that there's no time to spare you can escape right now, but agree to save the others and you can earn more XP. Use the ladder next to the lifeboat to reach the lower deck. Here you'll find the other prisoners now awake, and this place also filled with voidwokens. Defeat the enemies using strategy, being careful not to let yourself be ambushed by multiple voidwokens. Consider using prisoners as shields. After the battle, head back to the lifeboat only to see the entire ship destroyed by the Kraken before you get there. If you try to save the magister and the prisoners you won't make it to the lifeboat...
Fort Joy
But you survive, and wake up on the beach at Fort Joy, an Island used by magisters for holding sourcerers. Your character is one of the sourcerers taken here by force and you are collared, so no source skills can be cast at the start of the game. Your primary goal at this point is to escape the island. (See The Escape)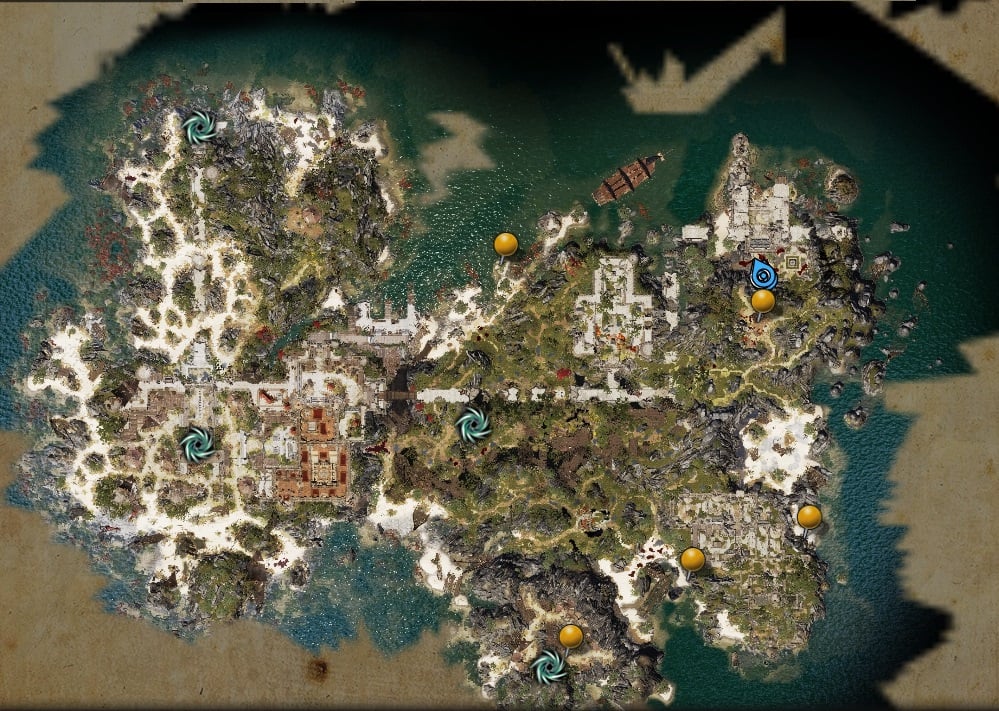
Go search the beach, and collect useful items such as coins and consumables, some treasures are buried so you will need a shovel or a Lizard to dig them up. (you will also meet Sir Lora if you have his DLC installed. It's an undead squirrel with its own quest. ) If your character is not a lizard and you would like to have a lizard in your party, you can find a potential party member The Red Prince to the south, not far from your starting area. (A shovel can be found on the broken bridge towards the Fort Joy Gate) To the east of your starting area, there is a shrine. In DoS2 this type of shrine serves as waypoints and can be used for fast travel by clicking them directly or a small button on your minimap (can be done from anywhere). The bridge to the fort is damaged, but you can come back here once you've acquired the teleportation gloves (or learned the Teleportation skill) to teleport one of your party members to the other side of the bridge and collect the loot. Near the damaged watchtower there is a small pathway that leads you to the mountain top, and there you can find plenty of useful items.
Continue going south. The game will autosave right before you run into some voidwoken, which are one of the main enemy types in this game. The voidwoken are not hard to beat, but be careful as their bodies may explode into fire or poison when they are killed. You may want to consider using ranged attacks when dealing the final blow. Also, keep in mind that directly attacking your opponents is not always the best strategy in this game. Using environmental effects can make an otherwise impossible battle much easier. For example, oil and poison surfaces are flammable, and water and blood surfaces can conduct electricity applying Shocked or Stunned status, or be frozen which creates ice that can act a slipping hazard. (Note you can combine Nails with your boots to make yourself immune to slipping on ice)
After you defeat these voidwoken, keep going south until you reach Fort Joy Camp. After you witness the event there, loot Magister Atusa's body at the gate of Fort Joy, and consuming the flesh will unlock Blood Memories. (This is an Elf racial skill. If you are not an elf, you can recruit Sebille to do so. An undead elf will have this skill. You can also keep the leg and give it to Kniles the Flenser later, to avoid fighting him. ) Many other sourcerers live here, and there are multiple quests you can complete. Your primary goal at this point is to escape the fort and move to the eastern side of the island.
Note: It is possible to battle Dallis at the gate of Fort Joy. To do so, you need to explore other regions of the island first. When you reached level 4 or 5 and have the teleportation gloves, you can try ambush Dallis on top of the wall or teleport her to your party when she is walking away after Atusa is killed. Alternatively, put all the junk you found in a crate to make it as heavy as possible and teleport it onto Dallis. Once Dallis is below certain HP she will transform into a Dragon and fly away (she cannot be killed at this point as she is required later in the game). Defeating her will give you an achievement but doesn't really change anything in future play.
Quests you may find in this area include:
- Every Mother's Nightmare
- The Shakedown
- The Murderous Gheist
- The Imprisoned Elf
- Withermoore's Soul Jar
- Blood Memories
- Artifacts of the Tyrant
- Signs of Resistance
- Saheila's Signet
- The Teleporter
- The Arena of Fort Joy
- Finding Emmie
- Keep Calm and Carrion (Four Relics of Rivellon)
Note: you can trade with the NPCs by just clicking the trade button while talking with them. Many Skillbooks can be combined with other skillbooks to create more powerful skills, see our Skill Books page for recipes and locations of traders. Also, you may notice a Black Cat following your character in Fort Joy. If you successfully escape Fort Joy without it being killed, you will gain the Summon Cat Familiar skill for the character it was following.
Most of these quests reward you with EXP and items, but none of them are necessary. You can also remove your main character's collar in this camp. To do so, simply become the champion of the underground arena (which you can get to via a hatch near the kitchen). Afterwards, talk to Nebora (a merchant woman near the main entrance) and she will remove your collar. See The Collar for more details.
- Tip: Heart of Waterfall
If your character has the Jester tag, he or she can make the little kid near the waterfall laugh. In return, she tells you about a valuable treasure box hidden inside the waterfall (which you can teleport to).
You can recruit more teammates here at Fort Joy and start their personal quests such as The Red Prince, Sebille, Lohse, Fane, Beast or Ifan ben-Mezd. Note that you can have up to three teammates at a time. Some team members don't get along very well, such as Sebille and The Red Prince. Although you could still have them on your team at the same time, you will need to be careful to not let one of them kill a vital quest character of another such as Sebille killing the lizard merchant Stingtail.
There are multiple ways to escape this part of the fort. The simplest one (but definitely not the easiest one) is to force your way out. There are four magisters that guard the entrance to the main building and more in the second stair of the building and the courtyard. Your characters should be level 5 or well equipped to stand a chance, otherwise it can be very difficult.
If you choose to force your way out, you have the option to save a paladin in the courtyard who was sent by the Divine Order to investigate what actually happened on the island. The fort also has an abundance of loot (especially paintings, which are worth a pretty penny), so even if you choose another means to escape you may want to come back later and clear out the Magisters in the fort.
Another option is to use the Teleportation Glove, which is acquired in the quest The Teleporter. Teleportation is an extremely useful skill, not just for exploration (getting one of your characters to an otherwise unreachable location or getting distant chests closer to your party), but in combat as well. You can teleport an enemy archer into your trap (like some burning ground, frozen blood, etc.) or send melee enemies far away so they have to burn their AP getting close enough to attack. Even if you use other means to escape, this quest is highly suggested. You can get the gloves without actually doing the quest by just killing the crocodile mobs that drop the gloves.
If you choose to escape using Teleportation Gloves, your characters will wind up in the dungeons of the fort (but not locked up). However, if your Thievery is not high enough to open some of these doors you can leave the dungeon using its south exit (Suggested level is 3 or higher, with 3 companions). Then go back to Fort Joy camp, teleport one of your party members to the second level of the fort (near the gate guarded by four magisters), drop the ladder down, and sneak into the Fort Joy prison. The prison is filled with silent monks but they won't attack you (unless you hit them first), so don't mind them. There you can find the prison ward, defeat him and ultimately use the sewer of the prison or the boat (from the quest Nothing But Child's Play) to escape.
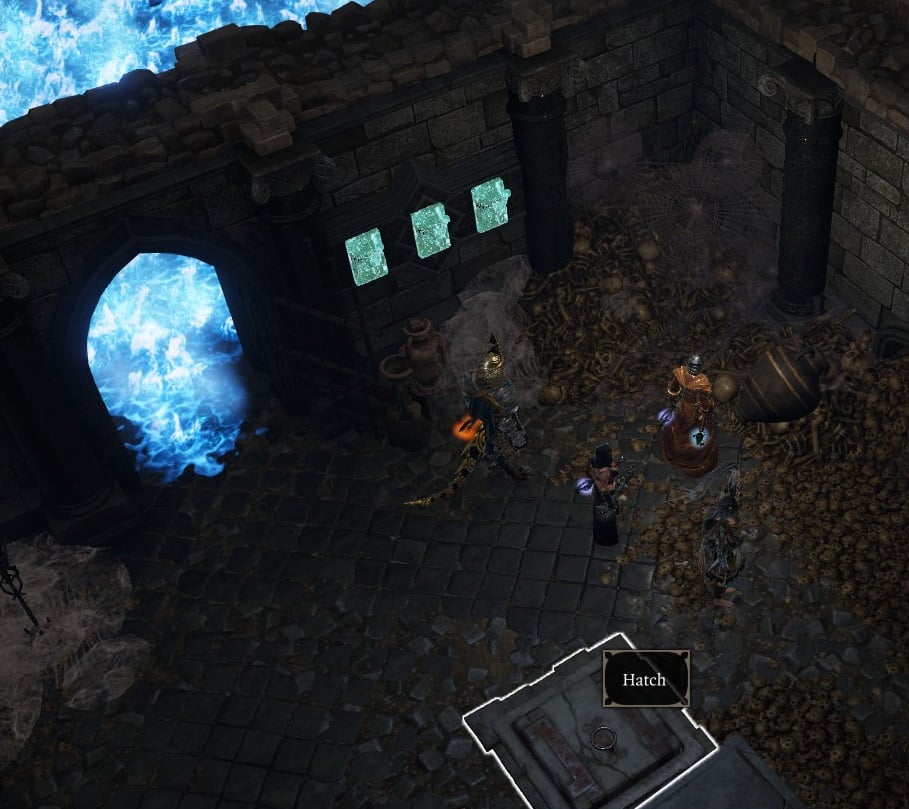
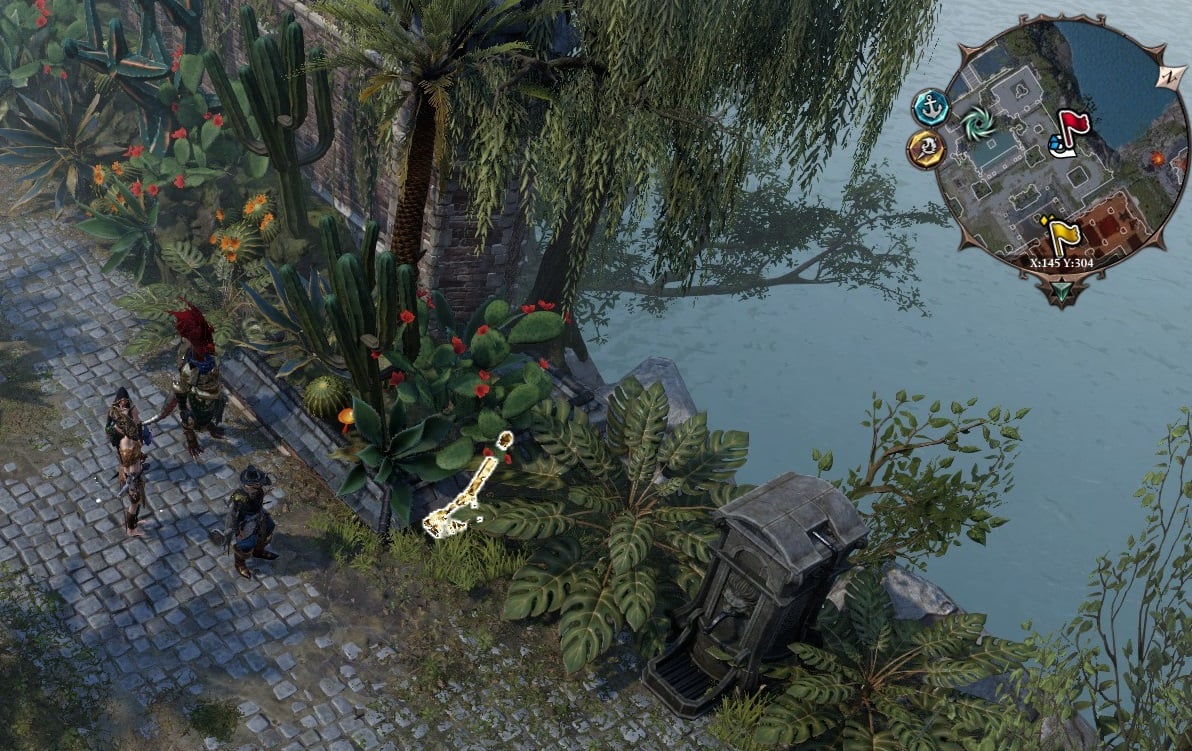
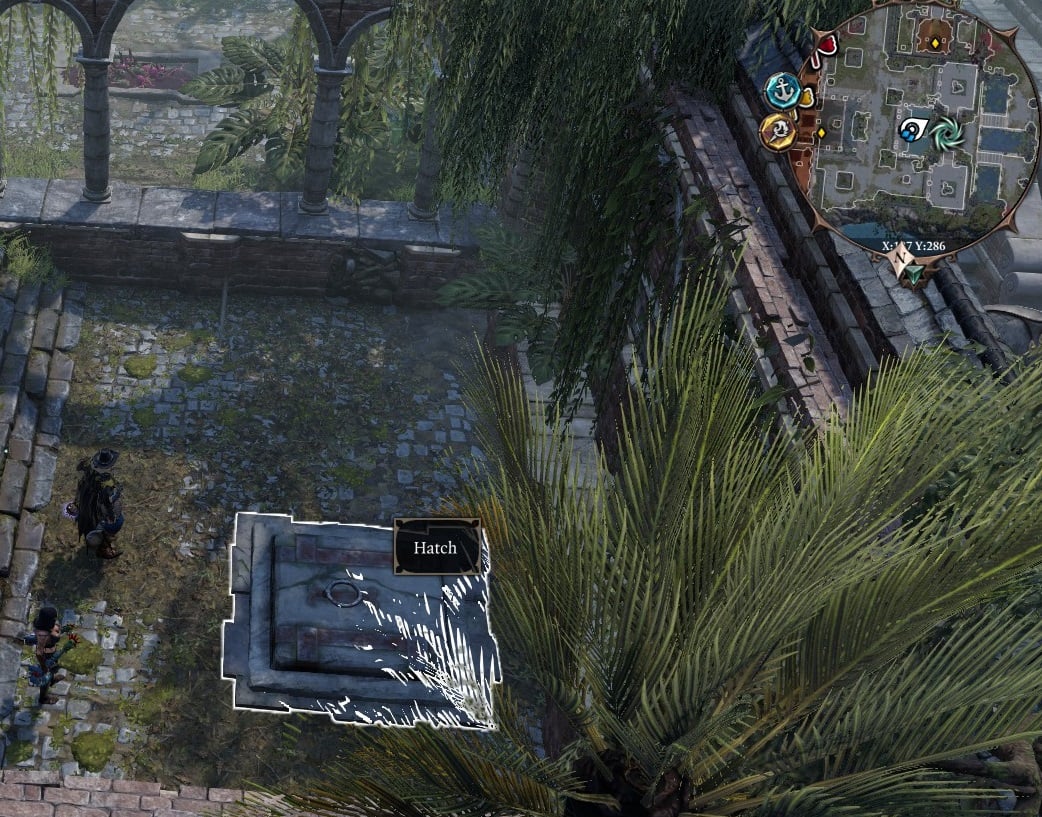
Similar to the above method, if you finished the quest Withermoore's Soul Jar, Lord Withermore informs you of a secret lever hidden in the shrine of seven at the camp. When you use that lever, a hatch is revealed, which will also lead you to the dungeon.
If you finished quest The Imprisoned Elf, Amyro will mark a hatch on your map. It leads you to an Ancient Tunnel, and once you gotten there you can also escape from Fort Joy Prison.
If you have your collar removed after becoming the champion of Arena, magisters will try arrest you on sight. If you chose not to fight back, you will be transported to Fort Joy Prison and you can escape from there.
You can also sneak your way out. Have one of your party members Sneak past the magisters (via the ladder to the second level of the fort, or the fort Harbor) to the east side of the fort, lowering the bridge to another part of the island. You don't need your whole team to sneak through, as there's another Waypoint on the other side of the bridge that will allow you to Fast Travel your party there.
Before you leave the fort, you may also want to complete companion quests for other characters such as The Red Prince, Sebille, Lohse and Ifan ben-Mezd. You can make some interesting progressions here, but if you choose not to do so you will be able to continue their quests later.
Leave the Island
Once you've escaped this part of the fort, all magisters will turn hostile so be careful. (You can still go back to fort peacefully if you manage not to be seen by a magister)
If you have installed the The Four Relics of Rivellon, you can also start collect these armor pieces. (Seed of Power, A Hunger From Beyond, Threads of a Curse)
After you've reached the east part of the island, your first primary goal is to find the Sanctuary of Amadia, where others escaped sourceres have gathered.
There are many voidwoken and undead creatures wandering this part of the island, along with some magisters. Saving your game frequently is a good habit here (use the F5 key to quicksave and F8 to quickload). When you face voidwoken, remember that they may not be as few as you first thought as frequently more voidwoken may join the battle later. It could be wise to not use all your consumables at the start and instead save some for any unwelcome surprises. Also, if you find a battle is too hard you can try to use the environment against your enemies. You can also set the battleground before a battle is begun since voidwoken only appear in several locations. Carrying a water barrel or oil barrel may look silly but it can sometimes save your life.
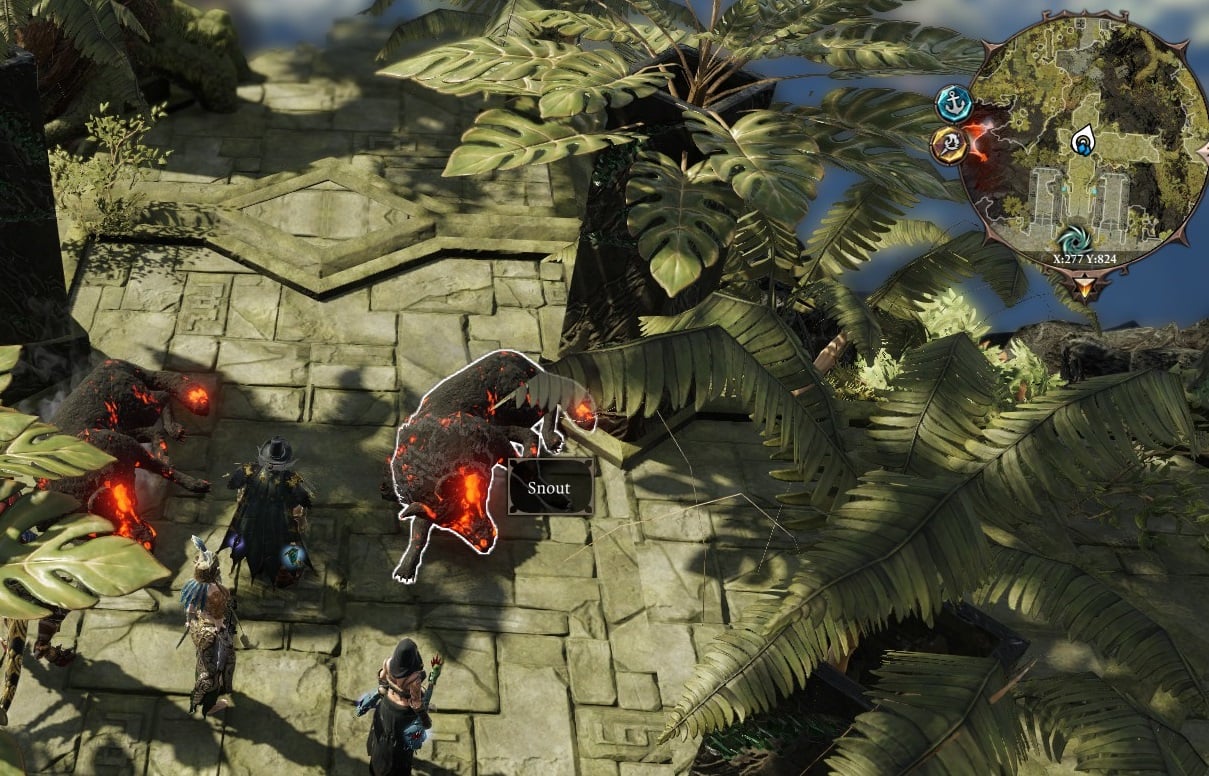
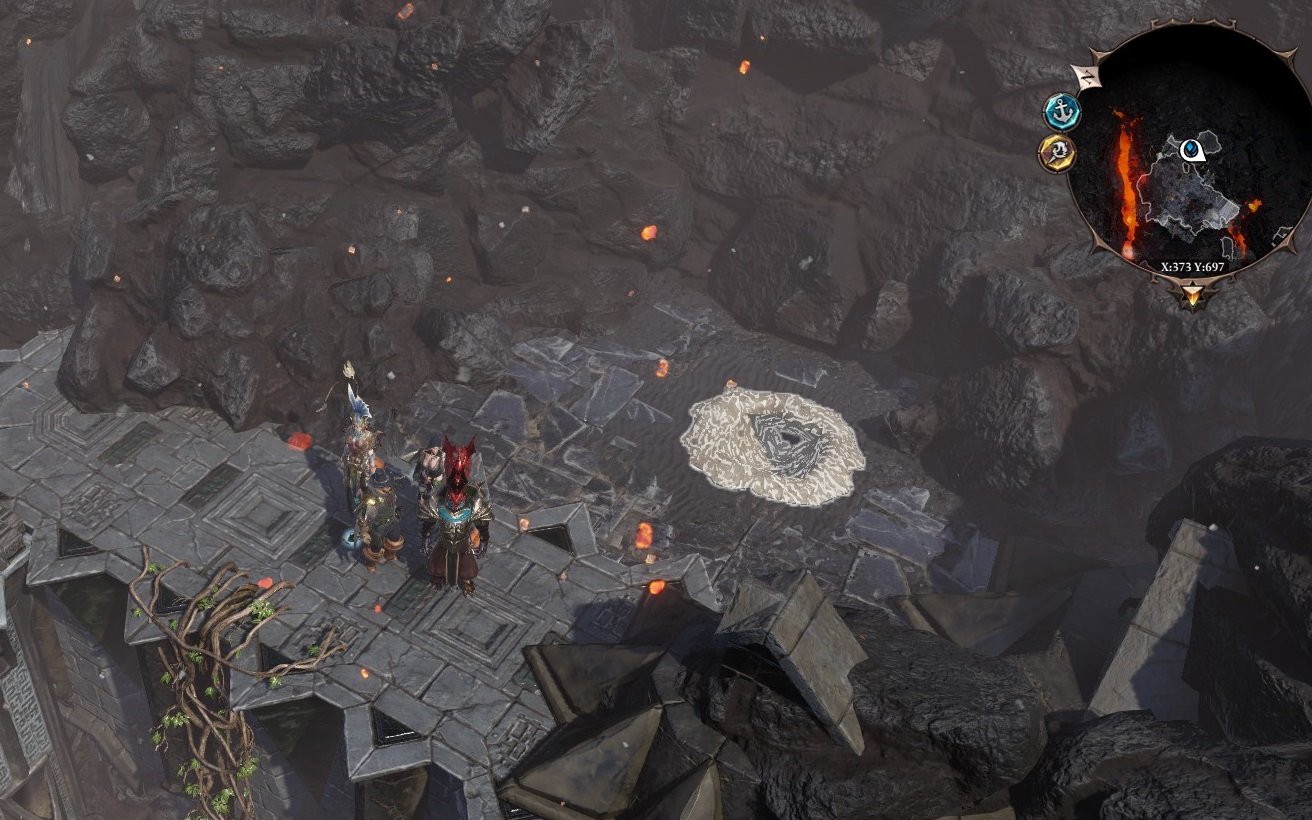
You can start exploring this part of the island by moving East. On your way there you may find places that are on fire or have poisonous gas. You can put out fire by using Hydrosophist skills (like Rain or Hail Strike), or remove poisonous gas with fire on most occasions (it will explode into fire and then fizzle out). The flaming pigs you meet can be cured with Bless (learned from a statue in Dark Cavern), and after that you will need to deal with undead Lizard Scapor by either fighting him (1800 XP) or a Wits persuasion check (3000 XP). One of the pigs can be cured and transformed back into human, see The Burning Pigs for details.
After you've killed some voidwoken salamanders, keep going south along the beach. At the end of the road you will find the Sanctuary of Amadia, and you will want to speak to the guard standing on high-ground to let you in.
Sourcerers in this sanctuary tell you that they are planning to escape this island by taking magister's ship. To do so, you need to save their leader Gareth and find a source weapon.
Gareth can be found in the ruins on the north, he is being attacked by several magisters, see Most Dangerous When Cornered for more information. (Don't forget to loot Armoury of Braccus Rex after you saved him. If you don't have the bless skill yet, come back after you visited The Vault of Braccus Rex ) If Gareth is killed during the battle, Exter will lead the Seekers later.
There are two source weapons you can find on this island, first is inside an illusionist's cave (The priestess in Sanctuary of Amadia will mark it on your map, the entrance is on the beach of the southeast island, not far from three salamanders), see The Vault of Braccus Rex for more information.
You will learn Bless skill in that vault, which is not only useful in combat, but also necessary to complete quests like The Armoury and The Burning Pigs.
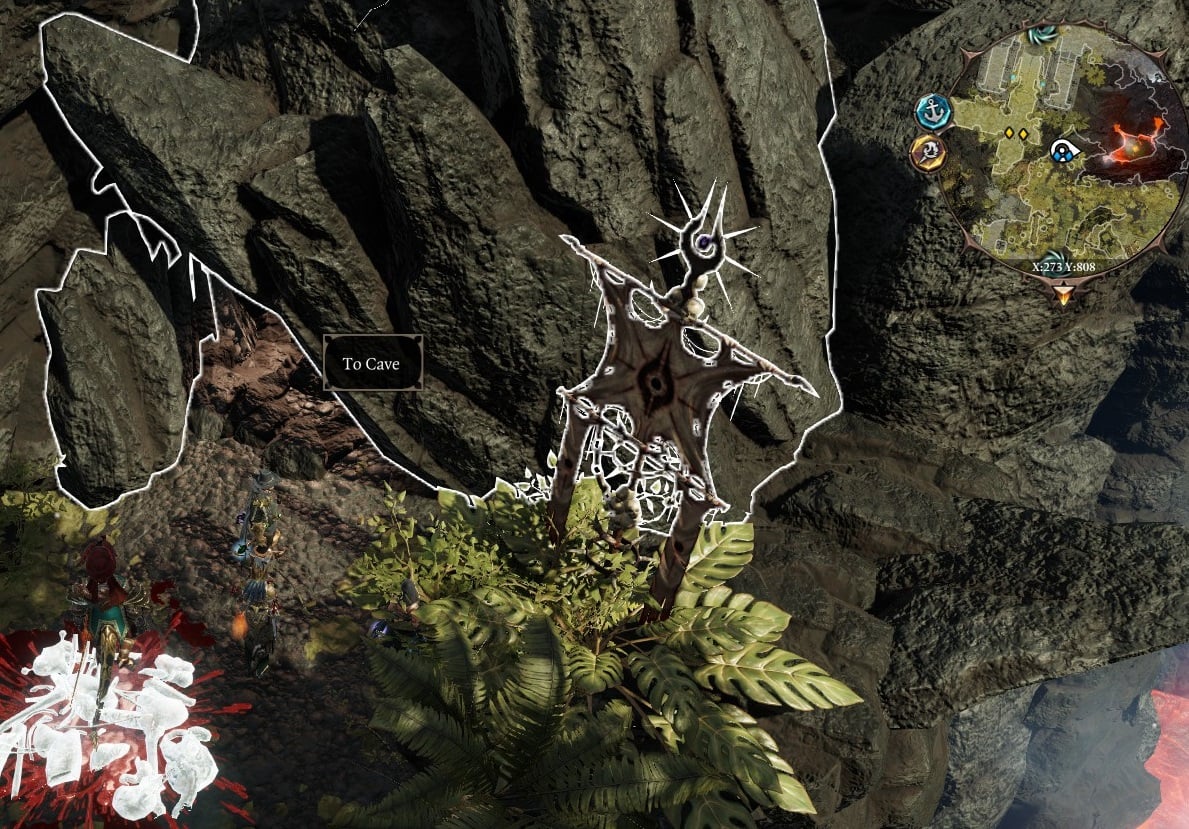
- Tip: Dark Cavern
Don't try to open that blocking field at first, look at your mini-map you will realize that there is another way to bypass it. There is a statue inside this ruin will give you some puzzles, the key is every capital letter in his puzzle stands for one word. (You can learn that by talking to rats, provide you have Pet Pal talent.)
The second source weapon you can find is possessed by a Radeka the Witch, she is hiding in a cave near Gargoyle's Maze, using her wand to control Slane the Winter Dragon. You can break Dragon's chains and promised him you will kill the witch and return the wand to him. He will help you to break in magisters' last bastion, you can also keep the wand for your own. See The Purged Dragon for more information.
There is also a place you may want to explore in this part of the island, though not necessary, see The Gargoyle's Maze and A Fate Worse Than Death for more information.
Before you launched the final assault to magisters, make sure you have finished other quests on this island because once you board the Lady Vengence, there is no turning back. See for more details:
Also, don't forget to ask Leya at Sanctuary of Amadia to remove your collars.
After you save Gareth, and the source weapon acquired. It is time to storm the magisters' bastion on the northeast of the island.(Quest: Call to Arms) Gareth and his men will steal the boats, you and your team confront magisters and draw their attention. This is a difficult task, so you can ask Gareth to send two people to assist you, you can choose from the archer, elemental spellcaster or melee warrior. But it may be better to fight magisters on your own, cuz Gareth's people have very low vitality and are useless most of the time (you can not directly control them).
Note: You may want to some equipment and skill books from seeker Kerban, he will be dead once you board Lady Vengeance and you can take whatever you sold them back. (but not those skillbooks and equipment of his own)
To confront magisters, you must pass the Shriekers magisters created first, use Source Vampirism will kill them instantly. Then, don't just go inside the bastion through the front gate, it will put you and your entire team in magisters' crossfire. You can take the door on your right and flank these magisters. Or use the corridor to lure enemies out one by one. The magister knight can use Phoneix Dive skill to ambush you and ignite the oil barrel nearby, so it is better to teleport the oil barrel to some other place.
Bishop Alexander is a very tough enemy and his melee attack can strike down one of your party members in one turn, the best way to defeat him is to keep distance and attack him from a distance. You can use Teleportation to keep him in distance or Hail Strike to freeze him. Once he is down, it's easy to finish the rest of the magisters.
But be careful, Bishop Alexander is not the final boss you need to face. In order to escape this island, you need to defeat Voidwoken Drill Worm, it appears after you killed Bishop Alexandar and his magisters. (Or passed several turns.) So don't use all your consumables when battling Alexander. Any surviving magisters will attack the void worm as well.
If you feel your team needs some rest before challenging Voidwoken Drill Worm, you can use flee ability to leave the battlefield and come back later.
Voidwoken Drill Worm had more vitality and armor than any other enemies you have encountered. But it is weak against Hydrosophist, using Hail Strike to attack it is a good idea. Also, don't let your party member stay too close to another, Voidwoken Drill Worm has many AOE skills.
After you defeated the Void Drill Worm, you can talk to Malady to board Lady Vengeance. (Lady o' War quest) Note: Once you board the Lady Vengeance, you and your teammates will be separated, you may want to put valuable goods on yourself. Also, once you left Fort Joy, all unfinished quests here will be archived.
ACT II
- Previous: Fort Joy
- Next: The Nameless Isle
- Recommended Levels: 12-18
All Quests in area
- A Danger to Herself and Others
- A Generous Offer
- A Hunter of Wicked Things
- A Man and His Dog
- A Prize Kill
- A Taste of Freedom
- A Trial for All Seasons
- A Web of Desire
- Aggressive Takeover
- All in the Family
- Almira's Request
- An Existential Crisis
- An Eye for an Eye
- Bitter Tonic
- Bound by Pain
- Burial Rites
- Burying the Past
- Business Rivals
- Counting Your Chickens
- Dark Dealings in the Blackpits
- Delusions of Grandeur
- Doctor's Orders
- Drowning Her Sorrows
- Eithne the Trader
- Finder's Fee
- Grebb the Scholar
- Heroes' Rest
- Hide & Seek
- Infestation
- Lost and Found
- Love Has a Price
- No Laughing Matter
- No Way Out
- Old Flames
- On the Ropes
- Opposites Attract
- Popularity Contest
- Powerful Awakening
- Press-ganged
- Red Ink in the Ledger
- Shadow over Driftwood
- Speaking in Forked Tongues
- Strange Cargo
- Stranger in a Strange Land
- The Advocate
- The Bark's Bite
- The Burning Prophet
- The Covenant
- The Driftwood Arena
- The Druid
- The Elven Seer
- The Forgotten and the Damned
- The Law of the Order
- The Midnight Oil
- The Missing Magisters
- The Reluctant Servants
- The Secrets of Bloodmoon Island
- The Silent One
- The Snoozing Adventurer
- The Stoic Spirit
- The Three Altars
- The Ugly Little Bird
- The Weaver
- The Wrecked Caravan
- The Merchant
- They Shall Not Pass
- Treated Like Cattle
- Unlikely Lovers
- Vengeance for the Fallen
- Window of Opportunity
- Wishful Thinking
Mastering the Source
Lady Vengeance
After defeated Bishop Alexandar, talk to Malady to board Lady Vengeance. Now the primary goal is to make this ship moving and sail to the mainland. (Main quest: Lady o' War)
The first thing you need, is the gem from Bishop Alexandar. You need to persuade Magister Ranley, or kill her, to inspect Bishop Alexandar.
Then you need to know the password to Port-Side Stateroom Door. Find the Starboard Stateroom Door and tell the door you've forgotten your password. Ask to be reminded. Then you will learn that the password for the master cabin is "Fortitude".
Note: there is a mirror at the lower deck that allows you to redistribute your talents, attributes and change appearance.
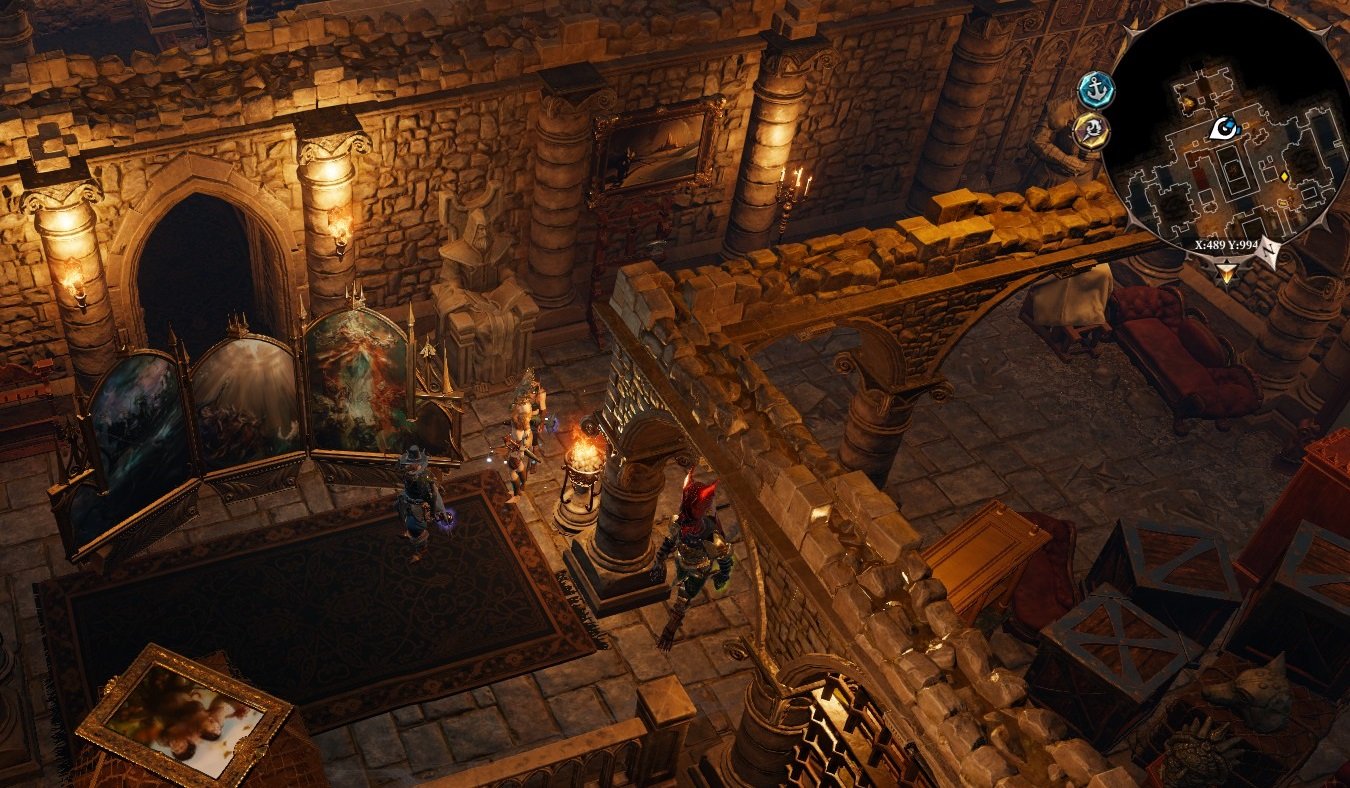
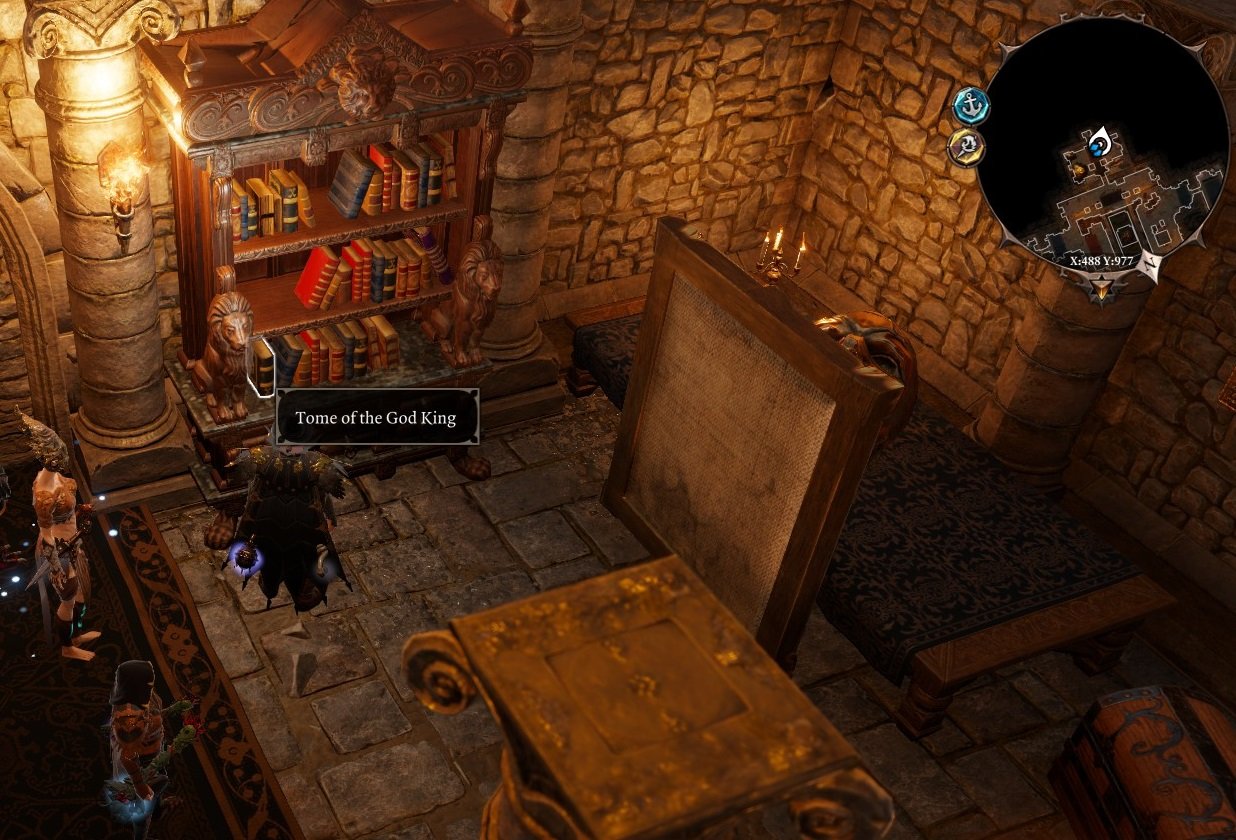
If you have Pet Pal talent, speak to Ship Rat and it will tell you Dallis use songs to control the ship. Go to Dallis's cabin and pick up Dusty Tome. (There's a secret chamber beneath Dallis's cabin, there are some useful items and coins, guarded by 2 Hammer's Pet. You may want to enter after you recruit some companions.)
After that, talk to The Figurehead and sing it a song. Then you will have the choice to free this ship or subjugate it, either way, you can control it.
Dallis will try to board the ship with a group of magisters, buy Malady enough time to unlock quest To the Hall of Echoes. (make sure you have recruited your teammates, after the Dallis battle, those not on your team becomes unavailable.)
Explore the Hall of Echoes, talk to the gods and use Bless on them. You will be teleported back to Lady Vengeance once you have talked to your god (depends on your race). When you returned, Alexandar already vanished from the ship, you need to speak to Malady for your next move.
Reaper's Coast
At Reaper's Coast, your main goal is to find someone to teach you the use of the Source. (Main quest: Powerful Awakening). Just like Fort Joy, this region has multiple sub-areas.
Explore the beach first, you will find some voidwokens and a magister caravan. Speak to the magister survivor will acquire quest The Wrecked Caravan. You need to report to magisters at Driftwood later.
There's dying shark at the beach, it escapes the sea in fear of some kind of monsters. You can kill it as it wishes, and took the human limb, it's for another quest Hide and Seek.
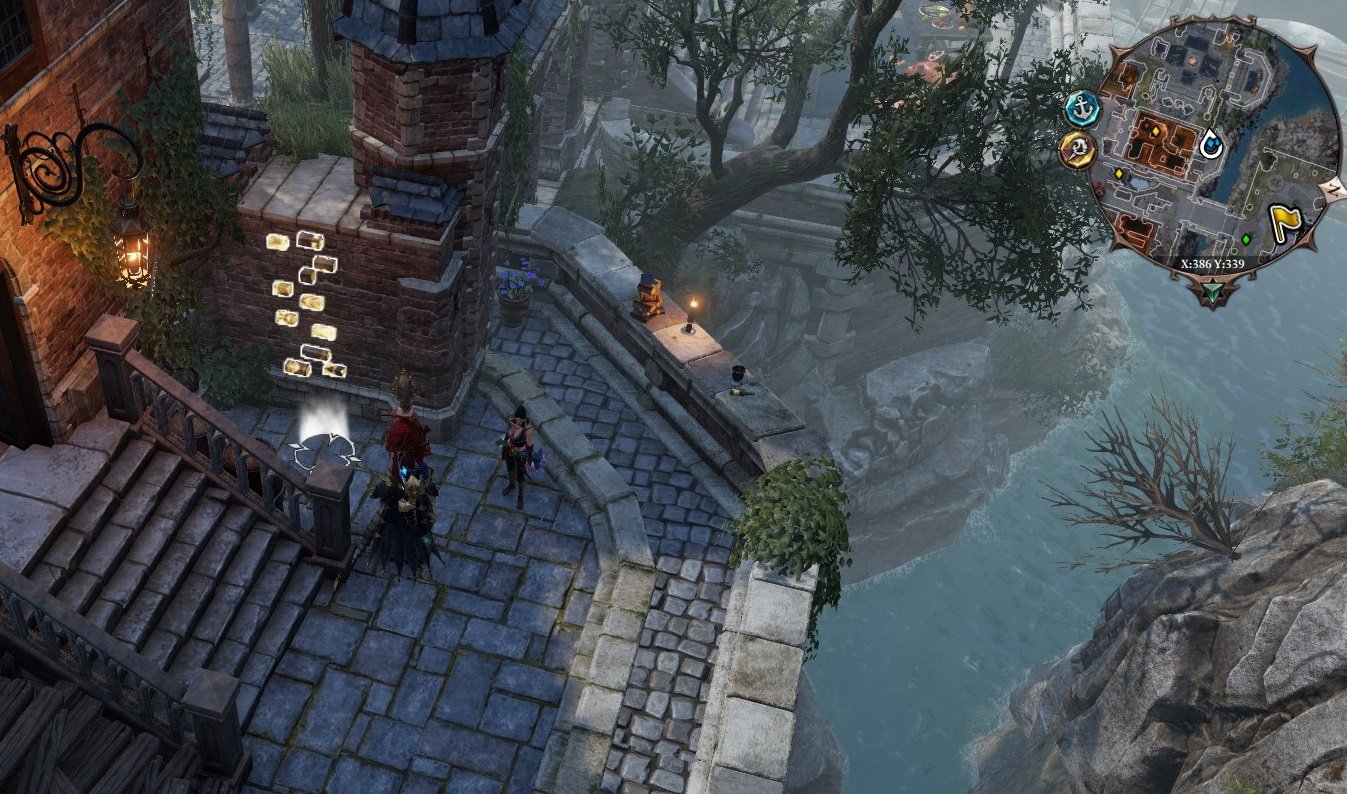
Near the edge of a bridge, you find a little boy crying for help, agree to help his mother gives you They Shall Not Pass. You need to reach the other side through paladin's hold and Stonegarden, and lockpick the door blocked the way. (You can do this quest later)
Approach the Driftwood there is a chicken house, if you have Pet Pal talent, you can talk to them and acquire Counting Your Chickens quest. Go to the marked location, kill the voidlings and retrieve the egg, return it to chickens and you will be rewarded.
Before you explore other parts of Reaper's Coast, you may want to rescue Siva first (see Powerful Awakening for details). She's hanging just outside the Driftwood, persuade the magisters to leave or force them. Sive will take you to her home and taught you a very useful skill Spirit Vision. (This skill is necessary to complete many other quests in Reaper's Coast region. Strongly suggest you learn it first before you move forward. Otherwise, you will waste a lot of time searching for information or running from one place to another. Also, please keep the ritual items.)
At Driftwood, right next to the waypoint, there is a beggar with a sick dog. If you have Pet Pal talent, you can pet the dog and heal him, then you can let him know it's his master that hurts him. Once the dog runs away, you can find him in the graveyard (A Man and His Dog).
In Driftwood, there are many small side-quests, click the link for more details:
- Grebb the Scholar (Help Grebb by eating void-tainted fish at fishery)
- Hide & Seek (Help two kids find their friend by eating the human limb from the dying shark as an Elf.)
- Red Ink in the Ledger (Investigate the attack, leads to two competing trolls in Business Rivals)
- A Web of Desire (Kiss the spiderwoman at undertavern)
- Drowning her Sorrows (Help the captain on the second floor of tavern, require Spirit Vision)
- The Snoozing Adventurer (Acquired from the adventurer at the second floor of tavern)
- Strange Cargo (Help the man in fish barrel to escape)
- Love Has a Price (Ask for exotic service at tavern, rubbed by bandits)
- The Driftwood Arena (Undertavern Arena challenge)
These quests give you additional XP, coins, equipment or new talents. Also, Strange Cargo quest will give you the information of a master sourcerer.
Driftwood is dominated by two competing faction, the magisters and the dwarves. Magisters will give you quest The Missing Magisters and The Law of the Order. While dwarves give you Shadow over Driftwood. (You can choose to accept both quests, they lead you to the same place Wrecker's Cave)
(Note: while you doing the Shadow over Driftwood quest, you may find there is lich locked under Mordus' house, see A Taste of Freedom for how to solve the puzzle.)
Travel to Wrecker's Cave, you can find a side-quest The Burning Prophet on your way. (just lit all torches to finish it.)
Near the prophet's statue, down the beach, there is an ancient lamp, which gives you Wishful Thinking.
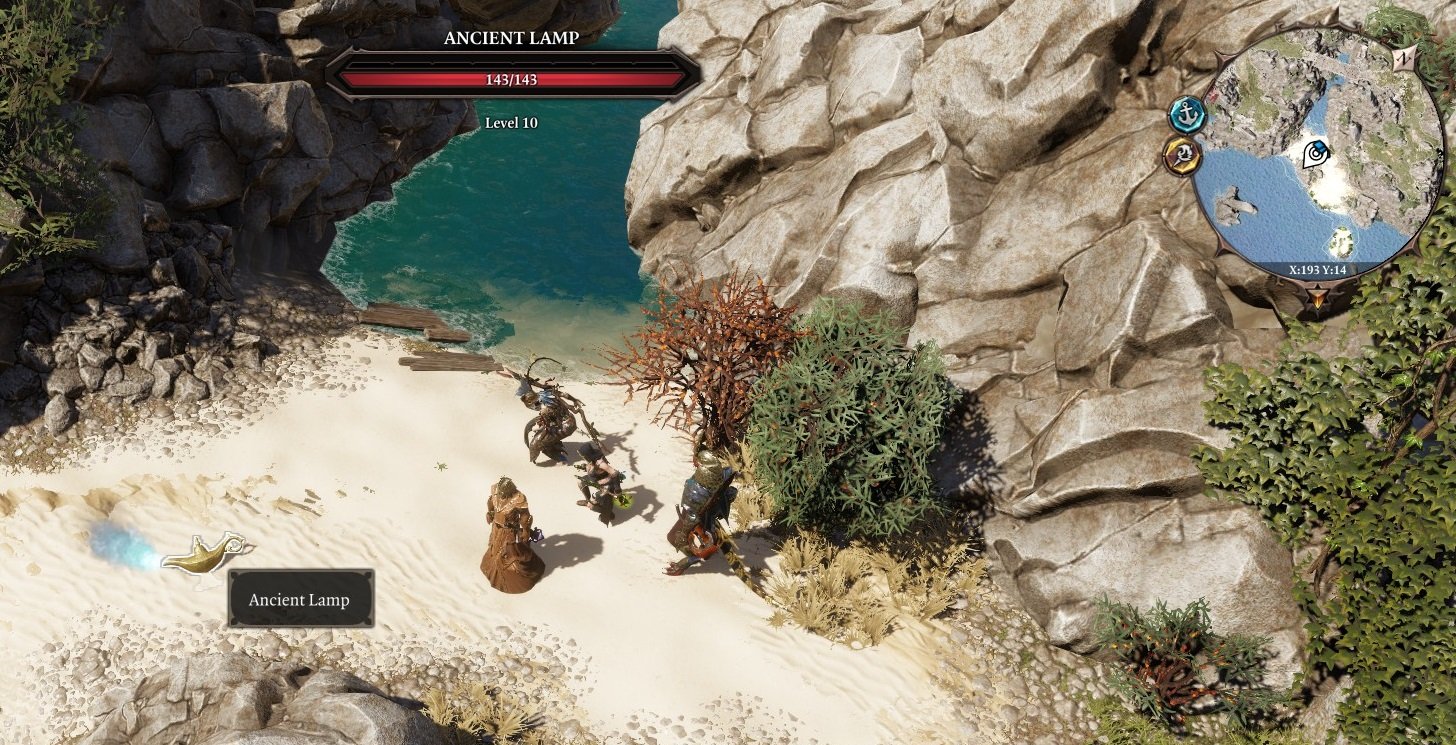
Inside the Wrecker's Cave, you will find a survivor, but there appears to be no way to explore further. However, when you investigate the end of the cave, four Storm Wing Void woken will appear and attack you. You and your team members will be taken to the depth of the cave, separated.
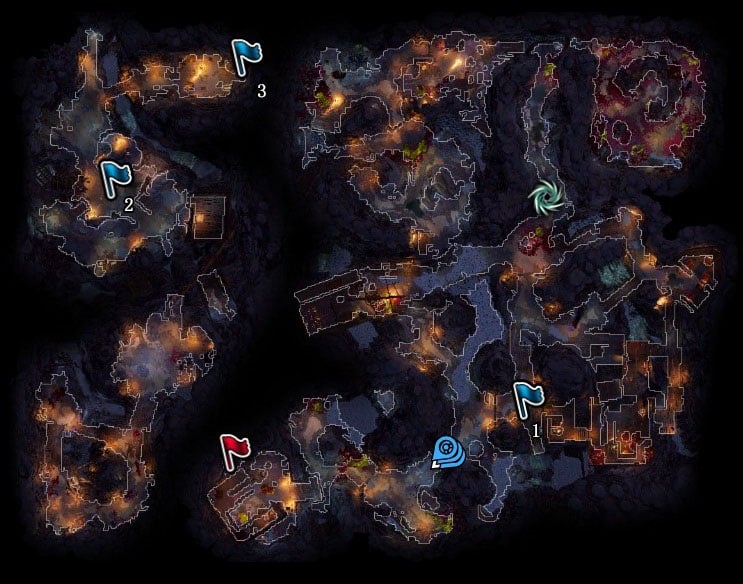
(Note, you may find the battles in Wrecker's Cave too hard. In that case, try to enter the cave through the entrance near the waypoint, it will lead you right to the Mordus. If you have teleporter pyramid with you, you can use it to regroup. )
One of your team member ( the main character) will be locked in a place without the enemy, explore the surroundings, you will find some letters regarding quest Shadow over Driftwood and The Law of the Order. If you talked to the dwarf in front of the strange device, you can also advance personal quest Ifan ben-Mezd. The door to other areas are locked, you can lockpick the door or find a key on the ground behind the south end of the ship.
Another companion starts in a bedroom. The private chamber key is in his/her area. However, this character needs to defeat several possessed dwarves and voidlings to get the key. (If you want to leave this area now, try to find the hidden hole that will transport you to the entrance of the cave. Shovel or lizard needed to dig the hole)
Note: Cast Spirit Vision and you will see many ghosts in this area, talk to them to learn what happened here.
The third party member is trapped in a cave full of voidlings, unless that character is incredibly good in combat. Use your other characters to save him/her. (Through a cave in the same area you find the key)
After you gathered all the companions, you can proceed to next area. (through a ladder in a shipwreck)
You will find Mordus in this area, he will attack you with his possessed henchmen. Buf once you strike him down, the battle is over.
If you loot Mordus' Amulet from his body, you can use it to open a hatch in his chamber. Beneath the hatch, you can find the gem to unlock the dungeon under Mordus' house.(A Taste of Freedom)
Report to Driftwood to finish Shadow over Driftwood. (or The Law of the Order)
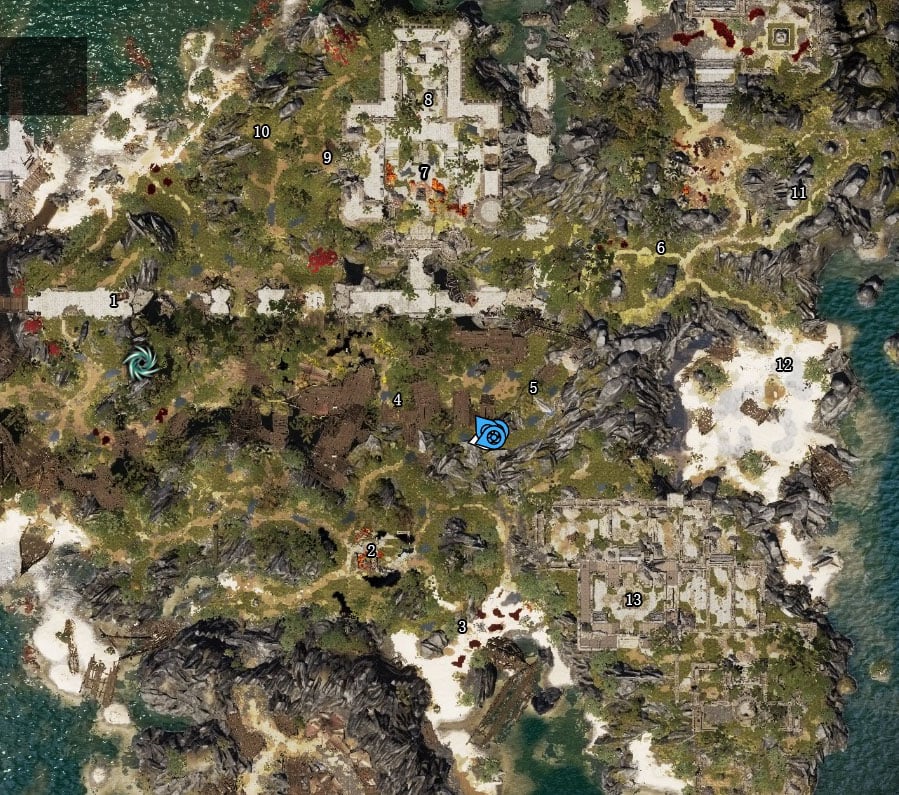
There's some other side-quest in Reaper's Coast Bluff that may interest you. The Aggressive Takeover requires you to talk to Garven in Driftwood Tavern, and agreed to investigate the attack location. (Marked on your map)
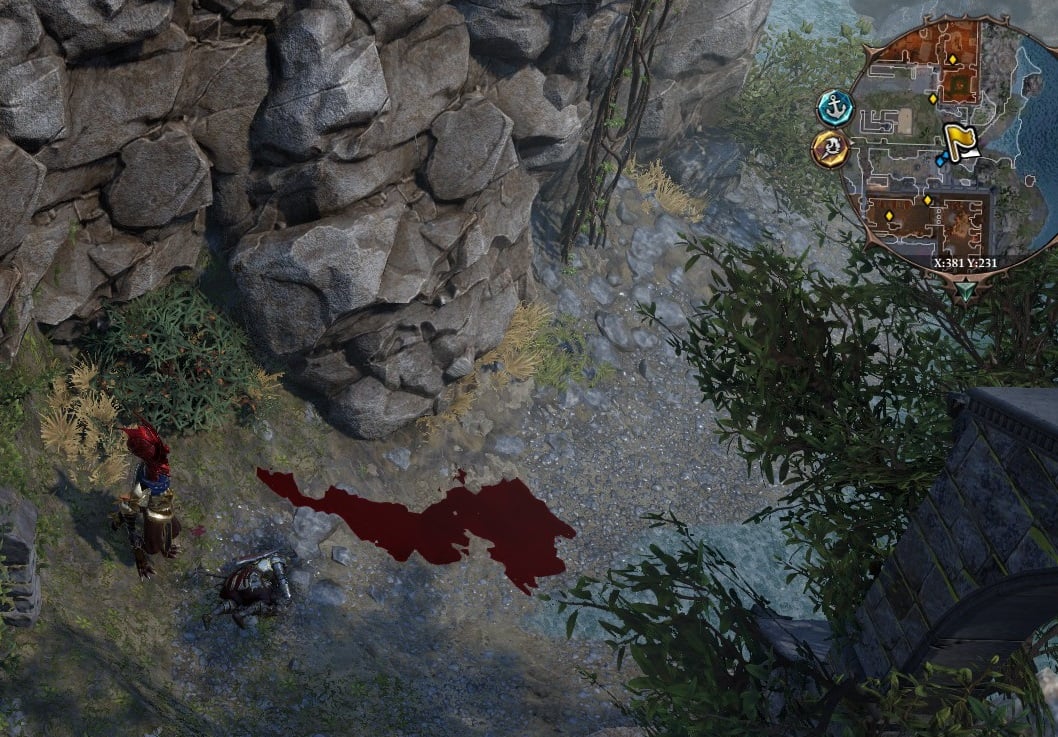
The attack location is right next to the bridge between Reaper's Coast Bluff and Cloister Wood, follow the blood trails, you will find a shallow grave. Loot the supplies there, then cast Spirit Vision.
You will see the ghost of Garven's partner, he accuses it's Garven, not Voidwokens, killed him, you can agree to avenge him or not.
At the bridge near Wrecker's Cave-Reaper's Cove waypoint, a giant troll Gorg wants you to kill another Troll Marg.(Marg is at the bridge between Cloister Wood and Driftwood - Fileds) You can help one gid rid of another. (quest Business Rivals) But be very careful, Gorg the Troll is a formidable enemy that can single strike some of your weaker characters. Before you fight the trolls, make sure you are prepared, and the game saved.
At the Cloisterwood (on the north of Reaper's Coast Bluff), you can find Eithne around X:168 Y:223 (Eithne the Trader). She asks you to find a particular tome - a volume that teaches the reader how to make corpses explode. (skillbook combined by a pyro and a necro skillbook)
In the ruins near Cloisterwood Waypoint, a powerful sourcerer named Hannag is fighting some magisters. You can help the magisters in Window of Opportunity, or help the sourcerer. If you helped Hannag, she will give you another task On the Ropes (requires you to investigate Blackpit area), in exchange, she will teach you more about the source. (One way to learn the source for Powerful Awakening)
On the east of the ruins, you will find the demon hunter's house. Speak to him advance Lohse's personal quest, and give you the quest A Hunter of Wicked Things.
North to the ruin, there's Alice's Corpse hovering around a burning land. Do not try to attack it unprepared, it has many powerful AOE skills and can be healed by fire. Save your game before you make an attempt.
At the west corner of Cloisterwood (Around X:115 Y:269) there is a Lamenting Abomination. When you approach it will summon wolves and attacks you. Kill it then kneel before the altar will acquire the quest The Three Altars.
Another alter is at X:414 Y:301, on the river. The third altar is at X:482 Y:260.
The Driftwood fields have quest The Ugly Little Bird and Treated Like Cattle. Both require Pet Pal talent. The first quest requires you to talk to a sick-looking chicken at a farm. If you have scholar tag and Pet Pal talent (like Sebille), you can convince it that it's actually a phoenix, all that needed to transform it into a real phoenix is to burn it alive.
When it agrees, cast some fire spells on it, and it actually turns into a phoenix egg, you can decide to keep it or eat it.
At a farm north to Driftwood, you came across a pair of cows that were, in fact, two people who were polymorphed and enslaved by a witch. They want to be turned back into their human form. (Treated Like Cattle)
The witcher's house is right to the east of cows, the key to get in is on the ground to the side of the house. In its dungeon, there's full of exploding rats, attack holes on walls to stop them from respawning. There is a lever that can open the door, or you can use teleportation.
There's only one potion at the dungeon. (Witch's book is on the giant frog at the dungeon, Witch's eye, one of the ingredients, is in the house.)
Having both the Scholar and Mystic tags will allow you to decipher the recipe book dropped by Zppt to craft the Witch's Potion.
An elven structure of sorts can be found east to the Driftwood-field Waypoint, across the river - four statues, surrounding a brazier. (around X; 447 Y:340)
Speak to the brazier as an elf will unlock quest A Trial for All Seasons. You need to attack four statues with different skills to complete it.:
Hero of Winter - Spell, Winter Blast or Hail Strike
Hero of Autumn - Static Cloud (use the arrow or use a fire spell on a pool of water then shock the cloud with a lightning spell)
Hero of Summer - Spell, Laser Ray
Hero of Spring - Spell, Raining Blood
Four challengers will appear once you attacked all the statues, defeat them to complete the challenge.
Near the 4 elven statues, on the east, there's an elven encampment. Join them and show your respect will complete the quest Burial Rites , speak to the elves and ask you to save Saheila in The Elven Seer. (if you did not kill Saheila in Fort Joy)
Saheila is prisoned in the sawmill on the north, guarded by lone wolves. If you have Ifan ben-Mezd on your team, you can enter the sawmill peacefully. (You can trade with these lone wolves, they have some decent equipment and a large amount of coins. You can sell them your unused equipment, and get them back later when they turned hostile.)
Many quests can be done here in the sawmill, like Sebille's and Ifan ben-Mezd's personal quest. You need to go to the second floor of the main building and killed Roost. He's guarded by two of his men and a real wolf. After killing the Roost, all other lone wolves will turn hostile. (if not already)
Escort Saheila to the elf camp to complete the quest, as a reward, Saheila will teach you how to master the source (increase source point you can store by one)
If Sebile is on your team, Saheila will reveal her true identity, and give her a choice to be the heart of scions.
Cast Spirit Vision in the sawmill, and you will see a lot of spirits in this area. Some of them will give you side quests:
- The Bark's Bite
- The Stoic Spirit
- Old Flames
- Press-ganged
- A Prize Kill
- An Eye for an Eye
- Bitter Tonic
- No Laughing Matter
- Finder's Fee
On the east of the sawmill, there's Red Princess's camp. Let Red Princes mate with her will advance his personal quest. Some lizards will ambush you afterward, but after you defeat them the Red Princess is disappeared.
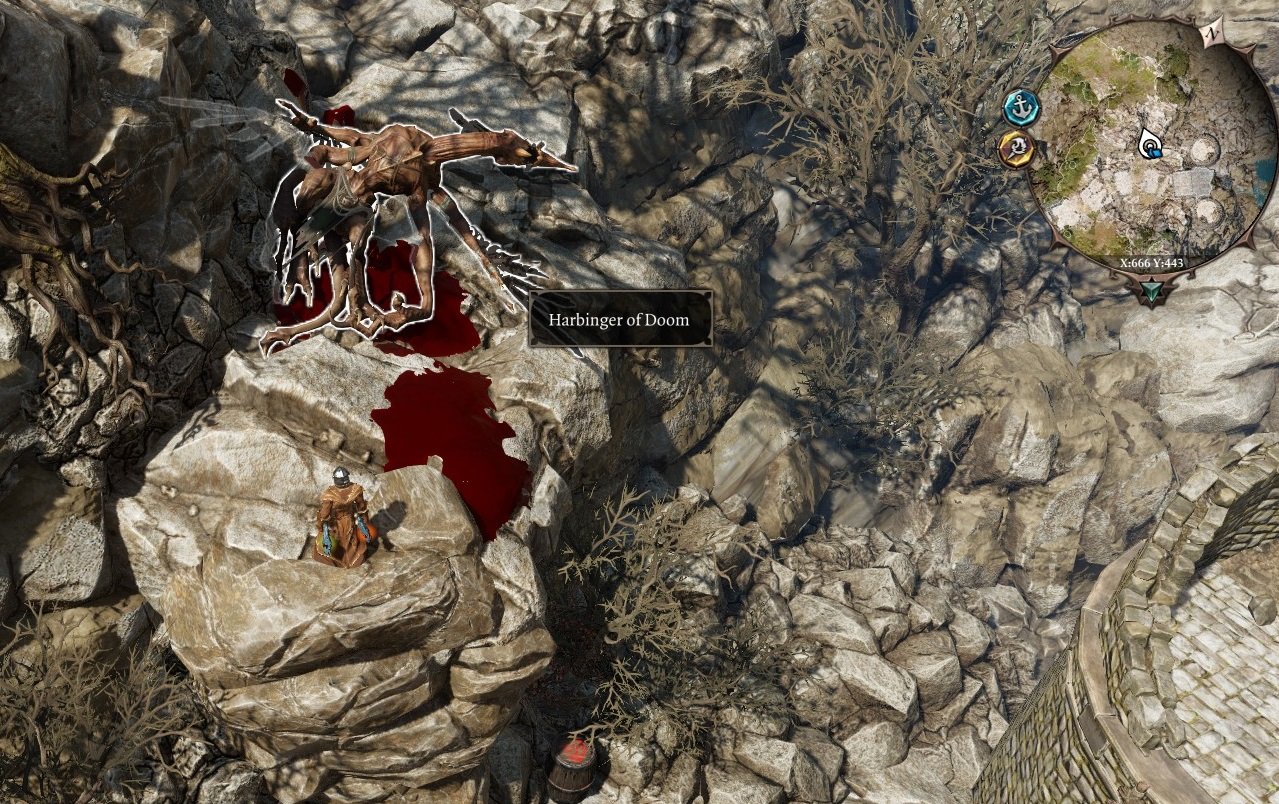
When you travel to the northeast corner of Reaper's Coast, the sky suddenly turns dark and all your characters get Decaying effect. (healing turn into 100% damage) At a damaged bastion you will find the Harbinger of Doom along with some undead. kill the Harbinger and the land will turn normal. (see quest Almira's Request for details)
Other quests in Paradise Down:
(Note, rifts separated this places into many small areas, you can use teleportation skill to reach different areas for loot. Or cast the Spirit Vision to find out what's happened. However, be careful when you teleport to an area constantly strike by meteors, some undead will show up and ambush you.)
At the northeast of the Stonegarden, there's a Healer's House. Persuade him you can help will unlock the quest A Danger to Herself and Others. (Help the infected sourcerer at his cellar or kill her)
Gareth can be found in front of a house in Paradise Downs, he wants you to kill some silent monks for revenge. (quest Burying the Past) You can do as he asked, or you can talk him out of this idea.
Stonegarden
Stonegarden is another story-rich location in Reaper's Coast, however, to complete the quest here, you will need to learn Spirit Vision first.

There is a black dog named Andras wandering this place. He is a powerful necromancer and can summon undead trolls, if you have Pet Pal talent, you can fight him and win some rewards. He guards the tomb entrance for his master Qanna. She has the Shadow Tomb Key needed for All in the Family quest. She mentions Anathema. In order to kill her to get information and the Key you need to cast Bless on her
If you Cast Spirit Vision here, you will see a lot of ghosts. Some of them can give you useful information and items, some will give you quests.
If you persuade the Featherfall (on top of a tower), you can acquire skill Summon Condor. (or use Spirit Vision, speak to the spirit first then talk to Featherfall)
Interact with that rotten flower in front of the elf ancestor tree will teleport you to a small underground area. There's a tough fight and many loots await.

Near the waypoint, there is a tomb with two rotatable statues, you need to find the missing angelic head first. (west to waypoint, in front of another tomb, on the ground) Repair the statue, then rotate both statues toward outside to open it.
Quests in Stonegarden:
- Speaking in Forked Tongues (learn the language by talk to salamander at Ryker's mansion, or eat the lizard limb at Ryker's basement.)
- All in the Family (help tarquin acquire some artifacts)
- Stranger in a Strange Land (help burn the lizard's remains)
- An Existential Crisis (books found at Ryker's mansion)
- Heroes' Rest (defeat the undeads and loot the treasures.)
- The Reluctant Servants (kill Ryker)
- The Weaver (giant spider in Ryker's mansion)
- A Hunger From Beyond (Shoes can be found on the shady digger of Stonegarden x592, y96)
In Stonegarden, you can find a lizard chest in between two fire-breathing statues. Let a lizard speak to it, and you will learn it requires a password to open. (transformed into a lizard does not help) The password can be learned from the salamander at Ryker's mansion, but it has to be a lizard character, with Pet Pal talent.
At the gate of Stonegarden, Tarquin asks you to investigate a family crypt and retrieve something for him.
You will need to lockpick the door to enter this tomb or get the key from Qanna. In the first room, there are two buttons on the wall, you need to get close to find them. Press these the buttons to open the stone gate.
Let one of your most tenacious companions get into the third room and step on the pressure plate. Then cast Spirit Vision (Learned in Powerful Awakening), you will see three levers on the wall of the second room. Press the levers (middle-left-right) to reveal a secret hatch.
There's a treasury under that hatch, use your character with highest lucky charm to loot them. The artifact is in the coffin, if your character is a lizard, he/she will recognize the language it says.
When you try to leave the tomb, all clay sentinels will revive and attack you.
Cast Spirit Vision at the Stonegarden waypoint, and you can see a Lizard ghost nearby. He asks you to dig his remains and burn it in eternal fire.
Place the remains of that Lizard on lizard part of the cemetery. (Where two dragon head statues breath fire)
The ghost of lizard will appear and thank you for your help.
At Stonegarden, you heard a voice calling for help. (where you overlook the Blackpits X:625 Y:153)
Agreed to dig him up, and that skeleton claimed to be a philosopher, and challenges you to a wits duel. If you agreed, he will have three questions, if you cant outsmart him your character will be killed instantly. (You need to read The Essence of Existence, Volume One two and three in Ryker's Mansion to defeat him. Some tags may also help.)
South to the Stonegarden Waypoint, there's four heroes' coffin, examine them you will learn the locations of their valuables. But if you examine all four of them, these heroes will rise as undead and attack you.
At Stonegarden you will find gravekeeper Farimah wondering around, she implored you to kill Ryker.
In Ryker's Mansion, he asks you to retrieve something for him, in exchange he will teach you the way of the source. (quest A Generous Offer and The Midnight Oil) Cast Spirit Vision here and you can learn more about Ryker. (if you find the contract in sawmill, you will learn that Ryker is a lone wolf, tasked to kill Godwokens)
If your character is a lizard Scholar and has Pet Pal talent, speak to the salamander in Mansion will learn the password to the chest on fire.
In the cellar of the Mansion, you can lure the rat to turtle with foods. (Opposites Attract)
Blackpit
Travel to the Blackpit, at the southeast of Reaper's Coast, this place is filled with voidwokens and magisters.
The apprentice' house is at the entrance of Blackpit, a group of magisters took some villagers, and are ready to execute them. (You can fight the magisters or leave them be. This is part of quest On the Ropes)
There are magisters guarding a gate blocking you from further exploration. If Reimond gives you the authority to assist the magisters, you can pass here without violence. Otherwise, you will have to fight your way through.
Inside the gate, you will see a white magister interrogating a sourcerer (apprentice of Hannag, required for quest On the Ropes ), kill the magister now may cause you lose a thread, and a large wave of oil voidwokens and fire voidwokens gonna appear and attack you.
Approach the harbor, the magisters there forbid you to move forward. You can try to sneak in, but two shriekers blocked your path. Use Source Vampirism to destroy them.
Note: If you keep the purging wand you acquired from Fort Joy, you can use it now to kill shrieker. If not, you need to master source and complete the ritual in Powerful Awakening to learn the Source Vampirism skill.
Reimond and some other magisters are in the harbor, interrogating black ring members. Once they found you, you will have no choice but fight them. (Reimond will try to escape if he is on low health)
After the magisters been defeated, loot the place, and read the notes and letters to learn what happened here. (Or you can use Spirit Vision and talk to the spirits, or let an elf eat the corpse.)
On the other side of harbor, quarter mistress Anna is guarding the Blackpit mine. Defeat her to get into that mine. (nearby is one hiding place for Hero's Rest)
That mine is filled with traps and oil pipes, you can use crates to block the oil pipe and disarm the pipes. Or you can use Teleportation or Spread Your Wings to get through. (If you have teleporter pyramid, you can let one of your teammates get through first, then teleport the rest to him/her)
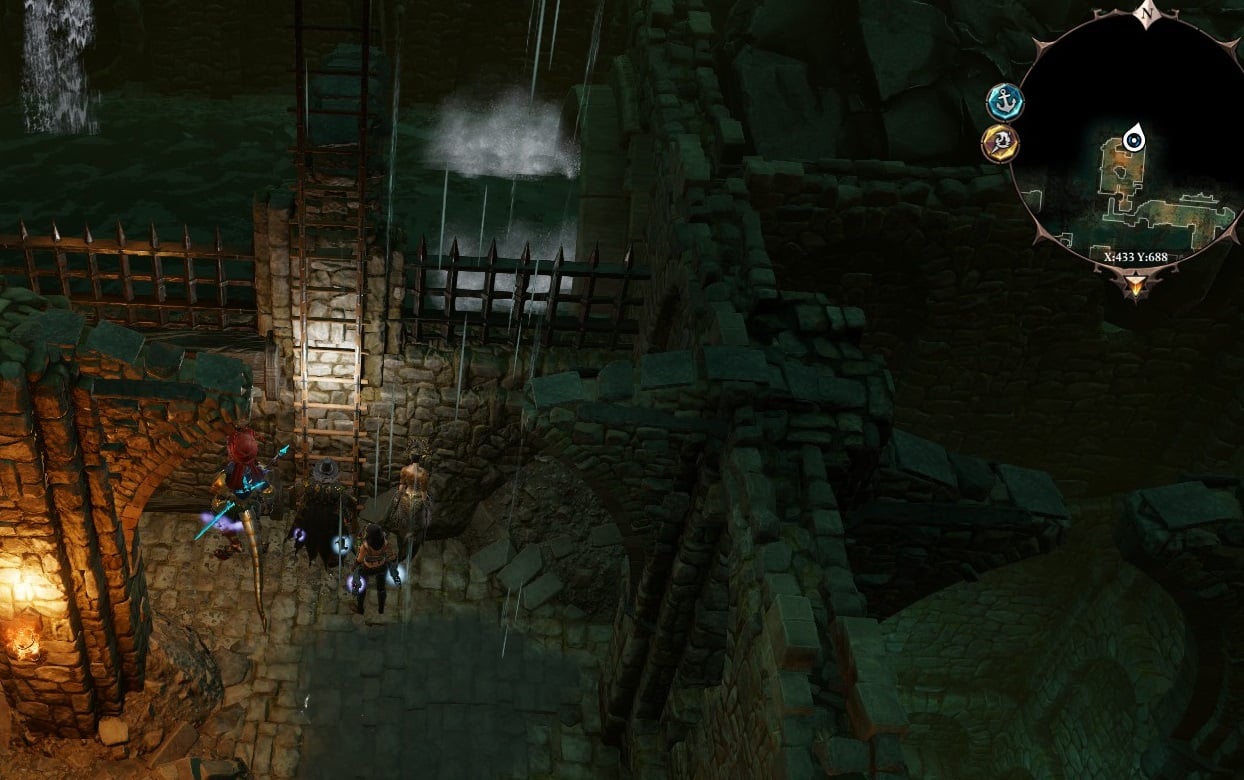
Deep inside, there's shrieker guarding the waypoint. Use Source Vampirism skill to destroy it. (there is a corpse on a broken bridge nearby, if you teleport there you can pick a note and a key)
Moving forward, you will see some Voidwokens fighting magisters at the excavation site. Defeat the Voidwokens, then you can persuade the magisters (if there is any of them left) you are just passing by, or you will have to kill the magisters as well. From one of the magister's body, you will find a key to a room nearby. Inside the room there is a hidden stone door, you need to get really close to discover it. Behind the stone door, there is a strange device that teaches you how to create a shapeshifter mask. (require one source point)
Leave the excavation site, venturing forth to the workshop, a group of magisters is here. You need to defeat them and destroy the crumbling gate (use fire skills on the oil barrels) to open the path to Ancient Temple. Interact with the device in Ancient Temple to acquire more information.
In the heart of Ancient Temple, there is a puzzle, there are seven shrines of seven gods, you need to activate them in the correct order.
The riddles are:
"Our first lord babes with power glowed, our second's born in blood that flowed. Our third's young to the wind returned, our fourth's to glowing flames adjourn. Our fifth lord's cubs with minds were blessed, our sixth's had brawn beyond the rest. Our seventh's brood spread from earth to glen, and thus no king shall rise again."
The key to the puzzle is within a book on a corpse within the Ancient Temple chamber. It will say on the second page that each god is a representation of an element or power:
Rhalic-Earth
Duna-Air
Tir Cendelius-Blood
Zorl Stissa-Fire
Vrogir-muscle
Xantessa-Mind
Amadia-Magic
The correct order is: Amadia, Tir, Duna, Zorl, Xantessa, Vrogir, and finally Rhalic.
After you hit all the pillars in the correct order, an Eternal will appear, and have an interesting conversation with your god. You need to defeat the Eternal and her stalkers. Loot the place and leave.
After you return to the Paladin Checkpoint, you will find they were ambushed by voidwokens. Assist the paladins so you can collect your rewards.
The Bloodmoon Island
Before you travel to the Bloodmoon Island, you may want to learn the source at some other places first so you can continue the ritual of Powerful Awakening and learn the Source Vampirism skill. It's necessary for many of the quests on the island.
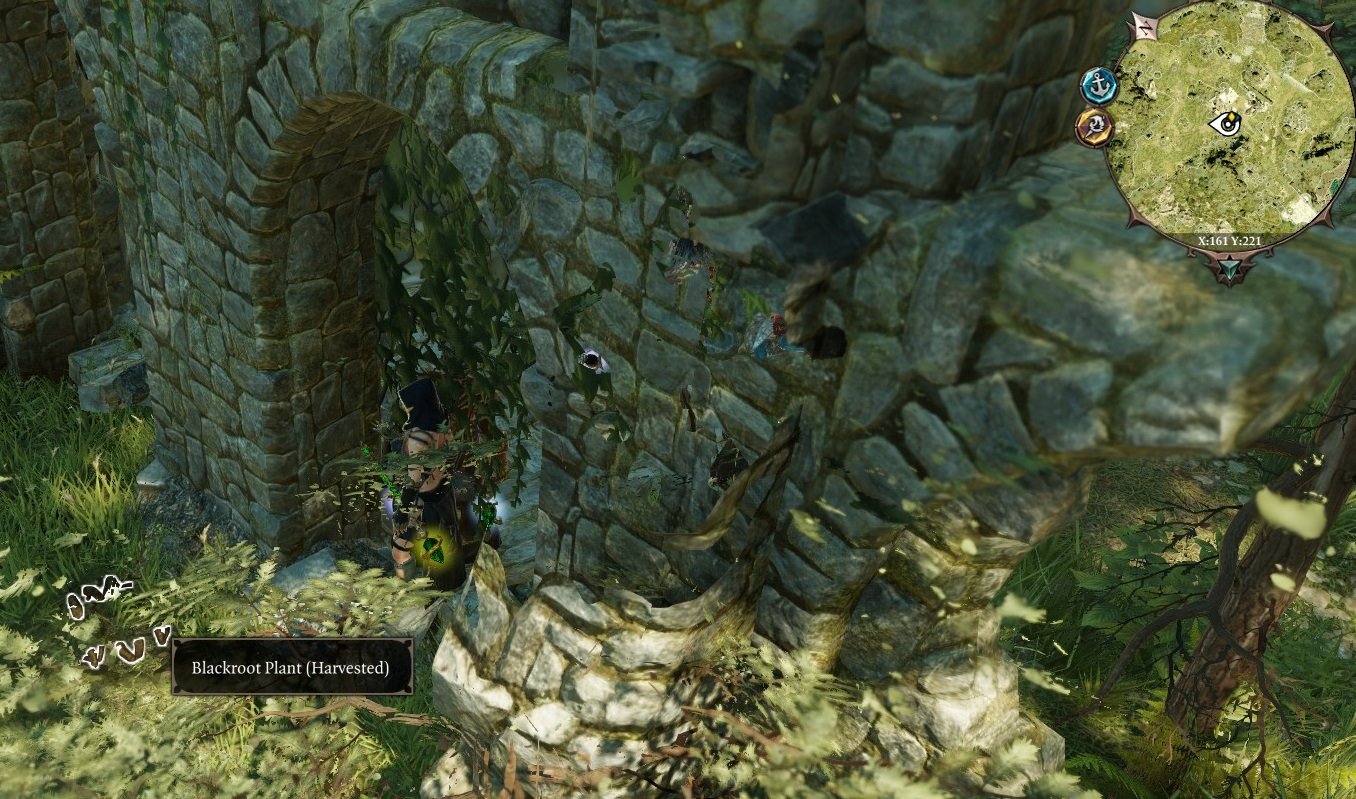
(Blackroot required to complete the ritual can be found here.)
Ask the undead boatman on north of the Cloisterwood to the Bloodmoon Island. Your first goal is to talk with The Advocate. That demon asks you to kill the Black Rings on the island so they can tend to their own business. (Note that The Advocate is the target of Hunter of Wicked Things and Lohse's personal quests. But to maximize your gain, you can kill him later.)
Explore the island, but don't approach the ancestor tree now. On the east side of the island, you will find an unfinished Vault. A nearby black ring carries silver bar, kill him to get it.
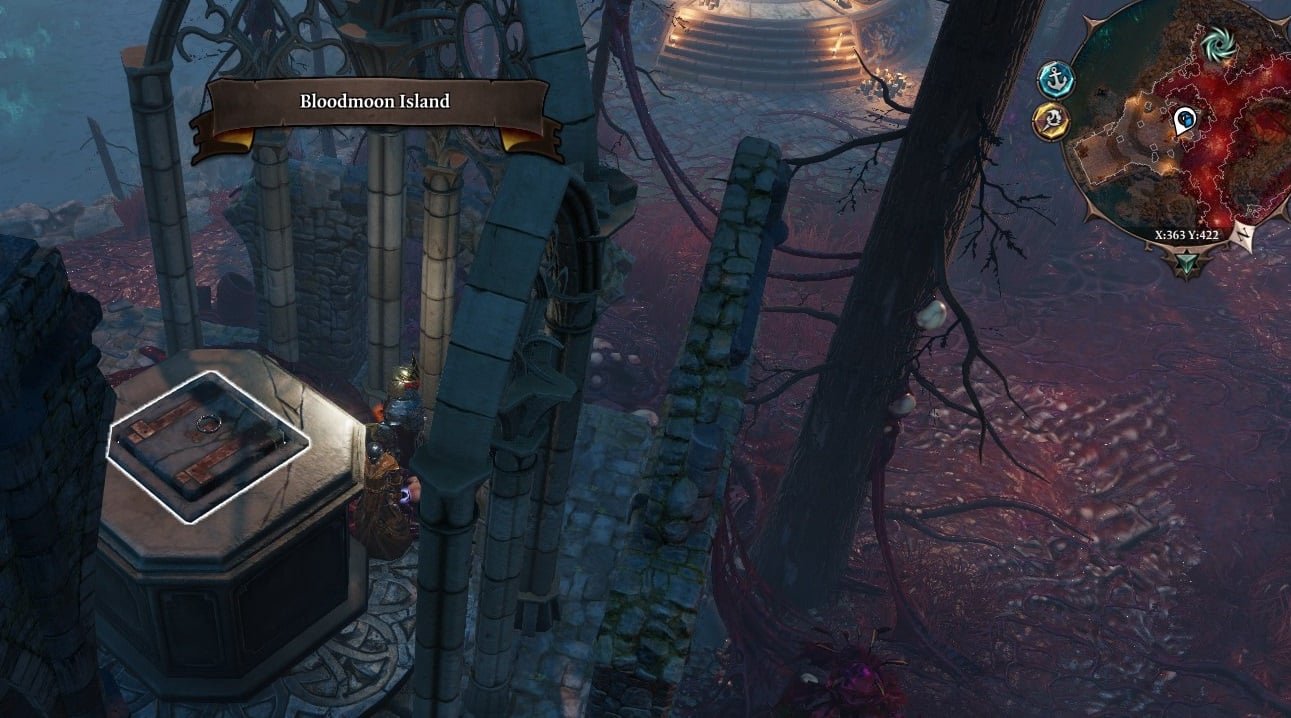
There's another Vault on the northeast, dig up the hatch. Inside you will find archivist's journal, read it to learn the name of the ancestor tree. (the other half of the artifact of All in the Family can be found here.)
On the west side of the island, if you cast Spirit Vision you can see multiple spirits. One of them will give you the quest The Druid. (In a ruined house with some demonic enemies)
On the north of the island, use the ancient forge to create two Silver Shaft Levers using the silver bar. (there is a silver bar right next to it.)
Now you can attack the Black rings near the ancestor tree. Kill them and The Advocate is complete. You can also kill the Advocate now for Hunter of Wicked Things.
Cast Spirit Vision and speak to the Tree Spirit, use its name to strengthen it, and you will learn the name of the demon who possessed Lohse, and give you the quest Doctor's Orders.
From one of the Black Ring member near the ancestor tree, you can find the book called The Taming of Holy Fire. (this book is called Ornate Hymnal before you decipher it, you need someone with Scholar tag to read it)
There is a "Kidnapped women" near The Advocate, persuade or kill her to get a map of the island with everything marked, the Archives, the Ancient Forge, the Tree Vaults and The Ancient Tree.
Use the Hymn to unlock the statues of remaining three vaults. You need to use Spirit Vision to see the guardians, persuade them or use Source Vampirism to get rid of them. The Silver Shaft lever can be used to repair the switch. For details, see Bound by Pain, The Silent One and Delusions of Grandeur.
After you settled the things on Reaper's Coast, back to Lady Vengeance and sailed to Nameless Isle. (Before you proceed, make sure you have three source points, complete Tarquin's quest All in the Family, and get the schematic for Swornbreaker)
The Nameless Isle
Here on Nameless Isle, your first goal is to get into Academy, and settled down your companion's personal quests.
Examine the bodies, and you will learn that the Black Ring and Magisters are fighting each other on this island. (some of the bodies has Purging Wand on them, you may want to keep one for later use)
If you saved Delorus at Fort Joy. He will join your team here and give you some information on Black Ring and Bishop Alexandar. (See A Familiar Face for details)
In the Drowned Temple (need to kill a Black Ring Portal Master to get in), interact with the altar to learn some information about Vrogir.
At Rhalic Temple, interact with the altar to see a vision of Rhalic.
The Elven Temple entrance has some shriekers, you will need Purging Wand to kill them. (Or source vampirism)
Alexandar is on the top of Elven temple, if you agreed to help him by killing the Sallow Man. He will help you enter the council.
There's also some side-quests and companion quests in Elven temple and the surrounding area, click the link for more details:
- Seeking Revenge (Let Gareth take revenge on Alexandar, or talked him out of the idea)
- Invaders (side with the black rings or fight them,)
- An Unlikely Patron (Agreed to help Alexandar to kill Sallow Man)
- The Sallow Man (Help Sallow man kill Alexandar)
- The Red Prince (Learn the location of Red Princess at Sallow Man's Camp)
- Sebille (Kill the Shadow Prince)
- The Mother Tree (Kill the mother tree, or let Sebille become one)
- The Watcher's Mercy (Kill the knight od Duna)
East to the Temple of Rhalic, there is a troll guarded cave:
Enter the Cave, use the Cowl of the True Sight given by Alexandar right after the altar, towards to fake wall. This will open the path to the Sallow man.
Kill the Sallow Man and report to Alexandar, and he will teach you the way to get in the council. (Note: the Shaft of Swornbreaker, is inside a chest at Sallow Man's war room.)
If you sided with Black Ring, you need to kill Alexandar, and bring his head to the altar. Sallow man will help you get the council. (Contact through black mirror)
In total, there are seven temples on Nameless Isle, although you don't need to explore any of them to complete the main quest. You may still want to explore them for equipment and items, once you entered the Arena of the One there is no turning back.
Two easily missed temples are:
- Temple of Xantezza (Running like Clockwork)
To enter this temple, you need to kill two wargs playing a Ruby near the Lunar Gate waypoint. Use the Ruby to enter the pocket realm of Xantezza.
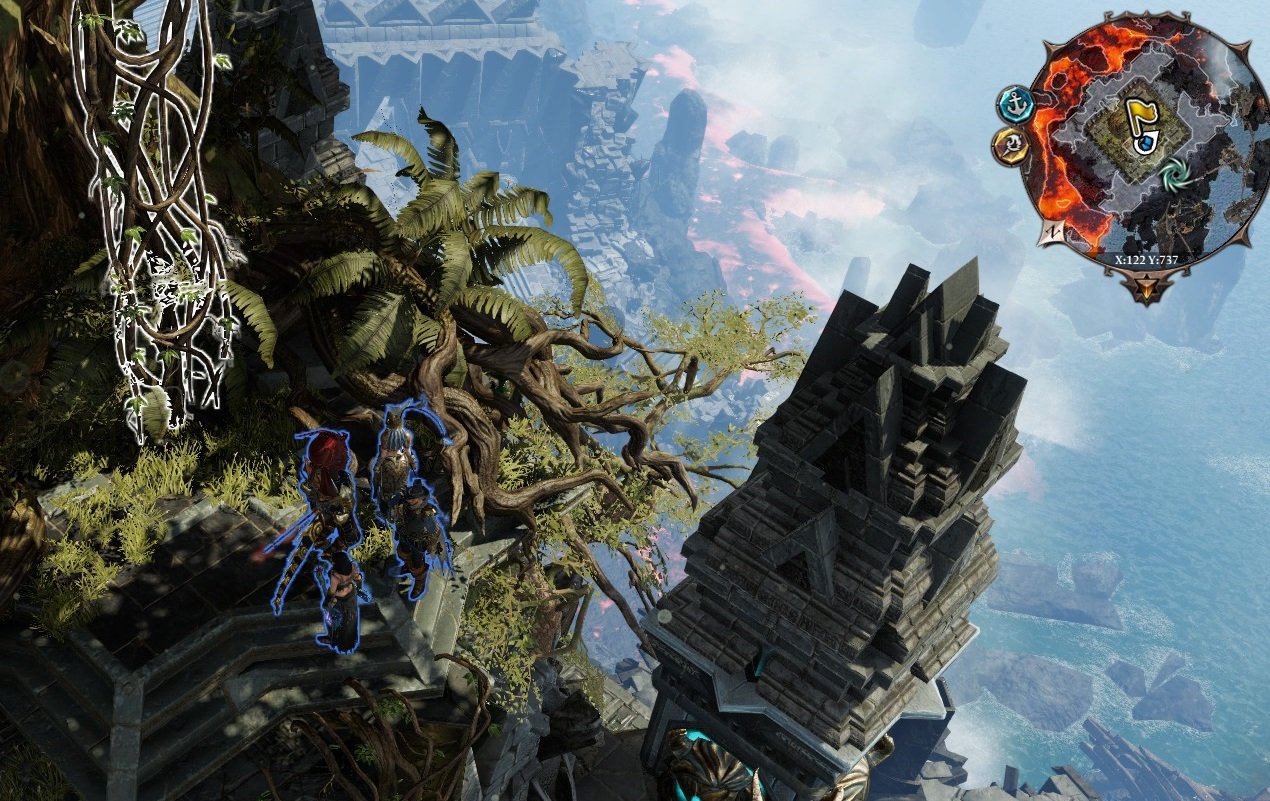
- Temple of Amadia (the floating temple above the clouds,quest Up in the Clouds)
To reach this temple, you need to use teleportation skill to get to the southwest part of the island (near the Temple of Amadia waypoint), then climb the vines.
Also, there are two secret caves on Nameless Isle. Before you entered the Academy, you should explore them.
The location of first cave:

(This cave is on the south of the island, near the shadow prince.)
The second cave:

(This cave on the north of the island, you can teleport there from the platforms of the elven temple. Inside the cave, there are multiple constructs guarding a nice sword. Make sure your character has enough strength to lift it.)
When you settled all other things on the Island, move to Lunar gate
The Lunar Gate puzzle:
First, you need to align all the seven gods: (which you can learn at their alters)
Human is aligned with the Sun
Elf is aligned with the Moon
Dwarf is aligned with the Moon
Orc is aligned with the Sun
Imp is aligned with the Moon
Wizard is aligned with the Moon
Lizard is aligned with the Sun
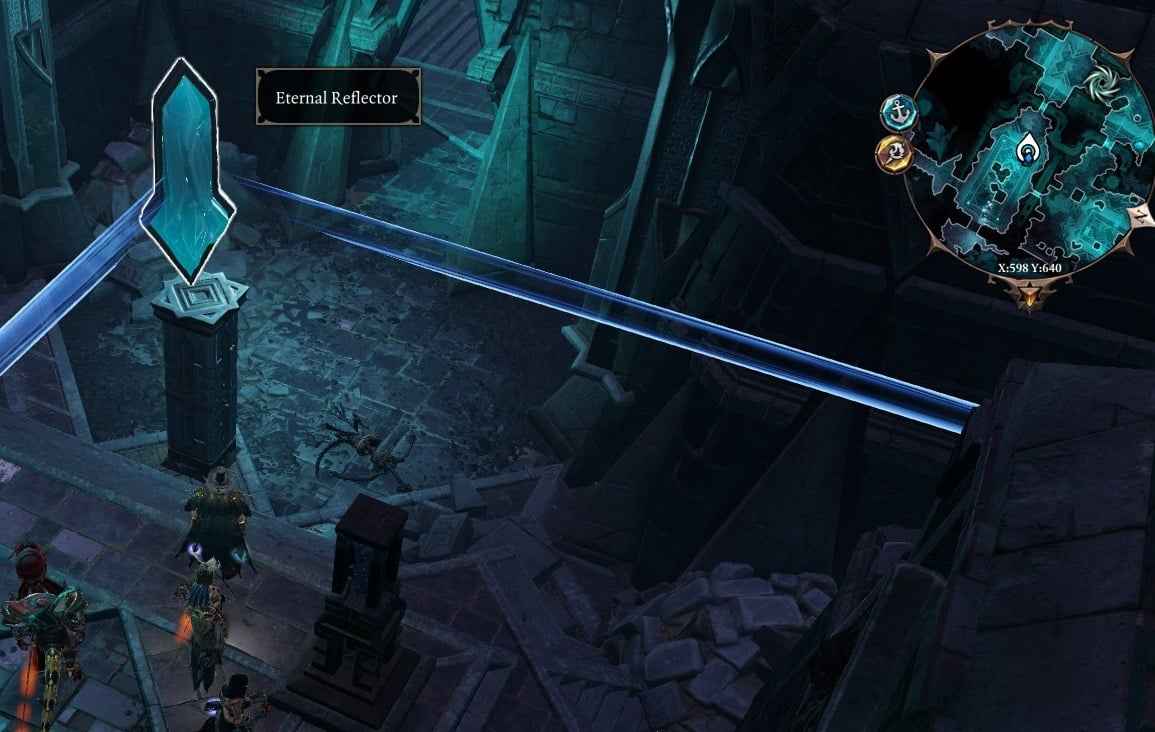
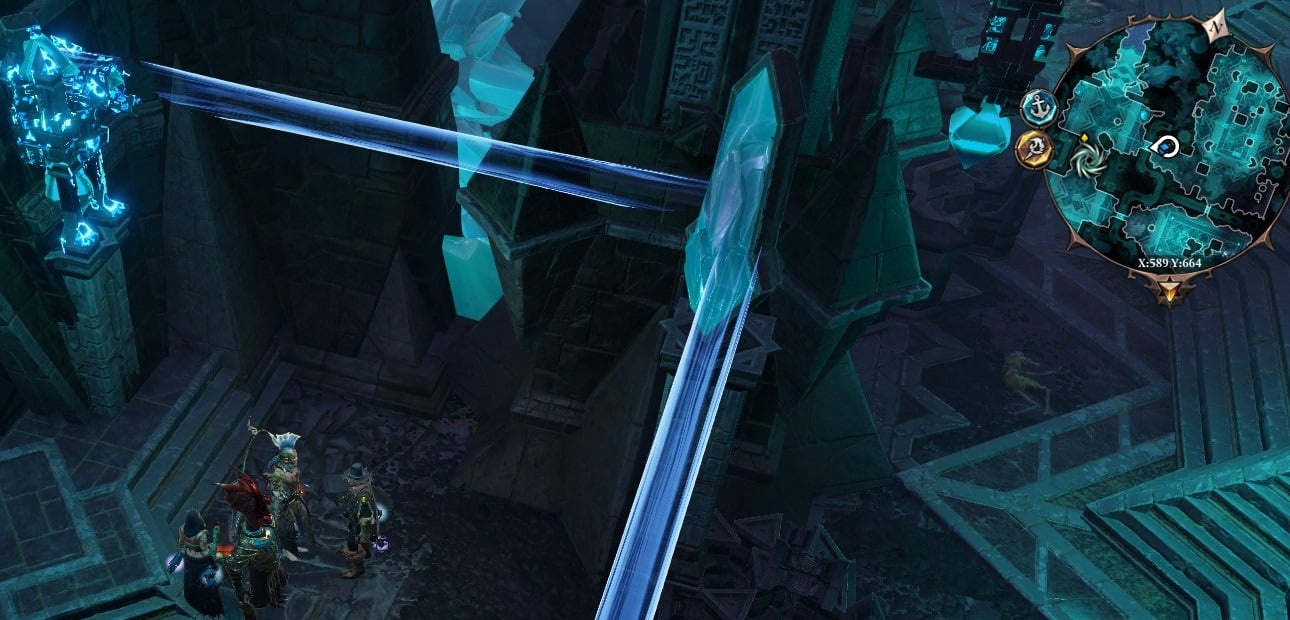
After you aligned all the gods correctly, use Lightning skill strike the Eternal conductor (if you don't have the lightning skill, or lightning arrow, you can place the phase capacitor on the conductor), then use the switch to open the gate.
If you want to side neither Bishop Alexandar nor Sallow Man, you can use teleportation skills to pass through the shattered areas on the south of the Dwarven Temple. At the eastmost area, you can dig a hole to enter the council. But becareful, once you entered the Academy, Bishop Alexandar will left elven temple, making some quests unable to complete.
(through this hole you can get into the academy without help either side)
Before you enter the council, your companions will temporarily leave your team. You need to persuade them to agree you should be the one ascend to Divinity. (Except your love interest, don't need to persuade him/her.)
No matter which method you choose, eventually you will enter the Academy.
The Seneschal near the Waypoint can be repaired if you have the capacitator, it will tell you some information about the Academy.
The Key to the storage room can be found in Library.
If you cast Spirit Vision in Teacher's Room, you will be able to see the spirits of teachers. Each of them can boost one of your attributes, at the sacrifice of another.
In order to lift the barrier, you need to activate all three lightning squares in front of it. Here is the way:

First, put a capacitor on the square at Teacher's Room. (Capacitors can be found at Sallow Man's camp and inside the academy rooms, one on the west room (storage) inside the academy, one master corpse in the library, and one in a cabinet in the library.)
Adjust the pylons to proper positions
 :
:
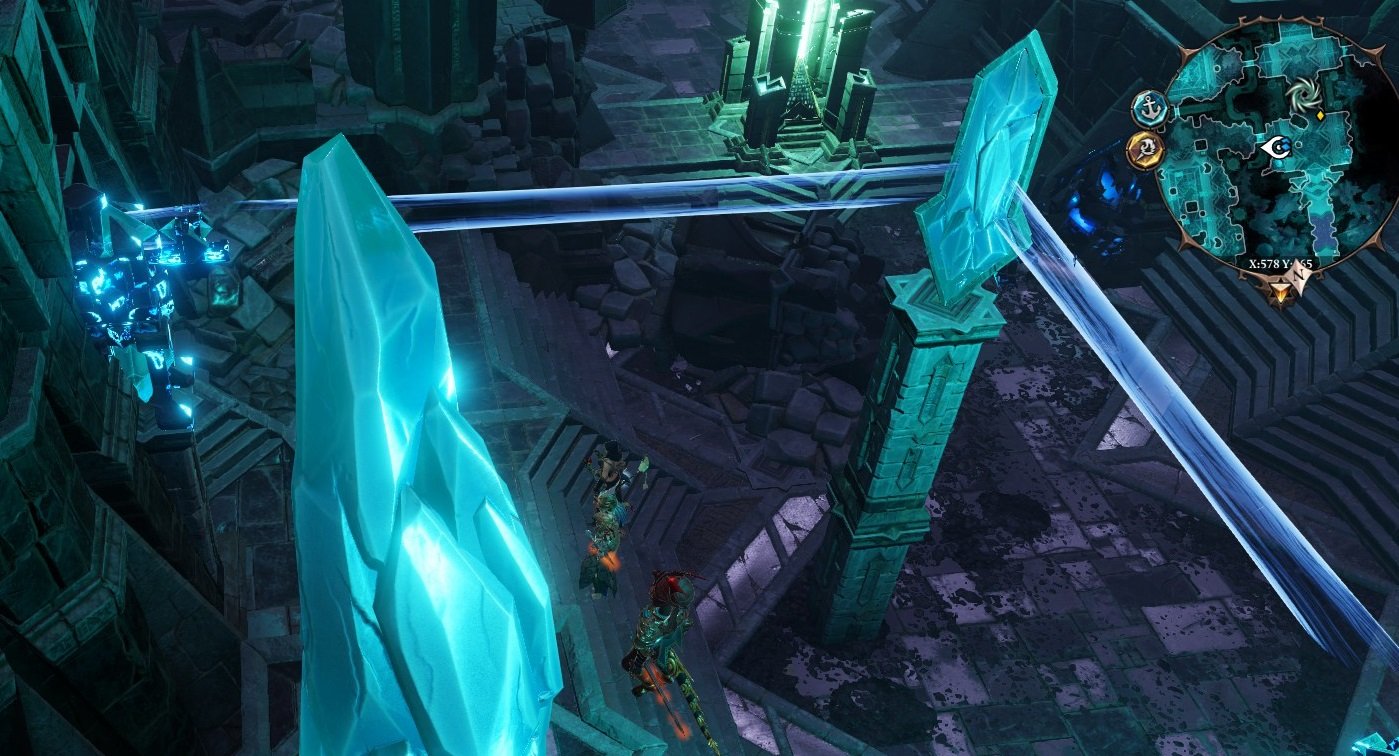
After you electrified all three squares in front of the barrier, use the switch to lift it. (Note if you don't have enough capacitor, you can create a water surface and cast lightning spells on it to activate both squares on the ground.)
Alexandar and other Godwokens are behind the barrier (the companions not in your team), when you are ready, talk to the Eternal Arbitrary to enter the Arena of the One. (Before you proceed, you can teleport one of your teammates to the Forbidden Library from here, for side quest Unscholarly Pursuits)
There are two side quests at the Academy:
- Unscholarly Pursuits (Cast Spirit Vision in the library, speak to the spirit of Taryan. Help her find her lover at Forbidden Library.)
- Proving Ground (Lockpick the door at teacher's room, enter the portal. Cast Spirit Vision then talk to the bird spirit to challenge the Eternal Protectors. You can get the Blade of Swornblade from this quest.)
When you are done at the Academy, talk to the Eternal Arbitrary, you will be teleported to the Arena of the One, along with other Godwokens. You are instructed to get to the end faster than the others.
If Alexandar is still alive he will be here, along with other companions not in your team. You can focus on them, then walk to the end.
When you are ready to absorb the power. Dallis suddenly appeared and took the power before you can. Her actions destroyed the Arena, you will have to escape the ruins before it's too late.
Angry at your failure, the gods within you will surface and attack you. When you killed all of them and the Source Titan, use the Malady's beacon to escape.
Back to the Lady Vengeance, you can spend a night with a companion of yours. When you feel ready, talk to the figure statue to summon Malady, then you will travel to The Arx.
ACT IV
- Previous: The Nameless Isle
- Next: --
- Recommended Levels: 22-30
All Quests in area
- A Craftsman of Dreams and Nightmares
- A King Reborn
- A Most Urgent Matter
- Battle at the Gates
- Blood Dowry
- Crippling a Demon
- Doctor's Orders
- Finding Lord Arhu
- Hammerfall
- Mercy is Power
- Old Means Gold
- Past Mistakes
- School's Out
- The Consulate
- The Execution
- The Last Stand of the Magisters
- The Loremaster
- The Missing Prisoners
- The Secrets of the Dwarves
- The Vault of Linder Kemm
- What a Fuss to Have Wrought
- End Times
The Hunt for Dallis
The Arx
The primary goal of yours is to hunt Dallis in this region. (quest Hammerfall)
First, travel to the Arx Harbour, voidwokens had controlled the area. Defeat them so you can speak to the Lord Dread (Dallis'ship) to learn what happened here.
On your way to the Arx, you will meet paladins fighting voidwokens at a bridge. Help the paladins to complete the quest Battle at the Gates.
When you reached the Arx, cast Spirit Vision and you can see many spirits of magisters and paladins in this area. You can learn some information from them, or use Source Vampirism on them to acquire source points.
The main goal in the Arx is to find a way to enter the Tomb of Lucian the Divine. (Quest The Vault of Linder Kemm, Finding Lord Arhu and A Craftsman of Dreams and Nightmares)
First, travel to the Magister's Barracks. When you reached there the first time, you will see Lord Kemm -- the leader of Paladins -- is about to execute a paladin but without a proper trial. You can save the paladin by persuading Lord Kemm (quest The Execution), later you can find the paladin in prison. She will give you the quest The Vault of Linder Kemm.
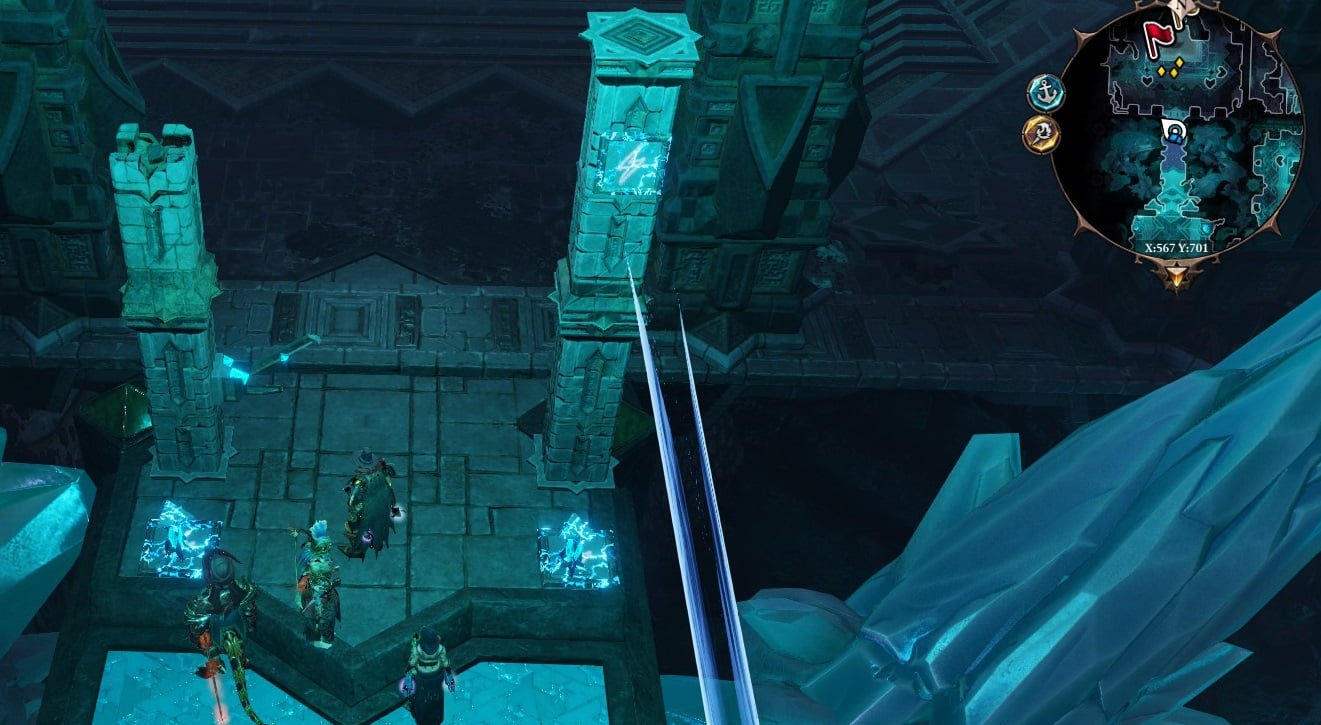
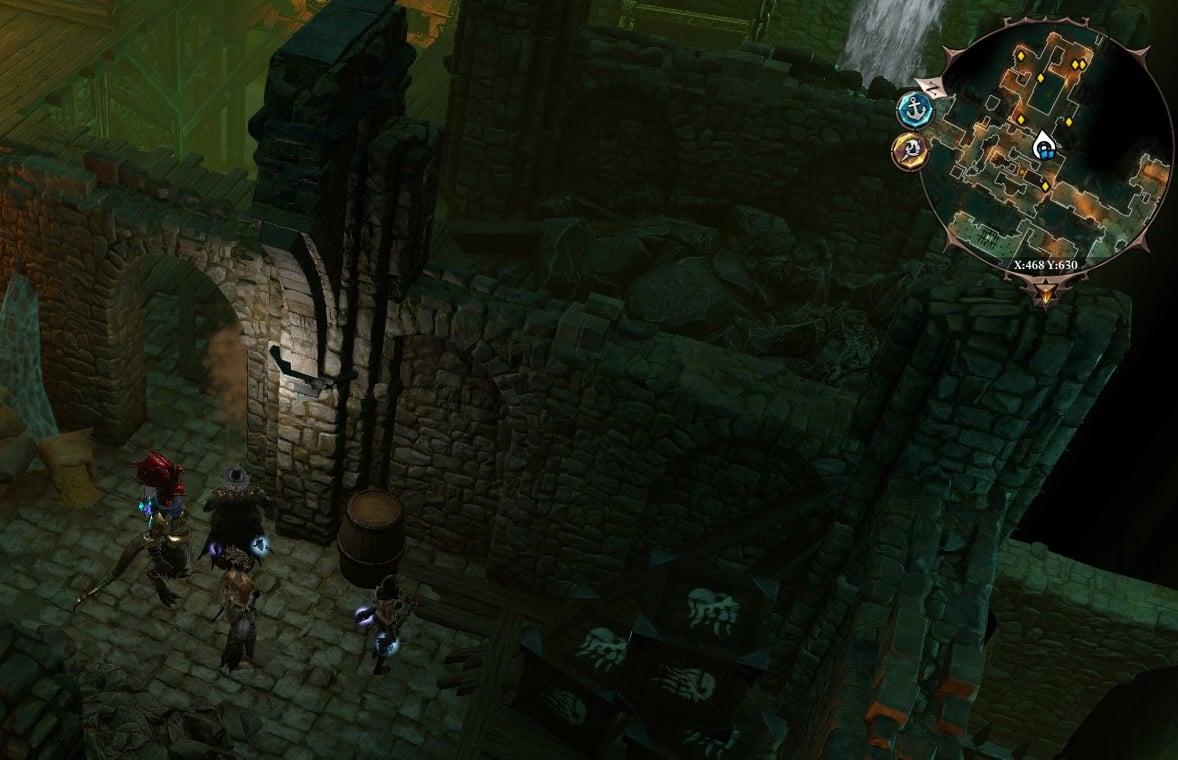
Search the Magister's Barracks, in a room with traps, you will find a hidden hatch and a spirit of magister. (quest The Last Stand of the Magisters)
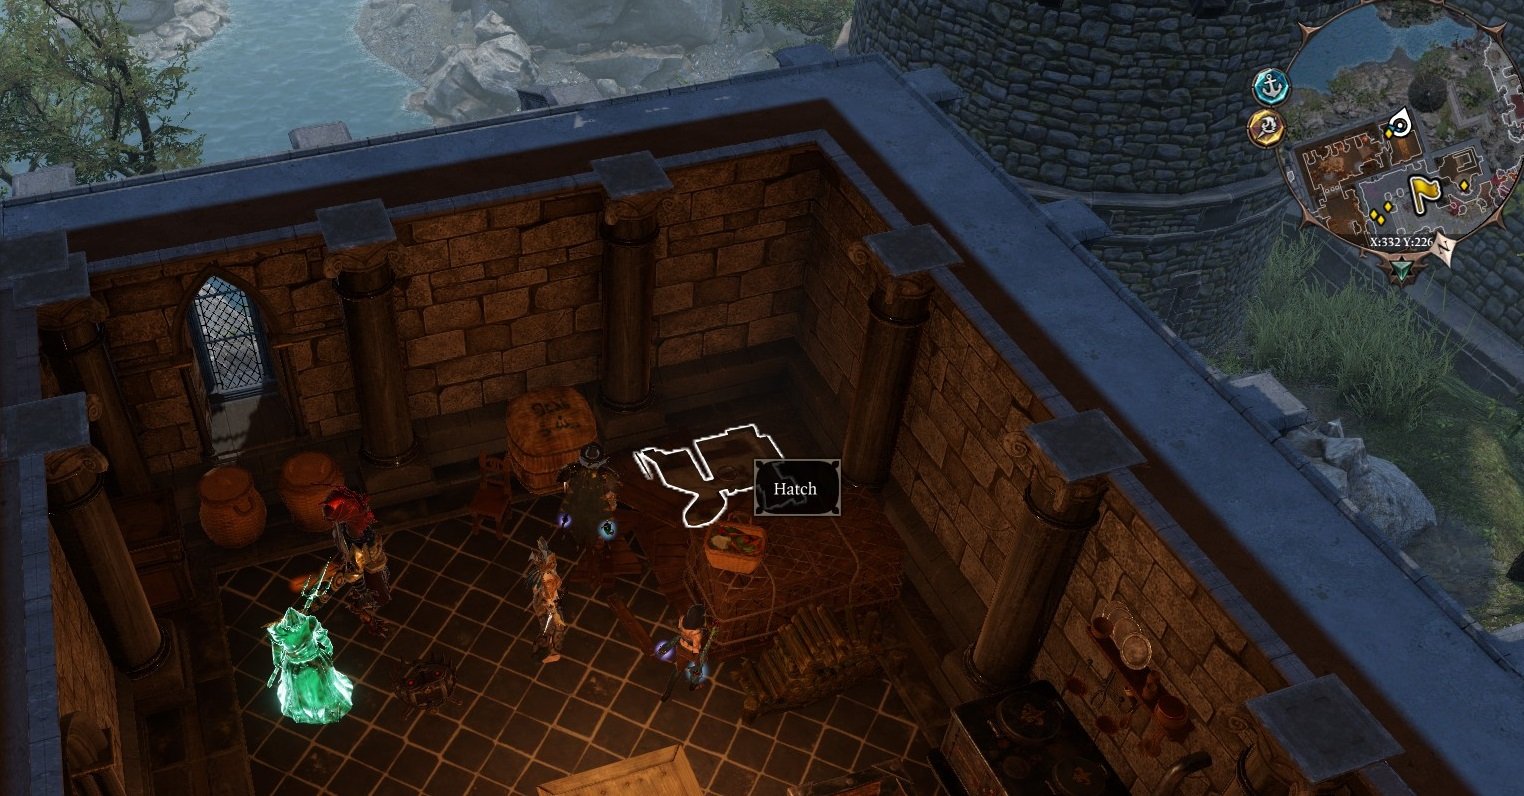
(In order to see this hatch, remove the crates above it)
You can try to persuade the spirit nearby to reveal the combination of that hatch, but it's extremely difficult. (succeeded with outlaw finesse persuasion of level 5)
The correct combination to open the hatch is related to magister's motto:
- Mind
- Body
- Society
- Loyalty
You will get some XP for solving the puzzle, and the spirit will disappear. (So if you want to consume him for source, do it before you solve the puzzle)
Inside magisters vault, there are 4 switches hidden behind the paintings. Remove the painting and activate them in the correct order will open a secret chamber:
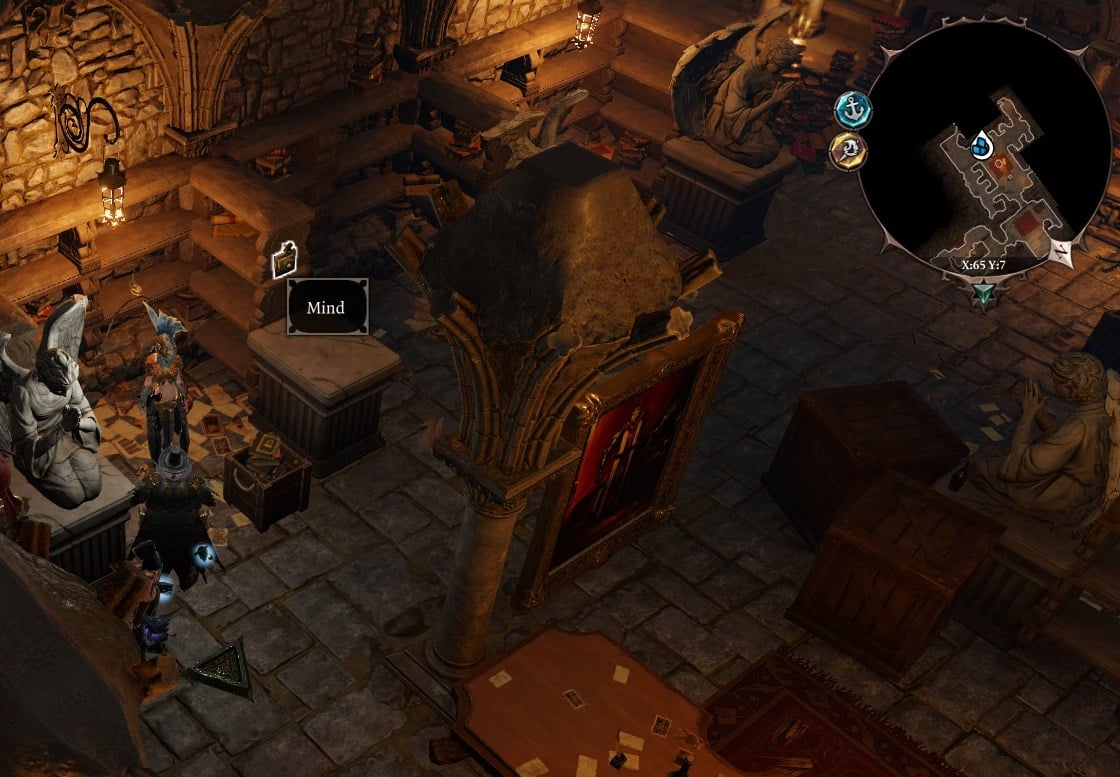
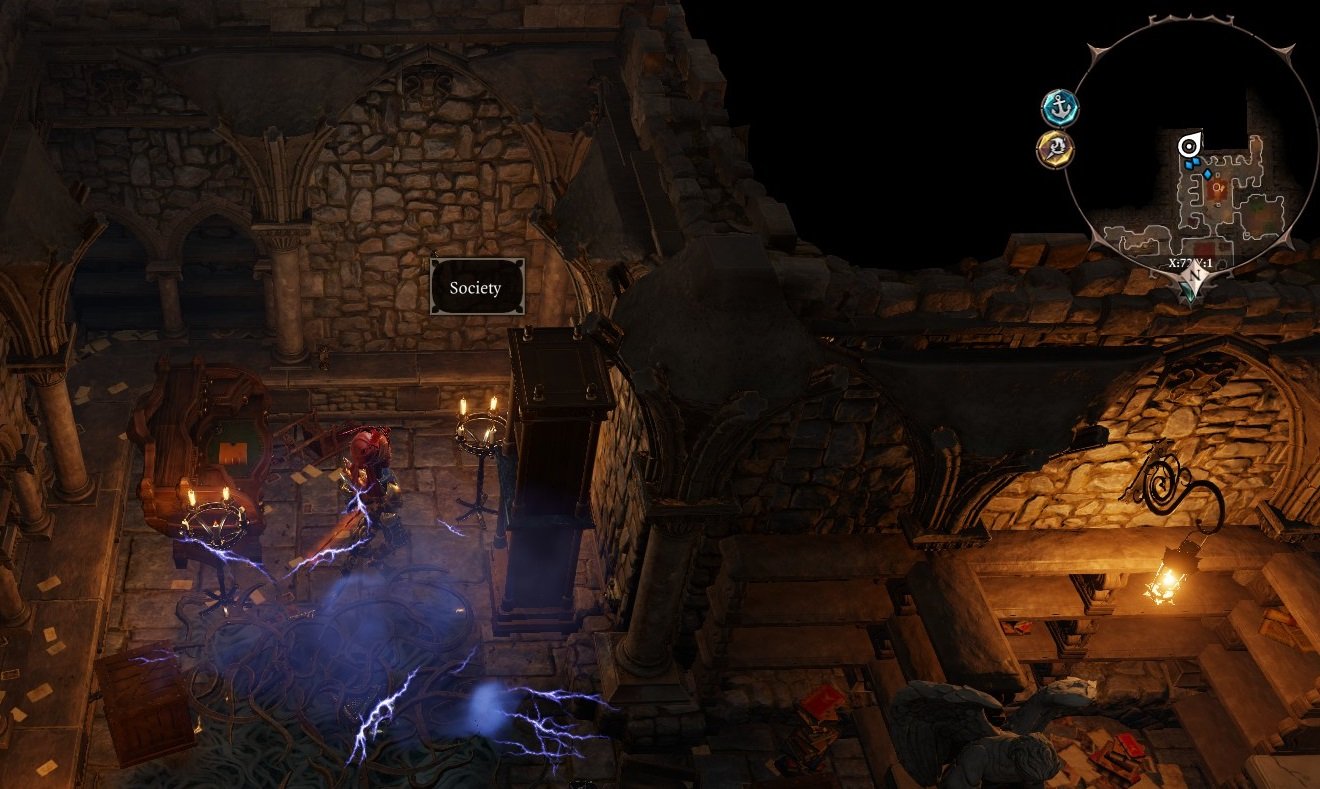

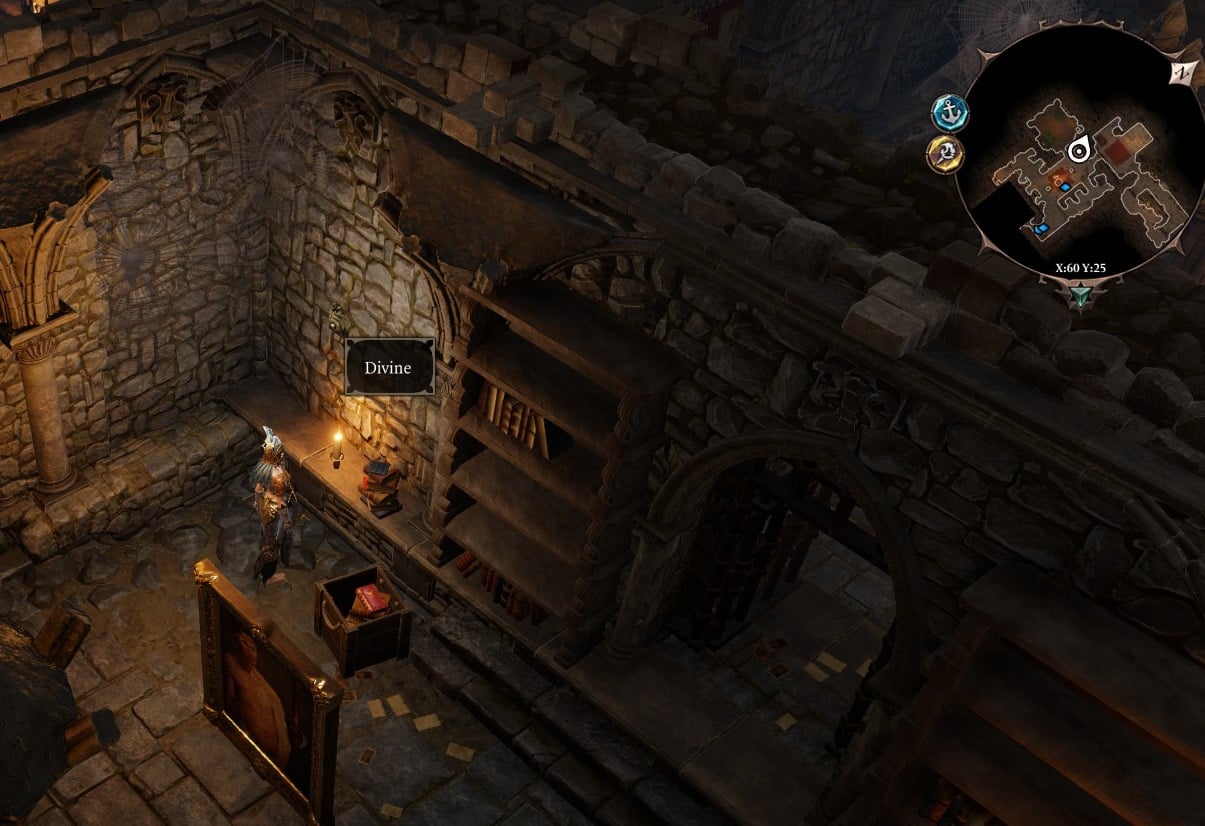
The order is Mind - Society - Body - Divine.
Inside the secret chamber, read the report will give you some XP. if you cast Spirit vision, you can also learn some information.
At this level you can find a book Report on the Toyseller, gives you the quest A Craftsman of Dreams and Nightmares.
The second level of magister's vault is guarded by three gheists, defeat them and from one of the corpses near the table, you will find another book, revealing that Dallis resurrect Braccus Rex. (quest A King Reborn)
Confront Tarquin at Hall of Echoes to complete A King Reborn.
Back to the magister's barracks, take the stairs to the prison. If you saved the paladin from The Execution, you will meet her there.
(Paladin de Blanchefort can be found at the entrance of prison, and she's been tortured by a magister's spirit. Cast spirit vison, persuade the magister's spirit or purge it lift the curse.)
Talk to the Paladin Warden, you will learn that some prisoners went missing, agree to investigate. (The Missing Prisoners)
You can also find Windego in the prison, persuade the paladins to let you handle her. You can free her by gifting her enough coins or items to improve the attitude and then lower the barrier (quest Mercy is Power). If you have swornbreaker, you can also free her from the God king. (you probably do not want to use the swornbreaker found in Lord Kemm's vault to save her, since you need it for Red Prince's personal quest)
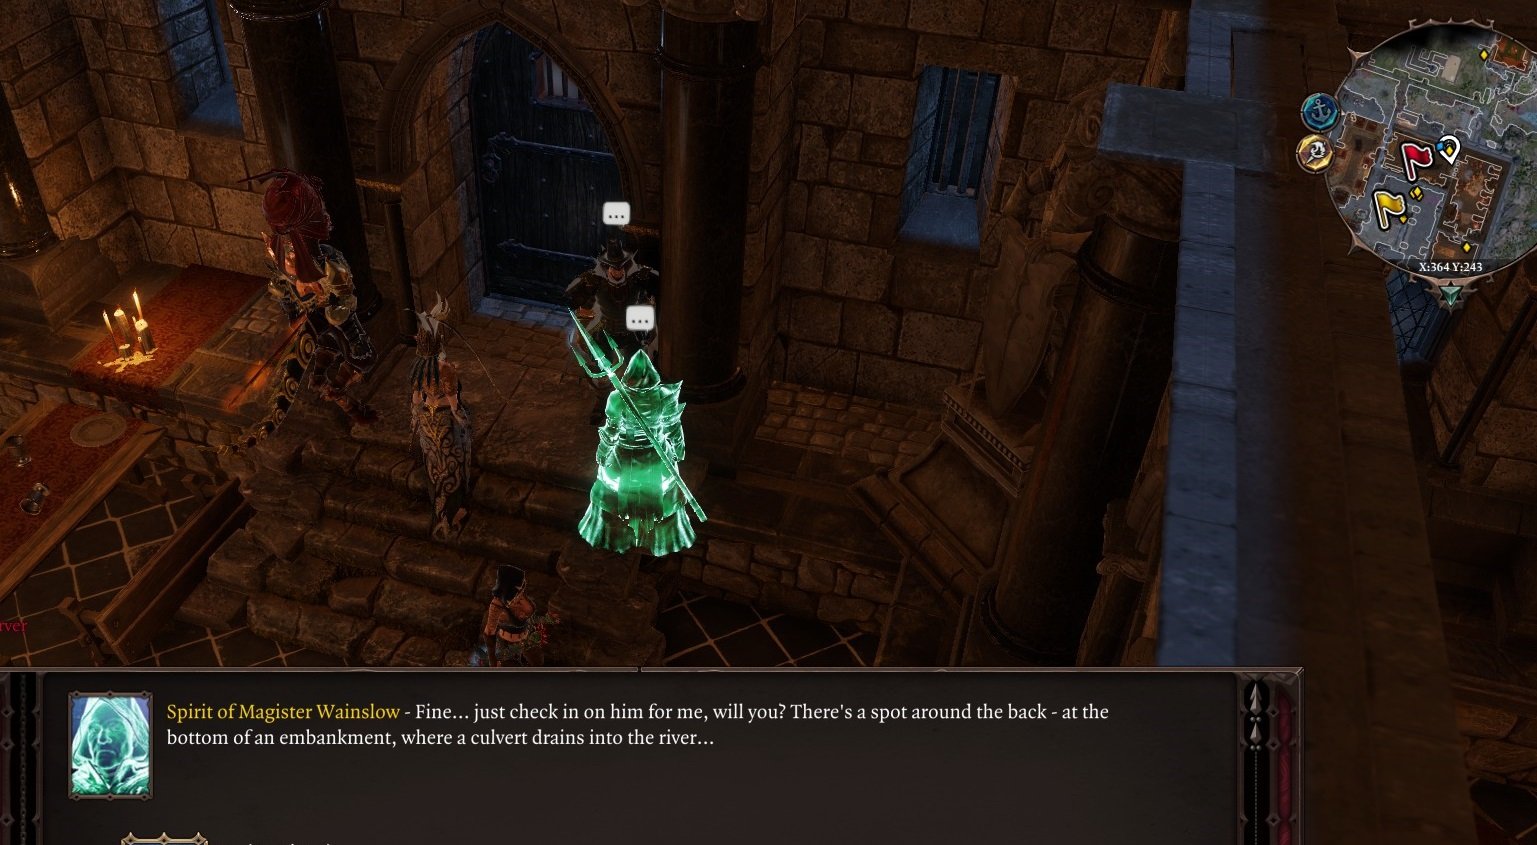
At magister's prison, cast Spirit Vision and speak to Wainslow, agree to help him find Bannet. Bannet's corpse can be found near the sewer, cast Spirit Vision, and talk to him. Enter the sewer.
Inside the sewer, you will find a boy crying for help inside a prison. If you cast Spirit Vision you will see the spirits of seekers are trying to contain him forever. If you let the boy out, he will turn into a crazy god-woken and attack you with some undead. (quest Past Mistakes)
Use the ladders to enter the second level of sewer, there you can find a thieves guild. (near the death-fog crates room, you can learn the location form a girl in schoolhouse)
(location of thieves guild)
There's a group of kids and trolls in here, buy the painting they stole from Lord Kemm's Vault. (or acquire it by other means, this is part of quest The Vault of Linder Kemm)
Travel to Linder Kemm's mansion, speak to the Cat the Appraiser on the ground floor, persuade her to give you quest Old means Gold. (collect three items from Linder Kemm's Vault)
The entrance of Lord Kemm's Vault is at his garden, you need to pull a hidden lever in order to reveal the hatch.
After you pull the lever, enter the vault through that hatch:
Inside Kemm's Vault, there some automaton patrolling, either you sneak past them, or fight them. (you need to kill them with Source Vampirism)
At the end of the vault, cast Spirit Vision, and put the painting you acquired from thieves guild in the frame. This will unlock the door to a secret chamber.
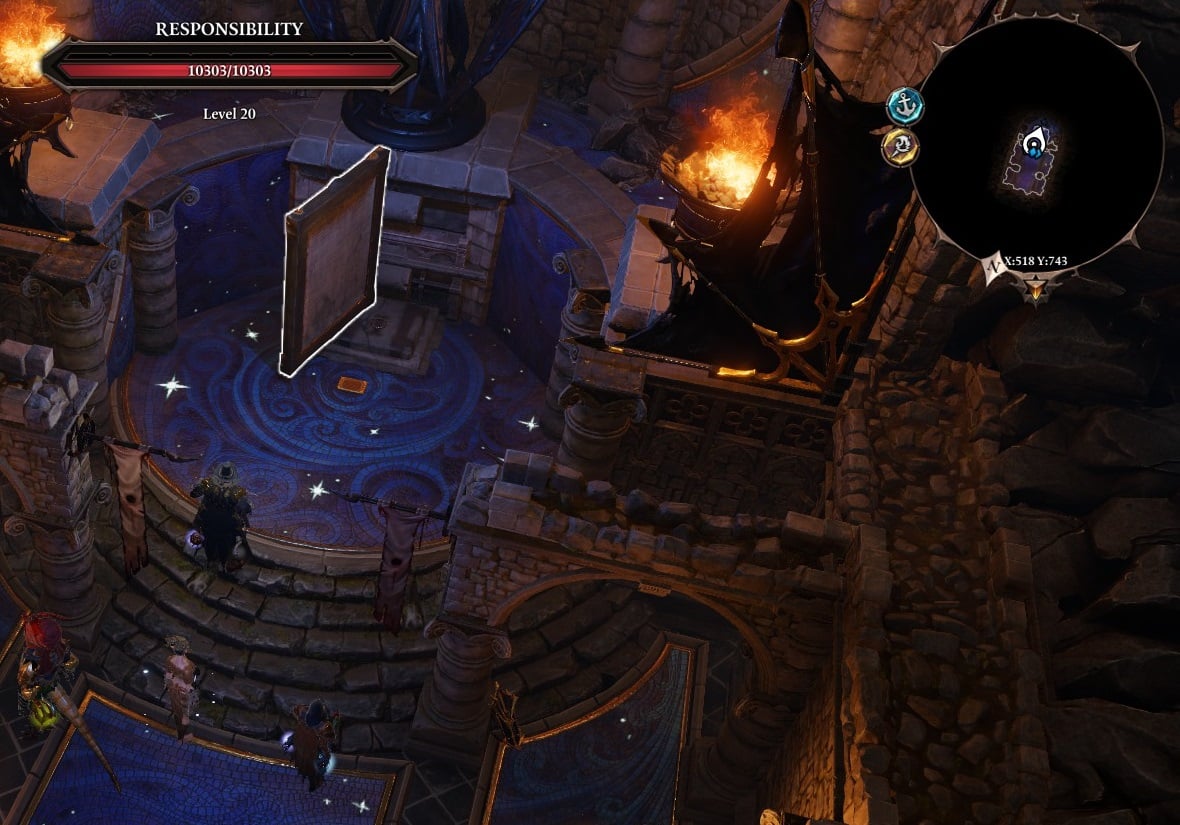
Inside the chamber, there is a painting name Responsibility, take it with you.
Loot the chamber, then activate the book of the right shelf.
Behind the stone door, there is a hatch, which leads you to the shrine of god king.
After you finished talking with god king. interact with the sign on the ground. It says Only God King knows the weight of Responsibility.
Put the painting named Responsibility on the altar, this will reveal the hatch to Arhu's prison.
Lord Arhu is imprisoned in this prison. To free him, you need to cast Spirit Vision and use source vampirism (in conversation) on those tormentors.
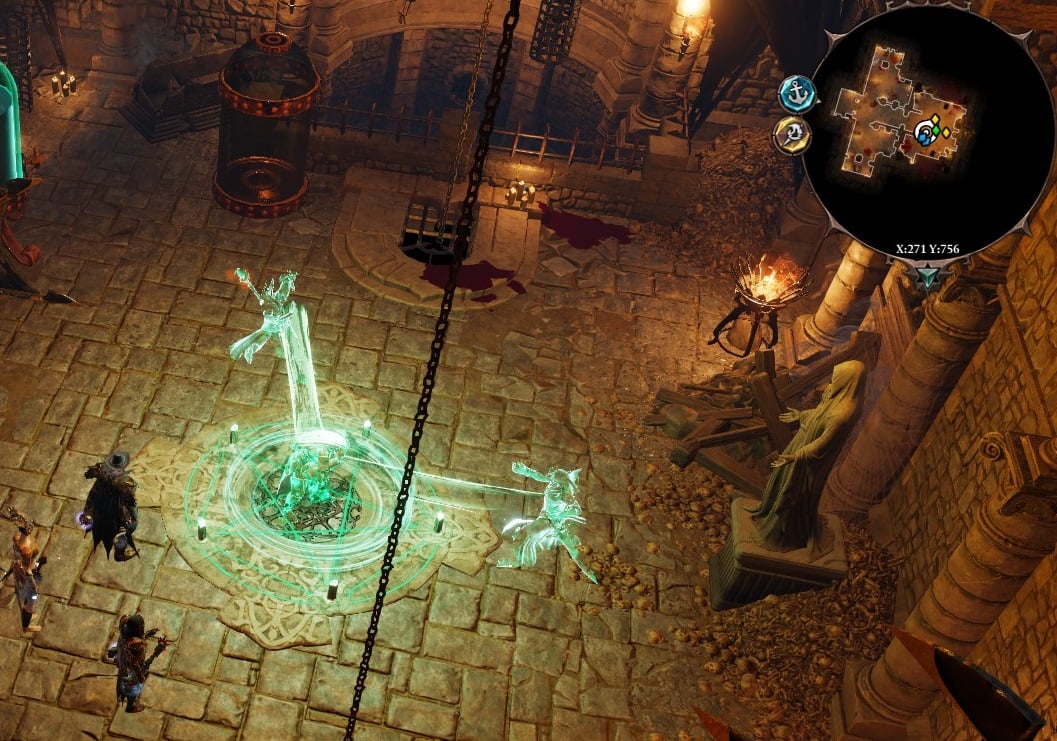
(Note there is a Swornbreaker on the statue, you may want to take it.)
Once Lord Arhu is freed, 4 Black Ring Defilers will appear and attack you, Lord Kemm will also show up in the second turn, you need to defeat him as well. (To keep Arhu alive, you may want to teleport him to a safe corner. Or you can talk to him using Spirit Vision if he's killed.)
After you defeat Lord Kemm and the Black Rings, Lord Arhu will tell you how to solve the puzzle in the Cathedral.
Before you leave the Vault, do not forget to take the three antiques for Old means Gold.

(location of the painting)

(location of the scroll)

(location of the cup)
After you find all three antiques, return to Cat the Appraiser for reward.
To enter the Tomb of Divine Lucian, you will also need an amulet and a scroll from Toyseller. (quest A Craftsman of Dreams and Nightmares)
Go to Toyseller's shop, persuade him to help you and he will give you an amulet which can store source. You need to fill the amulet then back to Sanders.
When you filled the amulet, return to Toyseller Sanders. If you managed to persuade him, he will tell you the Scroll of Atonement is also necessary to enter the Divine' tomb. The scroll is locked in a desk at the second level of his shop, the password is Giyora. (if you failed to persuade him, you need to sneak into the second floor and steal the scroll)
(Another way of doing this, is if you have an NPC character you control, kick him out of the party, and hire a new one, to be free of sin.)
Sidequests in Arx
At the southeast corner of The Arx there is a schoolhouse, currently occupied by some junkies and an excommunicated priest. If you talked to the little girl here and persuaded her, she will mark the location of thieves guild on your map. (quest School's Out)
Talk to Beryl Griff, if you share the information of Griff on Fort Joy with her, you will get some XP.
Beryl asked for your help in reclaiming the schoolhouse from the squatters. You need to talk to Sister Schori and persuade her to leave, or force her to. Then you can return to Beryl for reward.
There are multiple ways to acquire the quest The Secrets of the Dwarves, either you sneak into the wedding site (You can get the invitation form a drunken dwarf woman outside the building.) or from the backyard of loremaster's house:
If you have Scholar and talk to Loremaster you can challenge him to answer a question and he will then ask you questions, answers are:
Lucian parted from us in 1233, Tenex was the first king of the Dwarves, Cassandra was Bracus' twin. He will then invite you to join him in his private chambers. Talk to him again and he asks what's the most amazing thing you've discovered? Reply any one of the 3 options and you can ask him for rewards.
Alternatively, you can get in there through sewers:
(Note, be very careful when you exploring the sewers, there's a new type enemy called fog-swollen spiders, once killed they create a small deathfog, kills everyone near it.)
Voidwokens have attacked the wedding site, if you examine the statues, you will find a trace of the void from pipes. You can speak to the dwarves here for more information. If you cast Spirit Vision, the spirits of guests still wandering at the site.
Interact with the wedding cake will cause an explosion, and some constructs will appear and attack. After you killed them, you can learn from the guards this cake came from a man known as the Doctor. (this is related to Lohse's personal quest)
Enter the sewer, then head to the Queen Justinia's court.
(Sewer entrance)
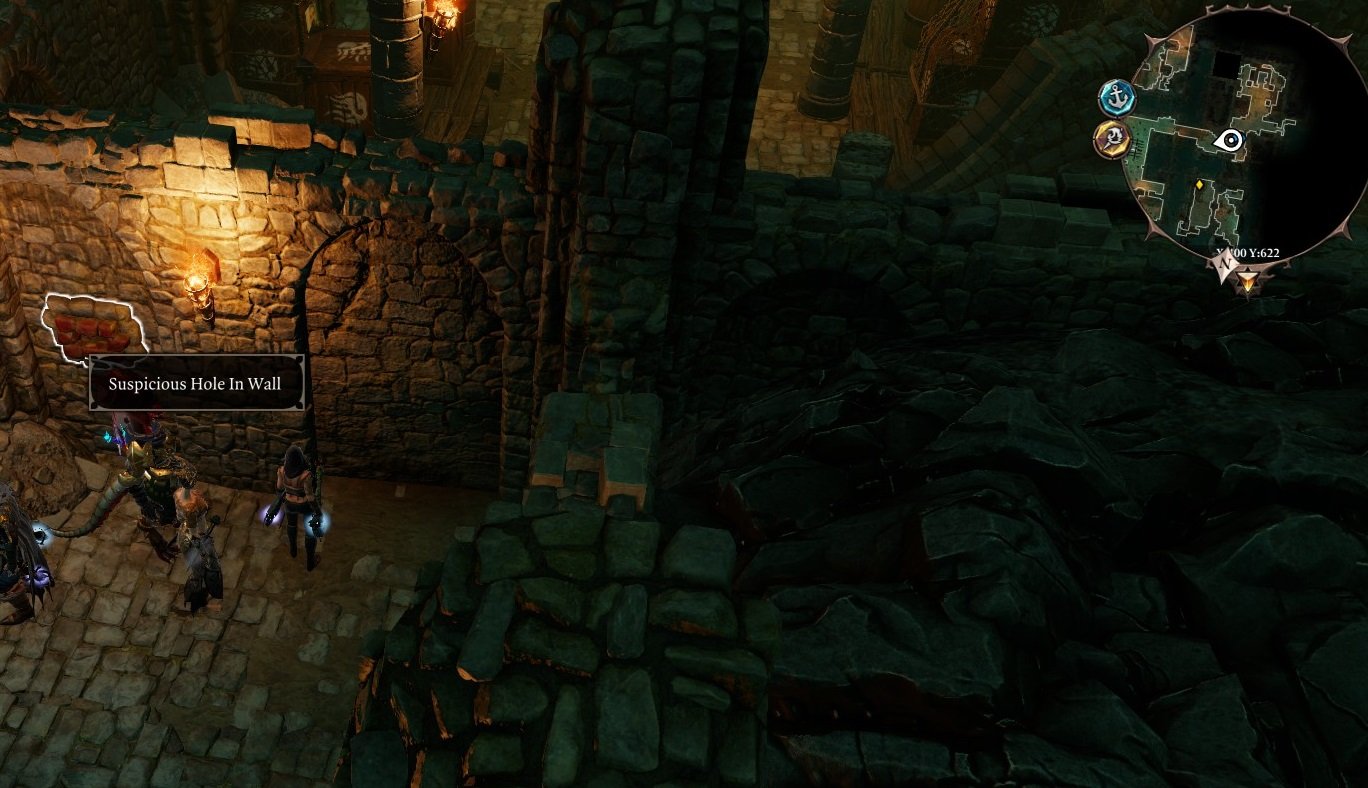
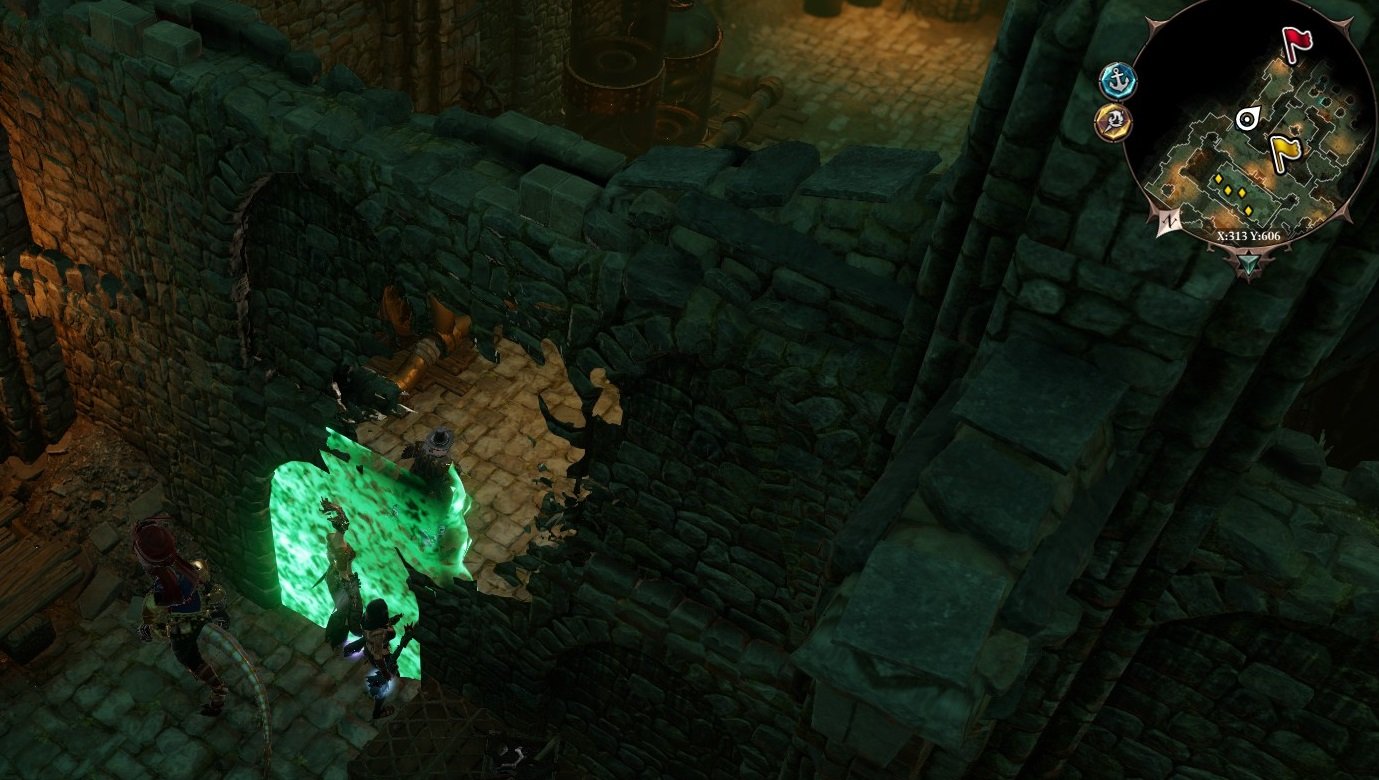
At the west side of the second level of sewer, lockpick the Suspicious Hole in Wall (showed in the picture above), then you can enter the queen's court.
When you meet queen Justinia, you will realize that she's been manipulated by her advisor - Isbeil. You can persuade the queen that release the Deathfog is not her own idea, and it's not up to Isbeil to make decisions. However, Isbeil knocked everyone out and locked you in her laboratory.
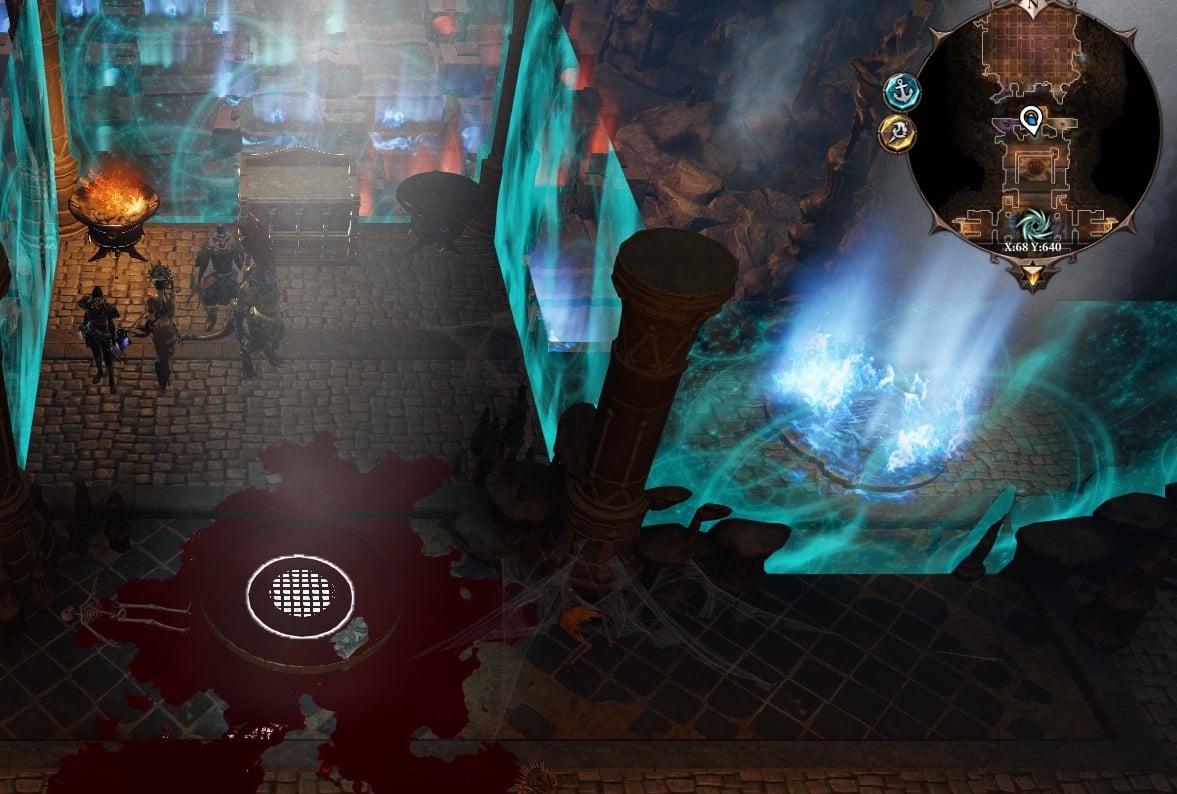
After a while of torture, you managed to break free of Isbeil's spell, now you need to kill her and her Black Ring followers. (This is a very difficult battle, you start in a cursed poisonous pit and Isbeil and her men have the high ground. However, you can use your powerful source skills to even the odds, when you defeat the enemies. Cast Spirit Vision and you will find some spirits inside the pit, you can use them to restore your source points. )
Using the Spirit Vision, you can talk to Isbeil and learn why she's so angry about the Arx. (Note, don't activate the doom device unless you are positive you want to do it!)
After looting this place, find queen Justinia and decide her fate. The quest is complete.
(Go through the illusionary door here to find Queen Justinia. Note on the other side of laboratory there's also an illusionary door, but there is a trap will release deathfog, avoid it!)
Sidequest Crippling a Demon and The Consulate are related to Lohse's and Red Prince's personal quests.
In Crippling a Demon, if you want to enter the doctor house you need to do something first, either you kill Isabel(a female dwarf) or after you freed Arhu inside of Lord Kemm's Vault. When get the invitation go to the doctor house (The Black house) and at the entrance you get to meet Malady again.
Speak to her and she will teleport you to the Demon's Dimension, when you walk with Malady there will be Candles, Snuff it out, screw moral decision even after you snuff all of the candles its health still stuck at 11k with tons of armor. After you snuff all the candle go inside and kill his nurse first (use physical damage, the nurse has a lot of magic armor but has a small amount of physical armor), the nurse will keep buffing the demon with haste and fortifying.
After you defeat all of the nurses speak to the Doctor and he will reveal his true form on his first turn. Try to use your source as fast as you can, since he can consume yours. After you defeat the demon there is a small surprise for you from Loshe. You can go to his cellar(inside the room filled with corpses) and find Jahan locked up inside. There is also a lot of cabinet being locked by magic, and yet a simple lockpick can still unlock it. One of the cabinet yield Kwyn's armor that gives you the ability to fly.
At the northwest corner is the Lizard consulate, the quest The Consulate and Red Prince's personal quest take place here. (Note The Consulate quest seems bugged, please save before you enter this area. )
Note: strongly suggest you carry a swornbreaker before you commence this quest. One can be forged with the two pieces you found on Nameless Isle, one can be found at Lord Arhu's prison. (Quest The Vault of Linder Kemm)
Use your character with highest sneak and thievery ability to infiltrate the consulate, till you reached the fountain. (if you find yourself in a battle, use retreat to start over.)
- You may need a key which is in "the office" (room on the left above you as you enter). I say "may" because I managed to do get it and didn't check if the first doors later can be lockpicked (probably yes, lvl 5 thievery is probably required).
- This key unlocks the door in the room on right from the entrance. Then you have the second locked door to the garden. I don't know if there is any key for them but you can lockpick them (thievery lvl 5 I think).
When you approached the fountain, use the teleporter pyramid to regroup your team. Then cast Spirit Vision to see the portal above.
You will be teleported to a strange arena. There you will have to fight shades of Malady, Bishop, Windego (once Shadow Prince spawned but dunno why). However, they will not appear immediately, only after you move from the center.
They will spawn even after their death, to beat the encounter you will have to break all the mirrors in the arena and then a magical door will appear. Now here is a little trick which will make a very difficult fight, a trivial one. If u have range character (crossbow, or bows) you will be able to destroy all mirrors without leaving a centre of the arena (so before the fight begins. You need to manipulate some angles and destroy some things but it's 100% possible.).
(Note, alternatively, you can use long-range earth skills like fossil strike or earthquake to destroy mirrors )
After that just move toward the door and when the fight begins just move one character to the door and the whole party will be ported out.
Talk to the dreamers will open the portal to princess's hideout. If you have a swornbreaker, you can free the princess from her bond to the God King. Then let Red Prince use fire breath to give birth to a dragon.
Leave the dream to complete the quest.
Once you have the knowledge from Lord Arhu and the amulet and scroll from Toyseller, you may proceed into the cathedral. (better when you finished your companion quests and other side-quests)
In front of the Lucian's Shrine, there is a switch, put the amulet acquired from toyseller in it, then read the scroll to reveal a hatch:
When you enter the crypt of Lucian, there is a pipe puzzle waiting ahead.
To solve it, first, you need to create some blessed blood.
(cast blood rain on this sink, then bless the blood to create blessed blood. If you do not have blood rain skill, you can attack yourself to create blood.)
The second step is to align the pipes, there are multiple ways to achieve that, here's one of the solution:
Once you aligned the pipes correctly, touch the altar to activate it. The coffin of Lucian will be moved and a secret hatch is revealed.
Venturing forth, you will enter a room full of levers and traps, along with some source puppets. Use Source Vampirism on these puppets to kill them, then pull the five levers bearing initials that spell POWER.
Make sure you are ready before you enter the real crypt of Lucian, after this point, you can not go back. (make sure you have your most powerful source skills memorised, and you best item equipped)
To be Divine
This entire chapter is the final battle you must face. Prepare yourself, for this could be long and challenging.
Just when you arrived the tomb, your followers on Lady Vengeance (Malady, Gareth and Tarquin) showed up and agreed to pray for you. Their prayer will reduce your source point cost of all skills. So memories some of your most powerful skills now!
(Note, please split your resurrect scrolls evenly to every companion of yours. During the battle, it is very likely that one or more of your companions will fall, doing so will let the rest have a chance to rescue the fallen.)
Lucian the Divine faked his death, and he is waiting for you, with Dallis, Braccus Rex, and some magisters. Lucian will explain his plan to you, why he killed all other godwokens, why the voidwokens appeared, and what he hoped to achieve.
Dallis will also reveal the true face of herself.
You can surrender yourself to him, otherwise, you must defeat him and Dallis. (Surrender to them and the battle will begin directly at stage 2, but you can still become the divine after Braccus Rex is defeated.)
Surprisingly, Lucian the Divine is the weakest among the three bosses. And he is the only one you can truly defeat at this stage. Focus on him, and soon he will be knocked unconscious.
If you knocked out Dallis, Braccus Rex will break free from her control, summoning the Kraken to attack all others. The combat will come to the second stage, Dallis and Braccus Rex will both restore their full health.
If you knocked out Braccus Rex, he will also be free of Dallis's control.
Stage two battle is much more difficult than the first stage, the Kraken has many powerful AOE skills and it can summon Black Ring followers (First Isbeil, Lord Kemm and Sallow Man. If you managed killed all three of them, Kraken will summon Black Ring Defilers. )
If you let some magisters survived the first stage, the battle could be easier since they are hostile towards Black Rings as well. Use them to draw enemy fire (teleport them to the black rings if necessary), do not stand in between them. The summoning skills will also help, especially fire slugs and Red Prince's Dragon (Learned in the quest The Consulate).
Focus on one target at a time is a good strategy, if you just wound someone, it is possible they teleport themselves to a safe corner and come back when they are healed. Especially Dallis the Eternal, once she drops to low health and you cannot finish her, she can resume her dragon form, will health and armors fully restored.
Constantly cast bless to make the ground healing your team is another key to survival. Before you attack any enemies, carefully examine their stats to see their weakness and immunities.
The Kraken is very hard to kill, since it can teleport from one place to another and you cannot engage it in a melee combat. But once you strike down Braccus the Rex, it will be considered defeated as well. (acquired The Abysmal Sea achievement。 Even if you killed the Kraken, Braccus Rex can summon it again)
( If you signed a contract with the doctor in quest Doctor's Orders. When you defeat the Braccus Rex at Lucian's Cyrpt, the doctor will appear (and kills Lucian and Dallis if they are still alive.)He will ask you to honor the contract, if you agreed, you will need to kill your teammates. In the ending, doctor and you will drive out the God King, and rule the world as gods. If you refuse to honor the contract, doctor will kill your main, and you will have to defeat him with your teammates.)
Once all bosses been defeated, you will have to choose what to do. To ascend to next divine, or purge all the source on this world, or let everyone capable of using the source. Whatever you do, the quest is completed and you will be transported to Lady Vengeance.
See different Endings and their requirements.
 Anonymous
I was playing with 3 other friends and at the end of the final fight, 2 of us chose to ascend, and two didnt. The two who didnt were put on my team and the last PvP fight ended up being a 3v1. Does anyone know why this happens? Is it just random whose team they're assigned to? Or were they on my team because I won the first two arena fights?
- Anonymous
Just spoke to the Toyseller. It seems that either i picked dialouge options that avoided the persuasion checks or they have been removed. Regardless it is possible to get him to tell you the password without needing to persuade him.
- Anonymous
- Anonymous
Dost thou kill ? ????? Me. No. Thou are a murderer boom dead
- Anonymous
In the Fort Joy part, about Sir Lora. Well he's definitely not undead, you can heal him by casting Restoration on him, if undead, it would damage him instead. His skeletal cat, Quercus, is undead, but they share Sir Lora's health and thus you can't damage Quercus by healing spells. And strangely Quercus walking over poison puddles gets damaged, eventhough Sir Lora himself doesn't get in contact with the poison.
- Anonymous
in the last battle there is a difficult trick to avoid the second phase. Braccus Rex innitiates the second phase right after he gets below a spicific life percentage (or Dallis is almost dead), so it's almost imposible to avoid. but if you hit him with one attack that puts him not only below that threshold but also kills him... he will remain dead, the second phase will never happen and the game will end after killing the rest of enemies.
- Anonymous
Plenty of the quests in the game that involve delivering items can be "cheated" in the following way: - Start conversation with one character and advance until you have the option to give the item. - While still in conversation select another character and unchain him from the group and make him get the item from the bag into his bag. - Move that character to a different map instance (if in Driftwood, move to the undertavern, for example) - Stash the item inside a chest in that separate instance. - Go back to the character in the middle of a conversation and deliver the item. The quest will "take" the item from you and proceed normally but you can get the item back from the chest! this can be done to keep swornbreakers for all quests.
- Anonymous
Quest for Possessed Girl if you rescued her from Bloodmoon Isles. Her follow-up quest is in Act IV (The Arx) called "Slience Broken". After you speak to some of the pilgrims, you find that people have seen a little girl with black eyes about. Find her at X: 354, Y: 171. There are 4 ways it could end, but I used the brute force method by allowing the demon to possess a character with an idol. Killing said character forces the demon out (and your character revives). He will summon 4 other lesser demons to fight with him. After you dispatch them, the quest is complete. Some dialogue (use ones that reminds her of her past). Pass 2 Persuasion checks. After which, you allow the demon to possess you. The alternative outcomes include: 1) Demon possesses you, 2) you kill the girl, 3) something having to do with purity and 4) remind the girl of her past.
- Anonymous
FROZEN ROOM ON SHIP: After you beat/send running the Kraken, go on the ship and find a hatch. It takes you to a room with a frozen Roth family, but it'll freeze you too soon enough. You can light all of the torches (hard way) or get the Flame Lamp down in the boat with the treasure chest which is your main reward (the family only gives you the key and no XP). I did it because I wanted to do them all and there is no guide for this hatch/room on this Wiki. :(
- Anonymous
wrong combination to enter the secret chamber in the magisters vault! correct is: Mind - Body - Society - Divine!
- Anonymous
How do I get onto Bloodmoon Island safety? Undead boatman takes me over, but all my party then dies immediately in the deathfog. Game over Tx in advance to anyone who an help
The link for Burial Rites has an extra + in the URL, please fix.
- Anonymous
I luckily killed Braccus Rex with the Arrow Spray at the first stage so it didn't go to the second stage. It ended up easier. No need to face the Kraken and others.
how do you kill the Shrieker in Blackpit with Source Vampirism if you have to get within 4 meters of it to use the skill?
- Anonymous
someone needs to edit the beginning or people will follow this guide to the letter not knowing atusa's leg is also useful not consumed, for those interested in not killing everyone lol
- Anonymous
Am i the only one who had to kill two of his teammates, because they wanted divinity for themself in the end? All the letsplays i watched end just with the death of Braccus.
- Anonymous
Actually, in my case, Dallis did not regenerate all her health in the second stage.
- Anonymous
I am stuck on the Lady Vengence in the hall of echo's. the map shows the teleporter but it is not there. Game glitch or puzzle i can't figure out?
- Anonymous
Yeah..... Doomsday device. I used it by "mistake" after a few tries on this hard fight, I just wanted to bath "her" into a pool of acid or something. But what I really did was ruin all Arx's quests.
Don't use the thing on your first playthrough.
- Anonymous
the battle with the cow forms is so CANCER
might as well sit afk and wait, the rest of the fight is so annoying too, such low dmg and many rounds
- Anonymous
If you move your chars to the northwest in the last battle with Braccus Rex, the Kraken cant hit you with his spells. There is no place for him to go so you are to far away for him.
Good God, you people really need to proof-read your walkthroughs. It hurts to read them, sometimes.
- Anonymous
"pull the five levers bearing initials that spell POWER." What?
- Anonymous
i think you have to use source vampirism to be able to interact with the flower
- Anonymous
Can't seem to interact with the flower in front of the ancestor tree in Stonegarden the ghosts are standing around. Anyone know why?
- Anonymous
If you want to net all the experience from the Magisters on the lower deck of the starting area (and thus be level 2 before you leave) you don't actually have to try and kill them yourself. Do your talking and looting and get Magister Payde to open the door to the next area. Close the door next to Magister Siwan and open the rest of the doors. You can then attack Magister Cadoc and walk your way up into the room past Magister Payde (Be careful not to go so far as to get out of combat with Cadoc and co.). The event will trigger and you'll gain the experience for all members that were in combat.
- Anonymous
- Anonymous
Just a tips :
*SPOILER*
When you arrive at Fort Joy, you will encouter a groupe of NPC which will automatically reward you with xp and you will get to lvl 2 (so your potential companion will be too), dont go near them, instead take the ladder on the right side and go look for the companion you want and once you have all of them, go back to the entrance (take the ladder again) and get close enough to the NPC to start the interaction.
This way all your companion will get lvl 2 while in your team and you will be able to give them the stat point the way you want it.
it does help healp to built the caractere the way you want it.
- Anonymous
i do *NOT* have the Lightning skill strike or anything lightning related and I am literally stuck outside the glowing gate from The Temple of The One. How do i proceed? Do help. Thank you!
- Anonymous
Hey,
I have a question, I found in acient temple recipes to create Swornbreaker. We need Blade, Haft and schematic.
I found online that blade and haft are on Nameless Isle but anyone know where exactly?
Thanks for answer.
- Anonymous
I cant get the password for lady o' war the doors dont get convinced
- Anonymous
Can anyone help me with the mission "Burying the past" in driftwood? Can't
find some item for the life of me.
- Anonymous
can someone make a walkthrough for the a hunter of wicked things quest
- Anonymous
How you can confine a walk through of this game to this 11 or 12 paragraphs is a disservice to the game... You've glossed over everything... You're supposed to go in to meticulous detail about everything in a walk through, not give a speed running strat. This is a summary of what happens in the game, not a guide of any description.
- Anonymous
Greetings, is it possible to defeat the very first 2 magisters you encountered? I wanted to settle things but they one shotted me and the Red King
- Anonymous
So this is it? im walking around like madman killing and running from everyone...
Haha ----....

DE crashes a lot in last fight if u quickload
0
+10
-1