

A Taste of Freedom |
|
|---|---|
|
Desiccated Undead |
|
| Location | Driftwood |
| Suggested Level | 12+ |
| Previous Quest | Shadow over Driftwood |
.png)
A Taste of Freedom is a Quest in Divinity: Original Sin II.
You find a tortured Lich hungry to feed after being drained of his Source for a long time by Mordus. Will you help him or kill him?
Important NPCs
- Desiccated Undead
A Taste of Freedom Objectives
- Find an ornate skull embedded in the wall, which seems to be missing one of its eyes.
- Find a Glowing Eye in Wrecker's Cave by killing Mordus and using his Amulet to enter the magically protected hatch.
- (Optional) You can skip Wrecker's Cave and lockpick the Ornate Skull with Thievery 5. However, Mordus might bug out if you visit him after killing the Lich.
- Place the gem inside the skull to reveal a secret passageway leading underground.
- Solve the puzzle underground (see Pressure Plate Solution)
- Set the Lich free.
- Find him again in the Cloisterwoods.
- Let him feed or kill him.
- Meet the Lich and watch him reclaim his Soul Jar.
A Taste of Freedom Walkthrough
After you speak with Lohar and start the quest Shadow over Driftwood, he will give you permission to enter Mordus' basement. Speak to the female dwarf sitting on the hatch and let her know Lohar sent you. She will step aside and send you below. See Shadow over Driftwood for info on the two trapped dwarves and that room.
Now that you are beneath Mordus' house, in the northern section of this room above the beer barrels an ornate skull hidden on the wall can be found which leads to a secret passage. Look at your minimap, you will notice a path that's visible on the minimap but not in the world. You may need 18 Wits to spot it if you're having trouble finding it. Not to be confused with the Bust statue in the room with the two dwarves.
The skull can be lockpicked with Thievery 5 which gives the Infiltration Achievement! However, it's advised to go to Wrecker's Cave and progress Shadow over Driftwood for the Glowing Eye gem by killing Mordus to find an Amulet on his corpse which is then used to unlock a magically protected lock in Mordus' private quarters section near the Ship Wreck entrance side. Inside the hatch behind the protected lock is a dead dwarf on an altar who has a Velvety Pouch that contains the Glowing Eye. This is the gem needed to open the secret passage under Mordus' house in Driftwood.
Hint: If you're having trouble lockpicking the Ornate skull for the achievement, there's a female dwarf named Dashing June who will try to con you out of some gold near the market in Driftwood. If you didn't have high enough Wits to catch her scheme and tell her about her true love Butter then you can pickpocket the "Fancy Gloves" from her in the Undertavern which give +2 Thievery. You may be able to buy them from her too. Papa Thrash in the Black Bull Tavern may have a chest piece with +1 Thievery for sale as well.
.png)
Caution: Be sure to unlock the magically protected hatch inside Wrecker's Cave with Mordus' Amulet before returning to Lohar. He will take the amulet from you and you'll have to pickpocket him to get it back. If you did return to Lohar first then you'll need to use three of your characters to talk and face some of the people away in the room. For me Marla (the traitor on her knees) was still not letting me pickpocket Lohar so I killed her in front of everyone and no one attacked me. She gave 4,000xp and isn't connected to any quests that I've found. An invisibility potion may help here as well.
Solving the Pressure Plate Puzzle
Once you get past the ornate skull, you will find a locked door and a pressure plate puzzle. Facing the door, cast Spirit Vision to see the correct pattern. A series of symbols will appear.
*Hint: A total of five plates must be pressed which will require you to get creative with an item or one of the vases in the room.
(To avoid spoiling the fun, the solution has been placed at the bottom of this page.)
After activating the correct plates, the door will permanently open.
But which switch is it?
Caution: If you explore the room before talking with the Lich, you have a high chance of accidentally releasing the hidden skeletons in the urns which reduces the reward and lore.
So, before exploring the room head straight to the middle and speak to the Lich. You will learn that Mordus has kept him here for a long time draining him of source. This also prompts a conversation regarding the Lich's release.
As you approach the button console he will warn you about the hidden skeletons, "urns will shatter" and "the bones will... rise".
Pressing the Yellow button turns off the braziers' lighting.
Pressing the Green button releases the Lich, immediately begins the fight and spawns the hidden skeletons within the urns. You can press it during battle as well if you pressed the Red button first.
Pressing the Red button begins the fight without releasing the Lich.
Pressing the Purple button unlocks the chest to right of the table.
The chest on the left can be unlocked afterwards with the Acid-Stained Key that is also in the room between two water barrels next to the northern staircase.

After pressing the Green button and an unconventional team up with the Lich he will offer you a skillbook from a category of your choice. (Tested the choices out 3 times and I picked Huntsman twice and got Marksman's Fang both times, Necromancy choice gave Shackles of Pain). If you attempt to ask the Lich to teach you about Source, he will pout and give you a random skillbook instead.
After the battle he will teleport to the console and destroy it. Then slowly teleport his way out, "I... Will... Be... Whole... Again... Hungry..."
If you began the fight without talking to the Lich first, he will simply leave after the fight without giving you a reward, and the quest won't be updated. If one of the undead accidentally attacks the Lich during the battle, he will join the fight as if you didn't speak with him.
Skillbooks given
Necromancy - Shackles of Pain
Geomancy - Impalement
Hunting - Marksman's Fang
Rogue - Gag Order
Warrior - Enrage
(Other answers will probably give a random book from the ones listed, but we kept getting Shackles of Pain. Admittedly low sample size for any skill other than that one.)
(Books seem random selecting Rouge gave me Sleeping Arms.)
To Feed or Not to Feed?
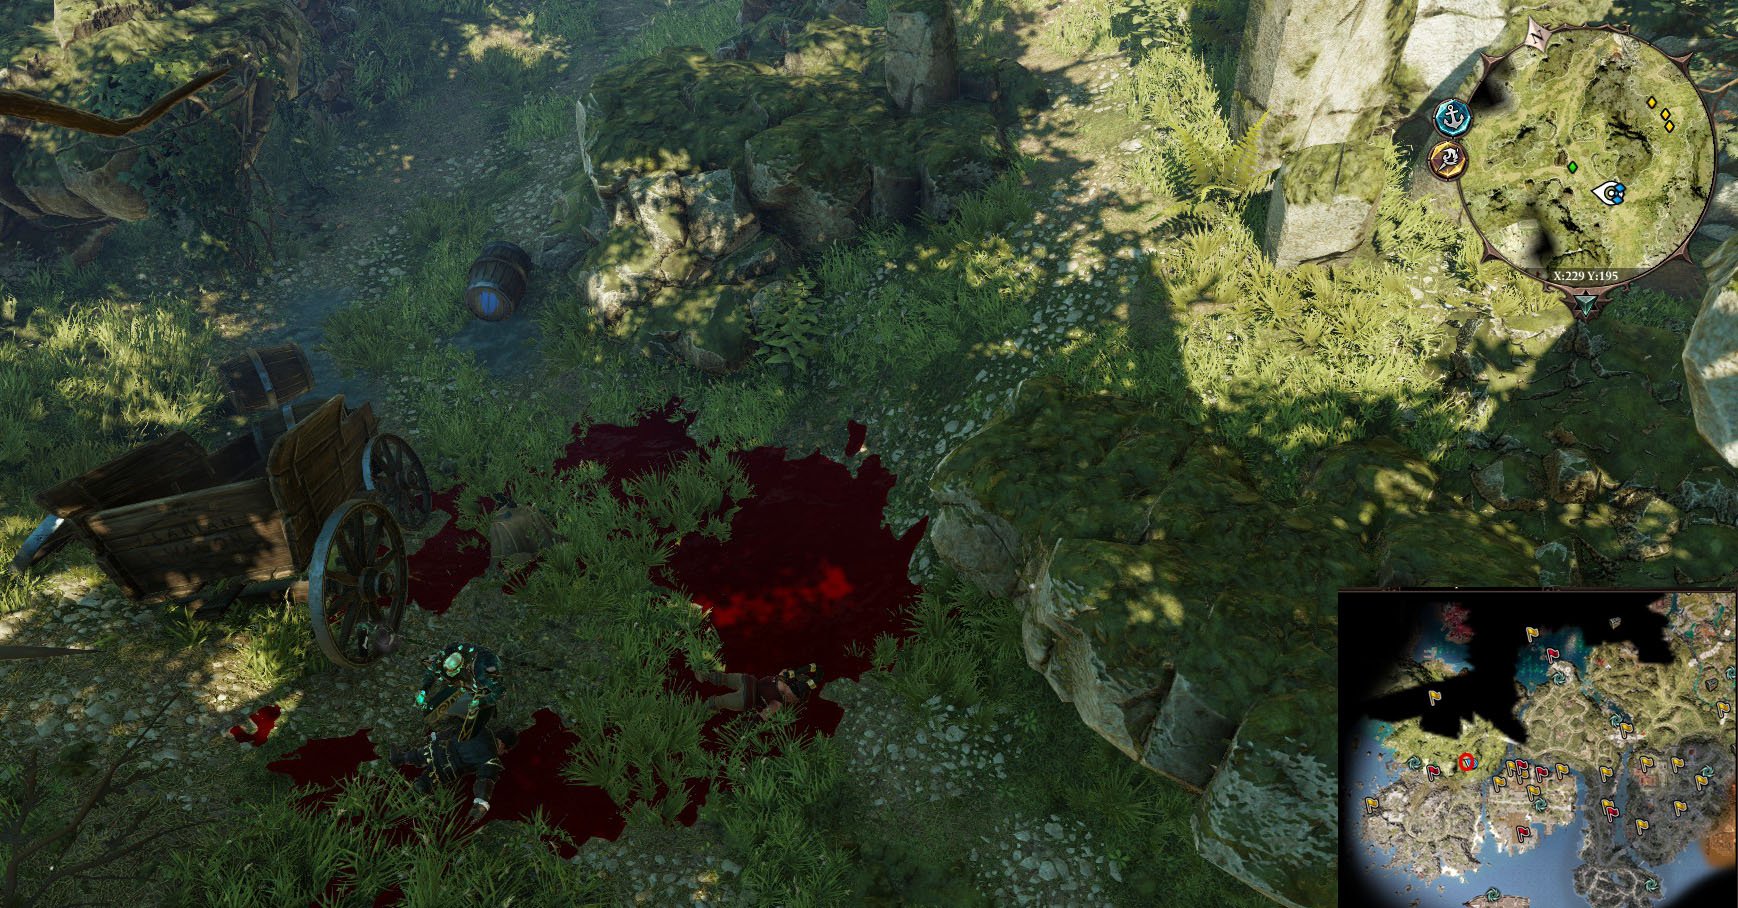
Back in Driftwood, if you hadn't already fought the Magister guards and their Source Hounds by the Western gate then you'll discover them dead with Poison around as evidence to the beginning of the Lich's killing spree.
You will encounter the Lich again in Cloisterwoods (at the bottom blue flag shown in the map below X:224 Y:192). This time you will see him feasting on the remains of innocent dwarves, unable to satiate his hunger for Source and sinew.
.png)
Now this next part has a couple different outcomes and may be a good saving point.
Option 1: (Must speak with him with a character that has a Source Point) Offer him one of your Source to save an innocent life in the future. Afterwards, he will request your presence at a nearby reliquary to retrieve his Soul Jar then teleport away and reward some quest progression xp. (You gain 4175 exp)
Option 2: Attack him. This will however, get an innocent child from Driftwood killed (who has some lockpicks and trap disarming kits on his corpse). On his first turn he will cast Bonedance and raise the three dwarves into undead and force them to fight with him. The undead dwarves give 7,500xp for two of them and curiously enough only 3,750 from the third. Defeating the Lich gives no XP because he doesn't die but is knocked out of the fight for more dialog afterwards. You can Spare him or Kill him here but it's recommended to Spare him for additional loot after the third encounter.
Note: If the Lich left after the first encounter because you ignored him, you will not be able to offer your own Source for him to feed on.
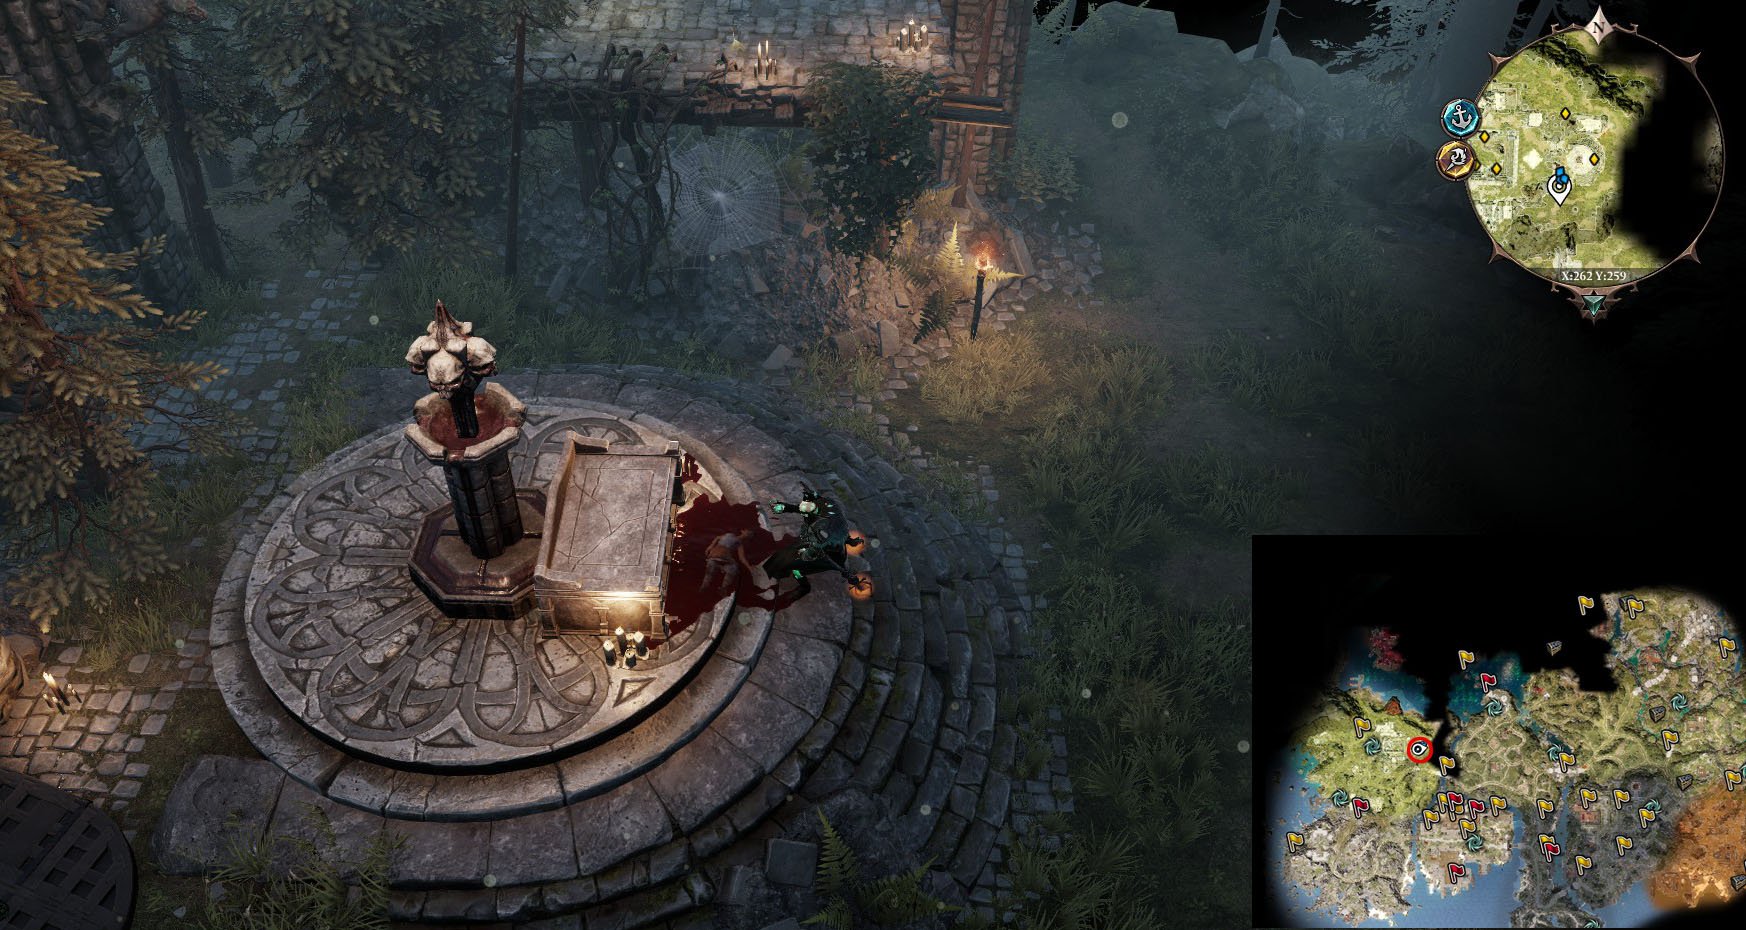
At this point, the available dialogue choices will vary based on your actions thus far, but they will all end the same way. You will meet him again for a third and final encounter, at the entrance to the ruins. (Shown as a blue flag at the top right of the map above X: 260 Y: 255.)
Ultimatum
Note: Another strong suggestion to Save before you speak to him at the reliquary as you will likely be interested in fighting him after the quest for extra loot and he quickly teleports away.
If you did not sacrifice your Source to him, he will be feeding on the young child mentioned before and you will have to decide between letting him continue his ritual for the Soul Jar or stopping this and killing him.
If you sacrificed your Source to him, he will be waiting at the altar without the dead child and he will ask for some of your blood to complete the ritual (this is safe; he only takes a small portion of your Vitality). You will have to pick a party member who isn't undead in order to give him your blood.
After allowing him to continue, he will cast his incantation using your blood or the blood of the child to reveal a cache with his true name on it. Then will say "I am me. I am whole. I am Xhaxh!" You will receive 4,175xp and the quest will close at this point. However...
If you attack him right after he spawns the chest as he's speaking his true name, he will spawn four Parasitic Hearts to help him this time around. In order to initiate combat here, you must cast a spell on him or some other hostile attack action right after he spawns the cache -- there will be no further dialog or opportunity to attack him, because he teleports away after the cutscene. Killing him is the utmost priority in this battle since the Parasitic Hearts deal relatively low damage compared to him. This time, you will kill him off for good "xxxhhhnnNNOOO! I was so CLOSE...!" and obtain 14,975xp for killing him and an additional 3,750 per Parasitic Heart. You will also get the unique Necromancer staff called the "Xhaxh's Staff of Parasitic Decay" as well as his Phylactery and other powerful trinkets for your troubles.
Additional Outcome / Strategy: If you attack him before he picks up his Soul Jar then combat starts with him Cursing you but the 5 Hp Soul Jar can be destroyed with any attack or skill from a secondary character while he still talks. This will kill him instantly.
Fun Feature: Once you have his Phylactery you can Right-Click and Use it. This will place it on the ground and prompt a dialog. You can decide to Absorb Xhaxh's Source which will restore 1 Source Point or crush it under your boot for nothing. Interacting with it one way or another does not reward any xp. Weighs 3lbs and sells for 120g. Basically an emergency Source Point.
.png)
Pressure Plate Solution
As promised, the picture for the frustrating pressure plate puzzle!

 Anonymous
Lol, the annoying Sir Lora just happened to step in the right plate and complete the puzzle for me, I don't know if the game scripts it.
- Anonymous
There's dead bodies all over the place for corpse explosion, the magistors from Hannag fight come in handy. Avoid charm it's annoying lol. You can buff whoever is talking to him and the buff stays on, magic shell, fortify, enrage can be handy and peace of mind. Heal him for damage too I think I blew up bodies all over em for 1 ap this time..
- Anonymous
On the final fight i found an incredibly simple way to do it. Give your blood with a character and instantly prep a teleportation spell while he is summoning the jar. right when the jar is about to appear teleport him away from the jar which will start his combat dialogue with the character who teleported him.While in that dialogue have another character interact with the soul jar and have them wait while combat starts.
- Anonymous
What's the point of freeing him if he ends up going on a killing spree?
- Anonymous
the unique staff must have got nerfed. It no longer rewards +1 memory on it.
- Anonymous
- Anonymous
The reply below me took about 10 tries to get the sequence of dialog/teleport/attacking just right but this was indeed quite fun to see unfold.
For anybody else, I'll try to surmise what I did.
1. Position one party member so that they can reach teleporting lich near Jahan
2. Agree to offer blood with another party member
3. Wait until the chest appears and teleport lich
4. Start shooting shooting the lich from up on the cliff (where teleporter stood)
5. Lich started slowly walking to my attacker, then initiated dialog > initiated battle
6. Jahan does his magic.
- Anonymous
Jahan is on the side, teleport the lich to Jahan and attack the lich and watch the magic happen.
- Anonymous
- Anonymous
Playing on DE tried attacking him five times and didn't work but then teletransported him right after the chest appeared and combat began
- Anonymous
Sorry but do they think albert einstein is playing this ****? who is figuring out this puzzle on their own?
- Anonymous
Wow this puzzle is awful. I thought that I had to somehow make it so that every sign is the same. I spent a few minutes looking around the room for clues but i've found nothing, and then I've spent 15 minutes on trying to trigger the plates in different ways. Turns out all of it is pointless because it's not a puzzle but a skill check. Without this skill, you will not be able to figure it out on your own; how dumb is that?
- Anonymous
- Anonymous
I have the key in my inventory, when I lockpick the achiviement don't show up :'(
- Anonymous
i stole the jar as he was teleporting away and killed him after he left.. sadly it didnt do anything but say what he always does when killed
- Anonymous
The skillbooks given aren't fixed, they're random. My necromancer book wasn't Shackles of Pain, but Infect. The question is what the pool is.
- Anonymous
Sir loras solved the plate puzzle for me lmaoooo I would have gotten it anyway but he walked on the bottom R corner one randomly and I was like wait what?
- Anonymous
- Anonymous
Necromancy: Infect
Geomancy: Mend Metal
Hunting: Marksman Fang
Rogue: Corrupted Blade
Warrior: Whirlwind
I've chosen Rogue and received 'Fan of Knives' instead of 'Gag Order', no idea why.
- Anonymous
i fought him at level 11, that was tough fight but we won .
- Anonymous
guys, don't let lich devour a child. if u give lich your own source point in second encounter, then u can continue your quest and get some XP without killing a child(not maximum XP, but enough) i know it's just a game. but it is really terrible if u let lich kill a child(sorry for my bad english...)
- Anonymous
If you shoot at him after he completes the ritual a dialog box will open before combat begins. If you don't close the text box another character can pickpocket his soul jar which you can then drop to the ground and destroy (5 hp) as soon as combat starts, killing Xhaxh immediately
- Anonymous
i thought better of freeing him, so i dropped mass traps on him and had sebille do the same, so 8 traps go off at once. before they went off, i shot him with barrage and when it hit him, he moved and triggered all 8 traps dying instantly before he could teleport away. i didn't get any xp for it, but i got xhaxh's staff of parasitic decay, an unidentified piece of equipment, epic quality, a skill book (phoenix jump), and some gold. i'll play it out a bit and see if the quest is broken or if i get special rewards for killing him early. i'll report back later.
- Anonymous
In short, to acquire maximum EXP in this quest for both encounters 2 and 3, acquiring all possible loot from BOTH endings for BOTH encounters, do as follows:
Encounter 2 (Bonus 4175 EXP)
1. Before the 2nd encounter, split your party in 2. (Party A and Party B)
2. Have Party A wait far away, outside of the range of the Lich.
3. Party B go and attack the lich, either via dialogue tree, or just attack.
4. Party B kills all dwarves, then flees from the lich and exits combat without killing him.
5. Party A having not been in the encounter at all, can go talk to the lich freely and sacrifice source for an additional 4175 EXP.
(Easy way to get both rewards as detailed in other comments earlier on, plus in the article above)
6. Before the 3rd Encounter, split the party in 2 again, ensure it is the SAME SPLIT as before, or at least that the character you used in Party A to do the source sacrifice is the same one you use in party A to talk to him again in encounter 3.
7. This time, leave Party B (the one that did the fighting) outside of the Lich's range.
8. Approach with Party A, speak to the lich with the same character that offered source earlier. Offer him your blood. You will receive EXP and a chest as a reward.
9. Select Party B and get ready to move while the animation of the chest appearing begins.
10. As soon as you see the chest appear (hold alt until you see the name/open box icon on PC) run up with Party B. Combat will initiate IMMIDIATELY. You won't need to attack or do any shenanigans with the soul jar. Just attack and the aggro will resume from when you previously ran away from him in the 2nd encounter.
11. Kill him and his spawns. Now you get all the EXP and the chest.
I've only tried this once, so I'm not sure how replicable it is. If it does work, you have successfully received all rewards from each possible choice during the 2nd and 3rd encounter. You have maximum loot and maximum exp.
Hope this works for everyone! Good luck!
Love,
Nao
- Anonymous
There's a slight (mostly positive) side effect to using Method 1 detailed in my previous comment about encounter #2 (see below) which also greatly helps with performing the exploit mentioned above wherein you fight the Lich after he gives you his chest during the third encounter.
Having had a party member from Party B run away after fighting the lich, they will IMMEDIATELY initiate combat with the Lich if they approach him at the third encounter, no dialogue will take place. Thus if you separate your party into the same Party A and Party B as before, and use the same character who sacrificed Source to him before speak with him from Party A again while Party B waits far away, outside of his vision - you can initiate dialogue, get the chest to spawn, and then walk a member of Party B into view as soon as the chest appears. This will immediately initiate combat. No attacking or soul jar shenanigans required. Thus you get the EXP from the fight AND the EXP and treasure from giving him your blood.
Hope this helps!
Love,
Nao
- Anonymous
Hi All.
After some testing it seems that during the 2nd encounter you CAN in fact kill all the dwarves AND feed him your source for maximum exp (18750XP for killing all the dwarf skeletons + 4175XP for sacrificing your source to him.
There are two ways I've found that this can happen:
Method 1 - This method seems to be safer, more reliable, and works every time. For this method, split your party in two. Have one half of the party (Party A) stay far enough away that they do not join the encounter (and are not visible?) while the other half (Party B) confronts the Lich and initiates the fight (either by dialogue or by directly attacking.)
With Party B, kill all the dwarves BUT LEAVE THE LICH ALIVE, then flee the encounter either by running or teleporting away. I found this most successful when getting a fair distance away, sneaking, and then using cloak and dagger to flee further while sneaking, though I'm not sure this is necessary. Then, using Party A, who have not been at all involved in the encounter, approach the lich and talk to him. Battle should not begin, you should be able to talk to him normally and offer your source point for the full combined 22925XP. Note that while I have tested this method to ensure it does give the full exp, I haven't yet checked to see how this effects the third encounter.
Method 2: RNG, only sometimes works for unknown reasons.
Fight the Lich by any method. At the end of the fight, instead of asking to be spared, you are sometimes able to talk to him as if you are just now encountering him for the first time. I'm not entirely sure what causes this to play out. There are a few factors that I suspect may be the cause though I'm not sure if it is one or multiple factors.
1. Talking to him with a different character than the one who initially spoke to him (if you initiated dialogue at all) might be the cause. I noticed another comment also mentioning being able to do the fight and sacrifice the source if you initiate the fight without first initiating any dialogue, so this may be related.
2. Hit him with an attack strong enough to kill him before he stops and asks to be spared. He will appear dead on the ground, yet can still be attacked or spoken to. Attacking him still causes him to reflect damage, but he remains at 0 HP, undying, and can still be spoken to. Once he reaches this state it once again seems to fall to RNG whether he then asks to spare him if you attempt to speak to him, or starts the dialogue from the beginning. Either way he is no longer hostile, at the very least. For further testing: If he gives the wrong dialogue at this stage (spare me etc.), perhaps reload a save beforehand and see if it makes a difference to talk to him with a different character, or perhaps walking away and walking back.
Anyhow, Method 2 seems to be very hit or miss, so I'd recommend doing method 1 and splitting the party.
Hope this helps! Enjoy your extra 4175 XP.
Love,
Nao.
- Anonymous
Seems like in the DE you can no longer cheese your way to extra loot at the end. I tried to smash his soul jar 5 times in various ways, but it seems that if you agree to give him your blood, you cannot prevent him from picking up his soul jar and destroy it for an easy kill. So if you want the extra shinies, you'll have to fight him the proper way.
- Anonymous
Another quest where they nerfed the xp for people who bought the definitive edition. What a **** move.
- Anonymous
12/4/2021: On the second encounter, you can attack the lich so that he spawns the other skeletons; defeat them, and then flee without killing him. He will still be there and you can offer source to him.
- Anonymous
If you’ve completed the “Keep calm and Carrion” quest and are wearing the armor, you won’t be able to depress a pressure plate as you are floating.
- Anonymous
To be clear, on the second conversation with the lich you have to attack him before talking to him. If you initiate a fight through conversation, then he won't stick around to let you offer a source point.
- Anonymous
- Anonymous
For me the window to target the phylactery was too small so I went back to respec my character to get Thievery 4, sneaked and stood behind him and took away his soul jar before he could teleport away with it...he did take it back once but I managed to steal it again lol
Talk about leaving your soul at home
- Anonymous
Weird, I'm trying to get full XP on this quest but when I killed him in the second encounter he just dies. Doesn't give me the option to let him live. I've tried reloading multiple times, trying different dialog, kiling the skeletons first.. nothing works. He's dead :(
- Anonymous
Attacked him right after I gave some blood, and he didn't get aggressive and just teleported away.
- Anonymous
rofl, so.... if you get him to the altar, and you let him feed, and you prep Teleportation at the spot where the jar spawns: catch it fast enough and teleport it so it takes fall damage. He'll die (again) immediately.
- Anonymous
18750XP for killing all the dwarf skeletons on the 2nd encounter (this will not update or mark the quest as "Closed") OR let him live and sacrifice a source point to help him feed for 4175XP.
I don't know the exact number but when i kill all skeleton i lvl up to lv.13
But when i sacrifice my source, i still lv 12 with 4550xp needed to lvl up
So i think killing skeleton must be get a better xp with the part of quest finish
- Anonymous
I can confirm that you won’t be able to give source point and fight undead drawf at the same time.
If fight and defeat him in 2nd encounter, he will teleport away right after you choose “spare him” in the conversation. And if you give him source point, you won’t be able to fight him; attack him with other team member before conversation ends only makes him vanish immediately, and the quest will still proceed to 3rd encounter.
So if you want to maximize EXP, you must let him do all his evil deeds to the very end, including killing and devouring a kid, and then kill him after he spawns the chest. You will earn extra 14,575 exp this way.
- Anonymous
"If you allowed him to live, he will trudge around the bodies and start feeding. You can talk to him again..."
He simply teleports after I spare him and now it's nowhere to be found!
- Anonymous
I play with only 2 undead characters... This doesn't bode well for getting the chest and killing him directly after. What I had to do is go back to the ship. Talk to the Lizard Lady that offers companions for a small fee of 2800. I hired any character, she gave me a human girl. Used her to sacrifice blood. Immediately talked to her and hit option 1 to get rid of her so that my LONE WOLF would activate again. However, that made me lose some abilities that I cannot memorize during combat now that I hit him before he ported away. If you have the skills you need memorized first (clear your abilities and use the ones you absolutely need) and you can smack the Phylactery and slowly kill the Hearts. This is the fix to the 2 Undead Character Lone Wolf scenario.
- Anonymous
Don’t hold high hopes this getting answered but I’ve gotten to the second encounter and it won’t let me offer source after fighting the skeletons he teleports away after i spare him.
- Anonymous
There seem to be an alternate ending to this quest. If you speak to the lich in the basement, promise to free it yet you press the red button instead of the green so the fight begins with the lich still attached, and it frees itself during the battle (from an aoe for instance), it will fight the skeletons alongside you and will be tagged as neutral but the fight won't end when they're all destroyed ; the lich will attack you instead. Killing it will trigger the party dialogue you normally get after it has run away BUT the quest will end and the log will say "we killed the lich". Probably a bug I suppose, but apart from the inappropriate dialogue, there's nothing out of place here. Tested on DE PC.
- Anonymous
3rd encounter, teleport the lich to Jahan and he'll zap lich's butt for 3k damage, one shotting him.
- Anonymous
Can't get the puzzle - some sites are saying different things - have there been updates?
- Anonymous
- Anonymous
anyone knows how to progress this quest if i can't find the lich after the first encounter? or where do i find him? he's nowhere near the area in cloisterwood.
- Anonymous
- Anonymous
He is vulnerable to charm. Break him and command his pathetic husk to succumb to his own creation.
- Anonymous
cheesed him with lava that hannag spawned, teleported him in there and moved the lava with terrain transmutation, also works for everything else, ty hannag
- Anonymous
2nd time I did this quest, when getting to the room where the Lich is held. I decided to see what would happen if I attacked the vases after talking to him but not choosing to release him. Fight ensued with the Skeletons, right near the end of that the Lich got caught in an AOE by me and he ended up joining the fight as a neutral to both me and the skeletons though he didn't attempt to attack my party, just the remaining skeletons.
Though after last skeleton fell, fight was still classed as ongoing. Ended up killing him right there and the quest updated to indicate it was over, even though I then got the party conversation as if we'd let him go. Looted him and the skeletons, ran outside to check he hadn't killed the Magisters at the west entrance to the town and he hadn't. Quest in archives show as me killing him.
This is on Definitive Edition on PS4
- Anonymous
since a certains squirrel kept messing with the plates, i had my main stand on the side and placed a treasure chest instead
One thing I kind of just randomly thought of was: "what if I target the phylactery before he picks it up?"
I kind of randomly decided to do this after I attacked him right after he spawned the chest and before he picked up his Phylactery. Since it has a lot less health than him and has no armour, I one-shot it and therefore one-shot him.
He Insta died after I destroyed it, and just left the 4 parasitic hearts. It's kind of cheese, but I figured it was fine since I already beat him once the normal way.
Hope this is helpful for others!
- Anonymous
It’d be crazy if any npc in this game had any semblance of self-preservation lol
- Anonymous
2nd encounter is bugged. I think normal and logical way is that u must choose to fight him or to feed him source. After u fed him he will dissapear and wont kill a child when u'll meet him 3rd time. If u'll fight then upon beating him dialog should auto pop up in which u can spare or kill him. Sparing him will result in 3rd encounter and he'll be feasting on a child. But his knockout in battle with sceleton dwarfs can end in a bug, when sometimes this dialog wont pop up but u still can click on him and initiate the same chat like before battle and sacrifice 1sp which will make him teleport (if u choose options to fight him again u'll be stuck forever kicking his body). 2 times out 4 this dialog glitched for me (no auto pop up) and these were the times when he was knocked down and turned into chicken (these were conditions for triggering the glitch for me). If u proceed with feeding him (after he was defeat and dialog glitched) then he will appear by the altar without child but he will be aggro to your character whom initited previous fight. U can leverage this fact. Leave that char not far behind, start chat with lich, donate blood and after he spawns the chest make a flashy appearance to start a fight. This will get u max loot and xp (and no harm done to the kid :) ). If u have necro in ur party then grasp of the starved will make a short walk for him and spawned hearts (enemies didnt get a turn, 4ppl lvl 13 DE tactician, only peace of mind to act first).
- Anonymous
so, I vaguely remembered the attacking him right after the chest spawned in classic and tried it in definitive, he proceeded to oneshot my entire party minus thane who was finished off by the hearts. Didn't remember this fight being of particular note before, though I could be misremembering. Probably best to either let him go or fight him through the dialogue now I'm guessing (was playing honor mode, so will be a while before I can do it again).
- Anonymous
Third fight tip, his parasites aren't able climb up the vines or get on the ledge (I'm pretty sure). So when I fought him, he teleported himself up there, and I was able to fight him 2 v 1. But I could see teleporting him up there yourself and avoiding the parasites. (Because they hit hard, I was only lvl 11 when attempted.)
- Anonymous
Not sure if it bugged out or I did something wrong, but when I did this, something weird (bug?) happened during the second fight. First off, the fight did NOT end when I killed all four dwarf skeletons, and I was forced to kill the 'main' skeleton as well. Then, once he was 'dead', I could still talk to his corpse. I chose to sacrifice Source to it in this dead/undead state, and he teleported away. When I encountered him a third time, however, I wasn't given a dialogue option at all; combat started before he'd even loaded onto my screen, and there was no child for him to feast on. Thus, he did not spawn in the chest as he was supposed to.
- Anonymous
In the Third encounter (feeding on kid) have your party standing midway between the Lich and Jahan and have a tank with a jump spell (Phoenix Dive etc) start the encounter. Survive the initial attacks then immediately jump away and run towards Jahan. This should bring Jahan into the fight who DOES NOT ***** around - he'll run for a turn or two then cast chain lighting killing all the parasitic hearts AND the Lich in one shot. Delicious cheese.
- Anonymous
For the accept then aggro route on the 3rd encounter, if you have a character waiting to attack on the ledge, have the dialogue character approach from the opposite direction. Only the character(s) in the visible attack direction enter combat at first so you can buff and reposition with the dialogue character before they join the fight.
- Anonymous
- Anonymous
Apparently Xhaxh murders Glenna on his way out too... I thought she left after I let her know Lohar sent me!
- Anonymous
also in 3rd encounter, even if he picks up his phylactery, you can pickopcket him with thief, then drop it on ground and kill it. Inta death
- Anonymous
In the third encounter when he spawns his phylactery if you time it just right you can destroy it with an attack just before he picks it up. You'll know you got it if you get the message for damaging his property before he just disappears and no additional enemies spawn. A good way to cheese the last fight and still get the loot :)
- Anonymous
Ugh. I'm in the second encounter and I chose to attack him. He summoned the three dwarves. I downed him, and then the three dwarves, but now I only have dialog to talk to the guy, which includes attacking him again. But he's already on 0 health on the ground, so I can't fight him :(
- Anonymous
In my second playthrough, my characters can't seem to find the skull with the missing eye despite already having the missing eye in their inventory, WTF? In my first playthrough, they found the skull and could proceed, but now, I'm running around and no "found something!" triggers. Same with the fisherman's lost ring in the sea. I only have 2 party members this time, am I missing any perks or stats that others in my 1st playthrough (4-member party) could have had?
- Anonymous
Actually I'd let him feed from myself (1 sp) then he wouldn't kill more innocents and gave the reward. I stole his pocket before he left.
- Anonymous
Does anyone have an updated solution to the pressure plate? The one in the pic above doesnt work.
- Anonymous
After having him help me defeat the skeletons, I tried attacking him while he was in conversation with one of my characters - in futility. When I ended the conversation, I attacked him while he was trying to destroy Mordus' control panel. With every hit, I interrupted his dialog, making him start the dialog over, which basically meant I could keep attacking him and killing him. Win-win.
- Anonymous
If you speak to him and have the MYSTIC tag, you can have the option of revealing his true name. I chose the option "In void you fell, and from void you come. Reveal your truth to me!" but I'm not sure if the other options work as well. I attacked him while he was still tied to the contraption and it triggered the fight, with him released. Looting his body after gave me a random skillbook, his staff of parasitic decay, and some gold. Good option if you don't want anyone to die.
- Anonymous
- Anonymous
Lich just teleported away after the second encounter, I didn't ignore him at the first one.
- Anonymous
I would really appreciate it if someone could update this. DE no longer offers this route. I'm experimenting now but the route you listed for max xp yield is no longer availabls
- Anonymous
Easy way to kill him on 3rd encounter: Have one from your party get high ground at the vines next to the shrine, initiate battle by damaging him when he summons the chest and teleport him to Jahan's face. I mean it literally, you have to hit Jahan with the teleport otherwise he will not aggro. After that it;s pretty easy. Jahan will one shot him and join for the fight with the hearts, which he one shots as well. Did it on level 13, Tactician, Definitive Edition.
- Anonymous
He’s nowhere to be found after I let him go at the first time. I’m almost finishing act 2 and he’s not near altar in Cloisterwood. I tried save and load but still I can’t find him
- Anonymous
In DE, in the third encounter he summons only one heart and the heart doesn't give exp :(
- Anonymous
This guide is confusing, and it's understandable as the game is rather confusing in places. I have the Mystic tag and learned his name was Xhaxh on the first encounter (basement). On the 2nd encounter (lower Cloisterwood x:230, y:195) he disappears after I attack him, kill the undead dwarves and then spare him in conversation. I also pressed him on his Xhaxh identity in the 1st conversation of the 2nd encounter, but I didn't offer him source before attacking him.
- Anonymous
what if im playing by myself and im undead can i still do the final mission? how do i get blood for him to enter
- Anonymous
Sooooo....I pickpocketed his soul jar before he left on the alter encounter. No XP. No fight. No quest completion.
- Anonymous
First encounter after setting him free by the overturned dwarf cart, I asked him about the mess and how he planned on getting his soul jar. When he said by killing more people I engaged battle. Mid fight, everyone within striking distance, he dropped out of the battle queue and healed to full, starting on the loop of his pre-dialogue animation (wandering, crouching, munching around the fallen cart). Finished the battle with the raised dwarves. I could not talk to him, but I could manually target and damage him. I whittled him to zero, but at no point did official battle start. He's at zero, bleeding from tendon damage as he wanders around. Not sure how to forward this bugged out debacle.
While you can kill him instantly by breaking/absorbing the jar as others have mentioned, you'll miss out on the Exp from the hearts. Another way to easily win the fight and get the hearts is to use Terrain Transmutation on the nearby lava (found on the southern side of the ruins, you only need to move it 3-4 times to get it to the altar) and teleport Xhaxh into the lava after the battle starts (you can position everyone on the high ground before you interrupt him with a ranged attack and block the vines with a summon). The hearts are easy to kill the usual way, they don't seem to be affected by the lava.
- Anonymous
In third fight as soon as Xhaxh summons jar and chest teleport him far away. Then have a player in you squad absorb the soul in the jar. He dies. Easy. You get the chest items, loot, and xp.I have definitive edition on pc.
- Anonymous
Had issues starting the fight right after he summons the chest and jar. Use teleport.. have it ready and him clicked.. you can do this way before... when he summons items... just teleport him behind you a bit and auto fight starts.
- Anonymous
Dunno if anyone already did this but if you attack him at the 3rd encounter the moment he summon the chest and his jar you’ll start the fight before he picks it up... and I didn’t pay attention myself till I used whirlwind beside the alter and the jar broke it was instant death for him easiest way to kill him.
- Anonymous
Where the 3rd fight should be I can approach him but his not kneeling at the altar like in the screenshot, he's standing there. When I hover my mouse over him with Lohse it shows a sword, with every other character though I get a conversation-bubble. It doesn't matter though with which character I approach him - the fight will immediately start and he'll summon his parasitic hearts. I have the Definitive Edition...
- Anonymous
Just so you know, if have one character give him blood, and then immedietely attack him once the chest appears, then Xhaxh will have a dialogue with whoever did so. Whilst that happens, then have a character who can pickpocket (I did this with a character with thievery level 4), sneak behind and steal his soul jar which was in his pockets by now, then absorb his source, and he will die, completely evading the fight, and getting the loot as well. Easy.
- Anonymous
During the 3rd fight, you can get Xhaxh's Cache, initiate the fight, and kill him in 1 turn by doing the following: 1) Have one character talk to Xhaxh (Desiccated Undead). The rest of your party will remark on the fact that he's eating a child. Pretend to be fine with this and let him live but DO NOT end the conversation yet. 2) Bring a second character which can deal piercing damage (sawtooth knife for example) within range of Xhaxh. 3) End the conversation from your first character and switch back to your piercer. 4) Wait until Xhaxh just finishes his summoning spell and IMMEDIATELY deal damage to him. Don't let him teleport or pick up his phylactery. Fight initiated. 5) Xhaxh will most likely teleport somewhere away from your party and cast some curses/cripples/shackles. 6) Destroy Xhaxh's Phylactery (Soul Jar) on the alter table. This kills him instantly. 7) CC the Parasitic Hearts with physical damage, they're nice and closely packed so Whirlwind, Battle Stomp and Battering Ram your way to victory.
- Anonymous
Another way to initialize the 3rd fight is to use the sawtooth knife skill right after the chest is spawned. The skill deals damage ignoring armor, similar to markaman's fang.
- Anonymous
The parasitic guys definitely do a*****load of damage, so you shouldn't ignore them to kill the boss for the 3rd encounter. They still keep fighting you after he dies.
- Anonymous
To clear up confusion on the 2nd and 3rd part of this quest, as I just did this today (PC Definitive Ed): 2nd encounter: when you choose to fight him, be sure to let him summon the dwarves first. Also, when you kill him, he won't be outright dead, just incapacitated, and you can talk to him again to let him go free. 3rd encounter: yes it is still possible to get both the cache and the fight, but it is very tight timing of a couple seconds. Basic attacks will not aggro him, but teleporting him from where he stands to the opposite side, where the parasitic hearts appear, will aggro him. Once you end the conversation with him to get the cache, he will "summon" the cache for a long time, about 4 or 5 seconds. Be sure to not aggro him during this time. You need to wait until you see the shrine/table change color (it will look cursed) which means the cache is spawning. You have enough time after the conversation to prepare just a couple buffs and to prepare the teleport for when you see the shrine change, if you're quick.
- Anonymous
It is a bit buggy on the Definitive Edition as on the 2nd encounter and you may need to re-Load your save before the fight. I had to reload the fight twice because after beating him and his oompa loopas, it wouldn't trigger. Same thing with the 3rd encounter. Sometimes even attacking him after he spawns the chest, he'll ignore you and leave as well. So your gonna have to Quick Save before you talk to him and try and him with a strong attack (He just ignores basics which is bull) and Quick Load if it doesn't work.
- Anonymous
" If you approach the Lich and end up attacking him, he will summon three dwarven skeletons to aid him. After you kill them, he will beg you once again to let him live." This doesn't seem to happen on Definitive Edition. He just keeps attacking. Ended up having to reload and just avoid fighting him on the second encounter.
- Anonymous
Not sure if this was changed in the Definitive Edition, but after giving him some of your blood. Attack him as soon as he spawned his cache & phylactery. If he grabs his phylactery, you won't be able to stop him from vanishing, even if you knock him down.
- Anonymous
As an alternative, I completed this quest in the first stage by defeating all the skeletons from the urns, then when I spoke to him and he asked me to free him, I force-attacked him instead. This automatically releases him and initiates combat, but it's pretty easy if you're prepped for the fight. You get his unique staff (not the parasitic decay version) and a couple of trinkets. Quest closes.
- Anonymous
This bug is an absolute nightmare, playing on Honourmode I don't have the option of creating saves and reloading where I please. How on earth can I get around this annoying bug!!
- Anonymous

I believe the part where the Lich murders the child was cut from the game (DE), I fought him where the dead dwarves are and he just died, no spare or kill choice.
0
+11
-1